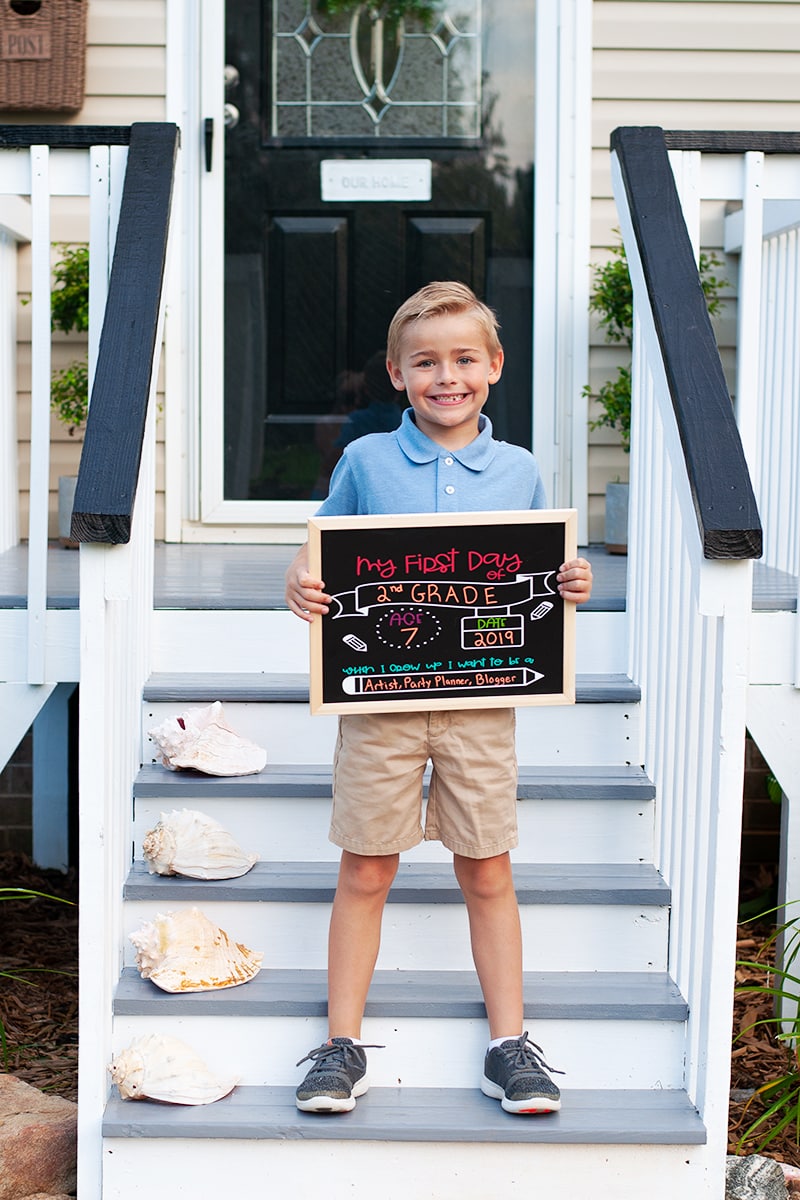
It’s almost time for the kids to head back to school. My boys start school at the end of July, so I wanted to share some Back to School Signs I made for the boys last year. Usually I’m scrambling the night before, not this year!!
Today I’ll show you three different Back to School Sign ideas you can make for your littles ones first day of school!
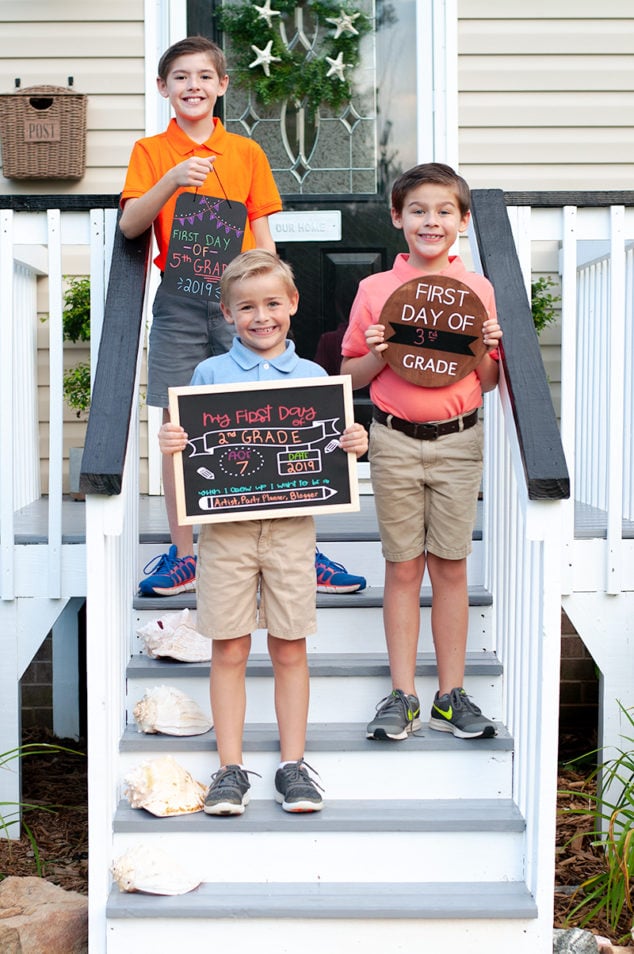
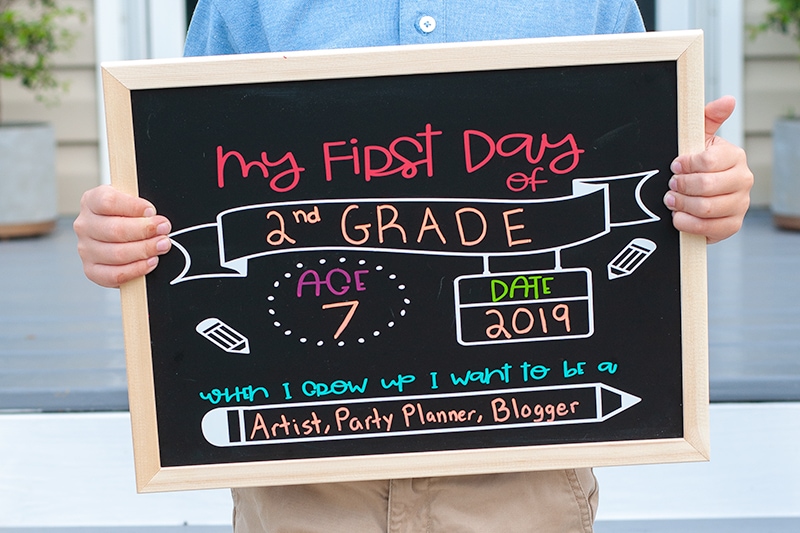
I’ve taken a first and last day of school photo with everyone of my boys since they started school. It has become a special family tradition for us, and I LOVE looking through the old first day of school photos and seeing how much each one of them have grown.
So let’s get started!
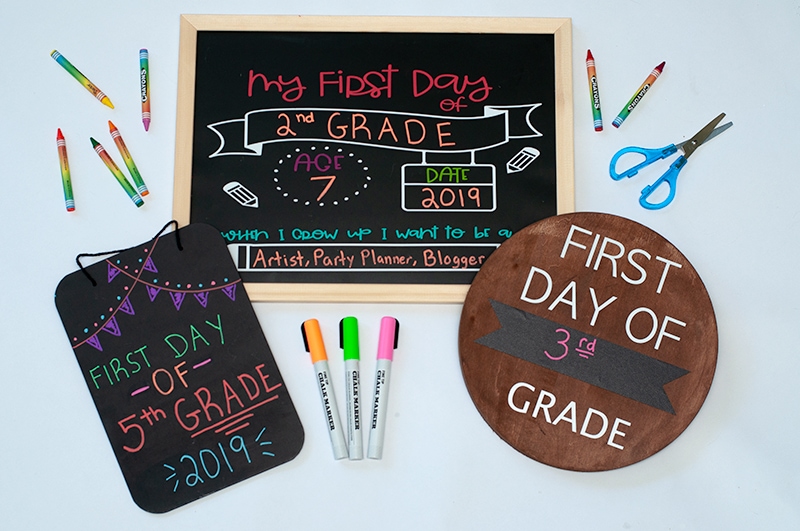
DIY Back to School Sign 1
I will start with the more complicated Back to School sign first.
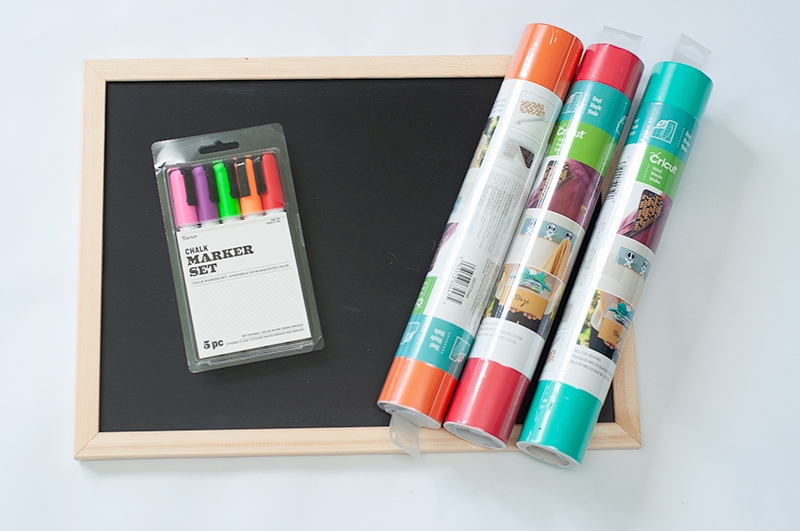
Material Needed:
- Chalkboard
- Chalk Markers
- Vinyl
- Transfer Paper
- Cutting Machine
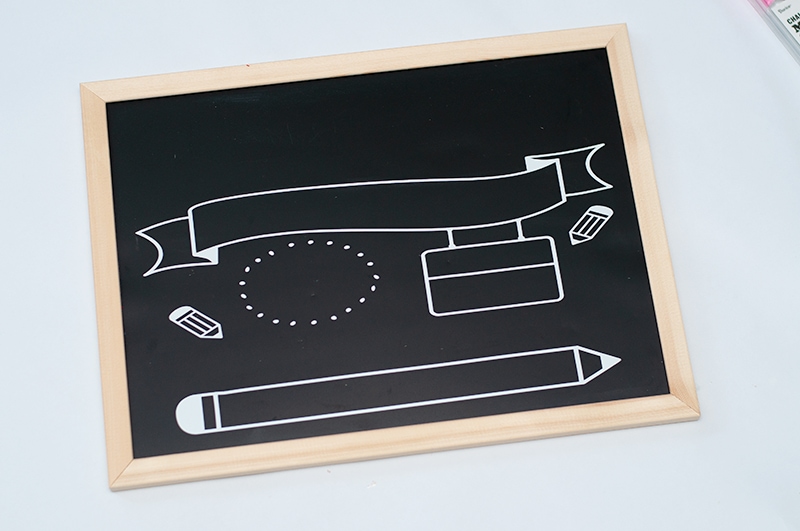
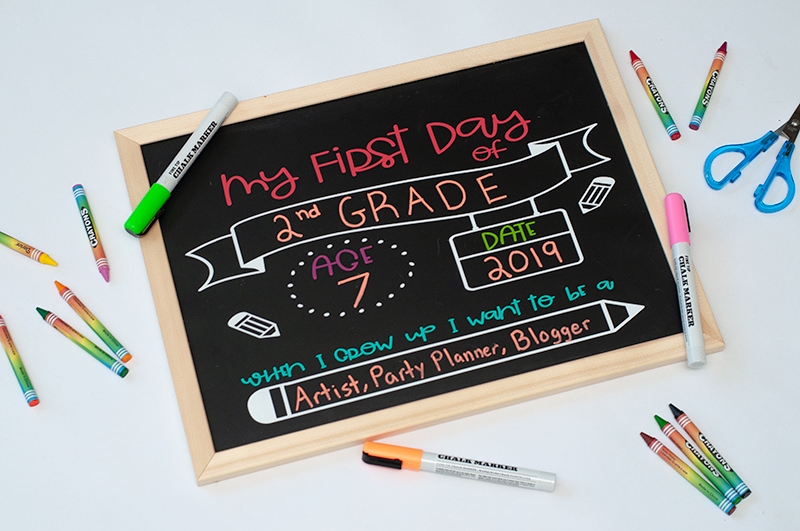
Step 1. I used my “hand dandy” Silhouette Cameo to come up with my first day of School sign phrase. In the Silhouette library they have several First Day of School sign options to choose from.
Once my design was ready, I measured the chalkboard and then resized my design in Studio to make sure it would fit nicely.
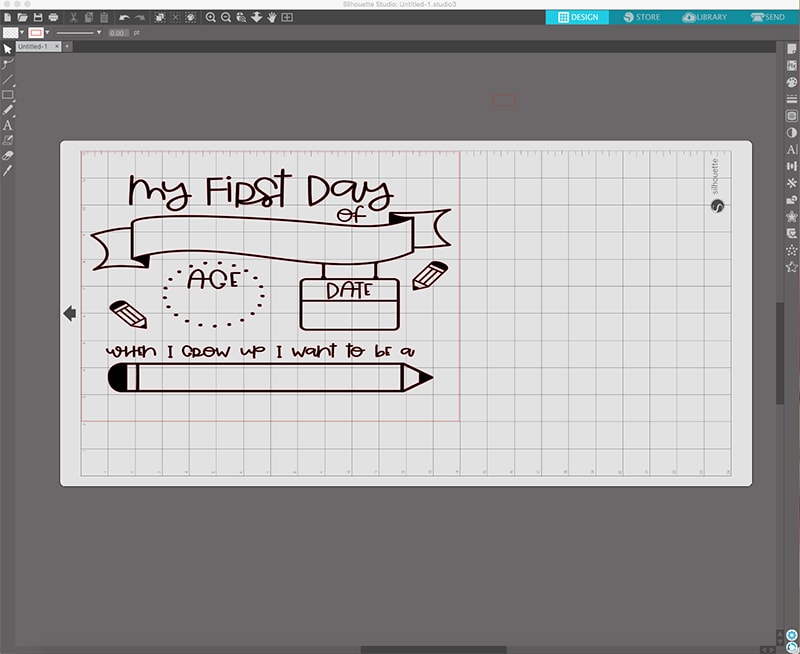
Step 2. Next, I cut out and weeded all the phrases. Since each phrase is a different color I had to “ungroup” the phrase and cut them out each individually.
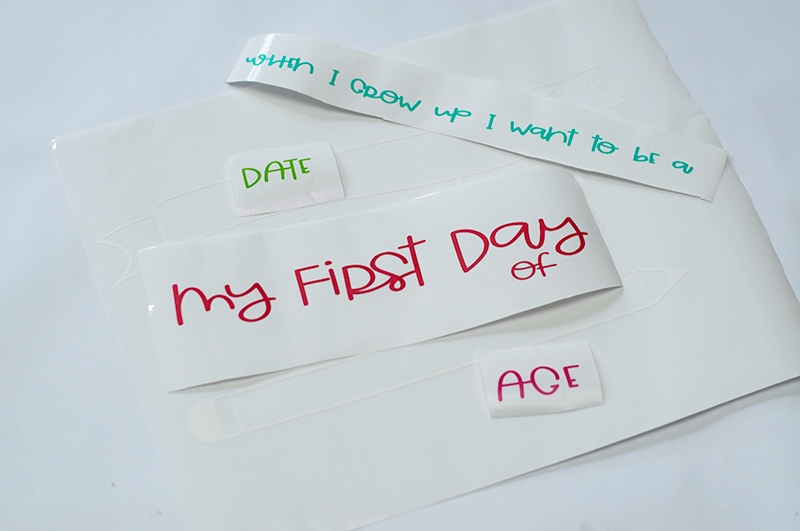
Step 3. Using transfer paper I adhered the first part onto the chalkboard. Next I added each phrase.
Honestly it seems like a lot, but it’s really very simple.
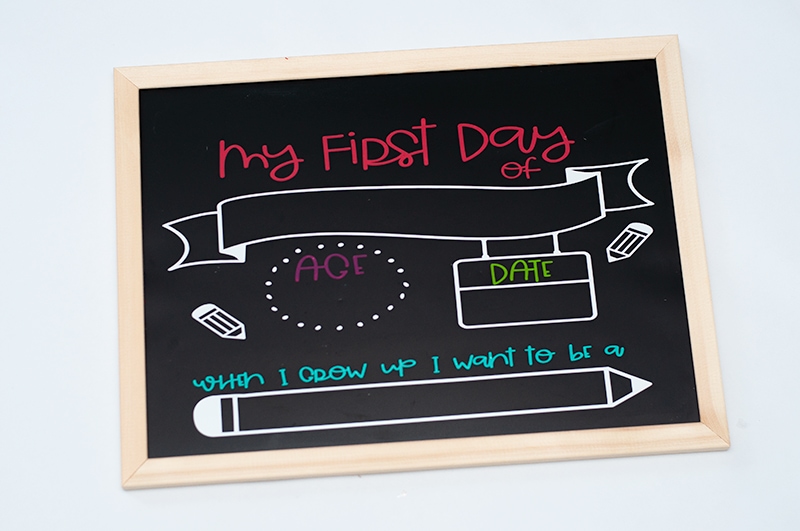
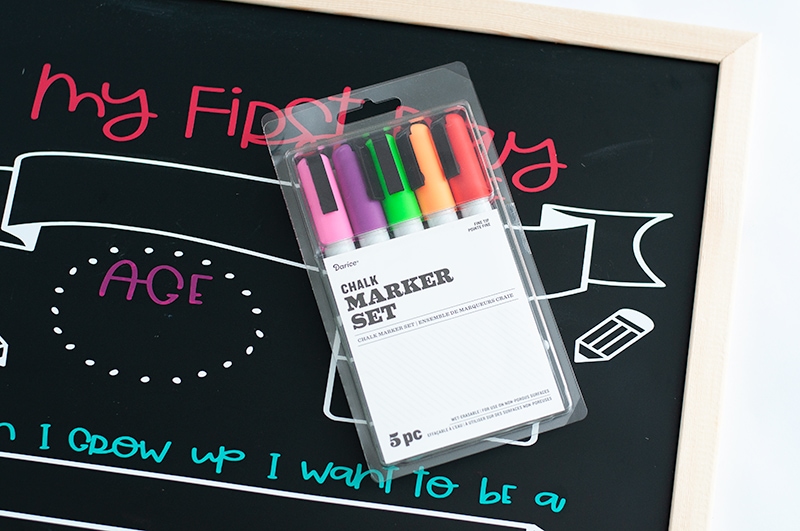
Step 4. Finally grab your chalk markers and fill in the answers!
This Back to School Sign can be used for many years!
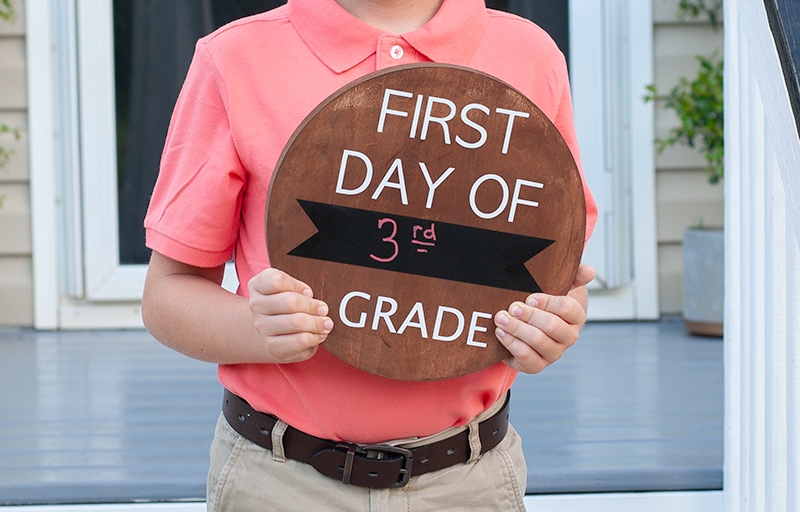
DIY Back to School Sign 2
This Back to School sign is another one I made using the Silhouette cutting machine, but a lot less steps.
Material Needed:
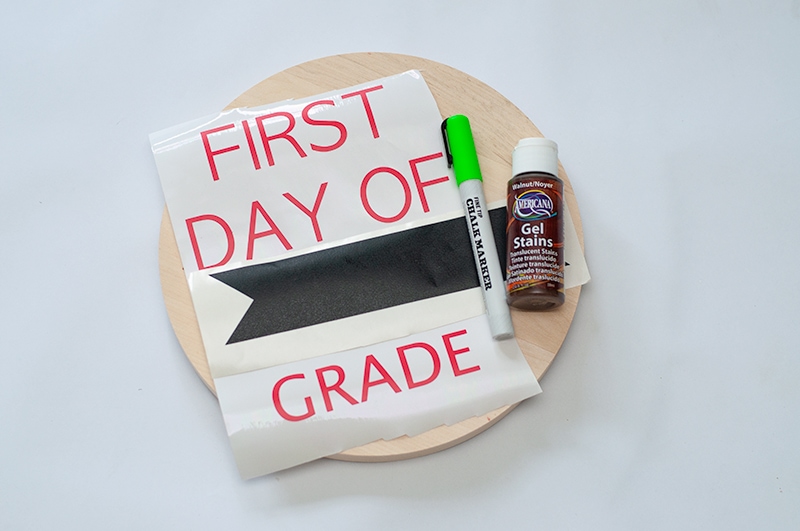
- Unfinished Wood Circle
- Chalkboard Contact Paper
- Chalk Marker
- Vinyl
- Transfer Tape
- Stain
- Cutting Machine
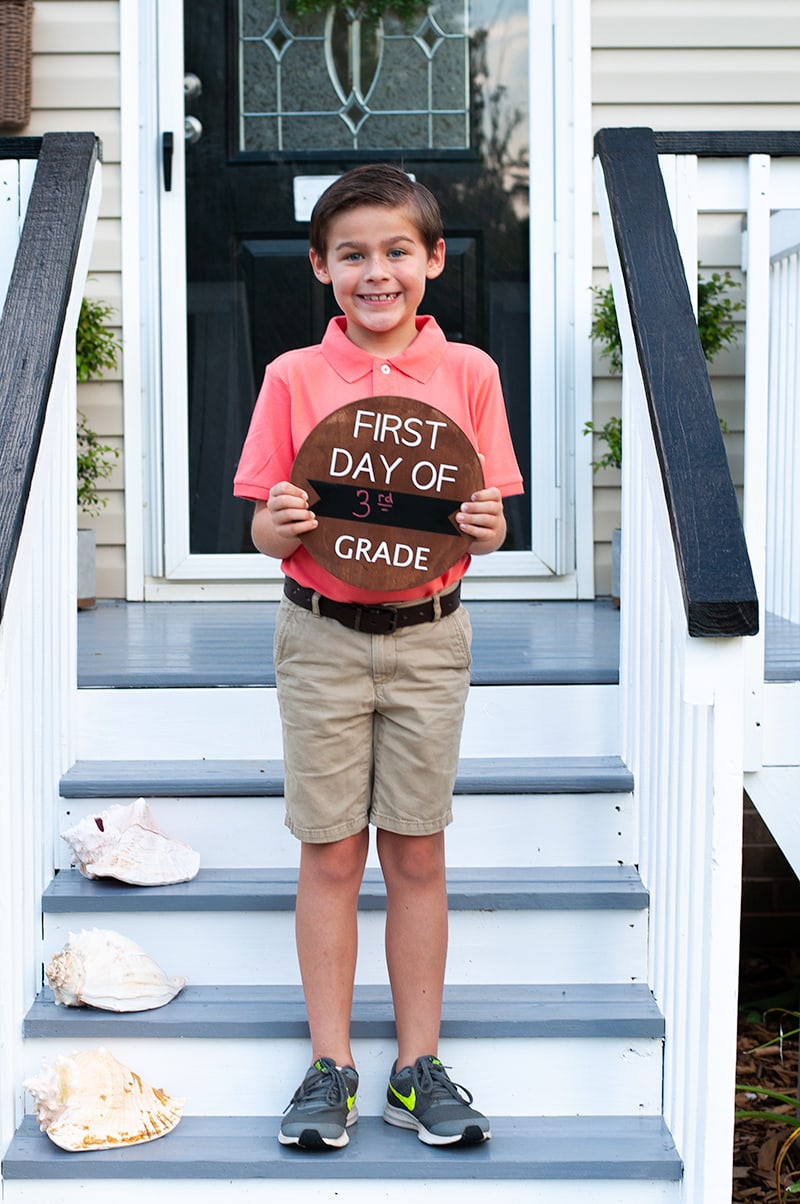
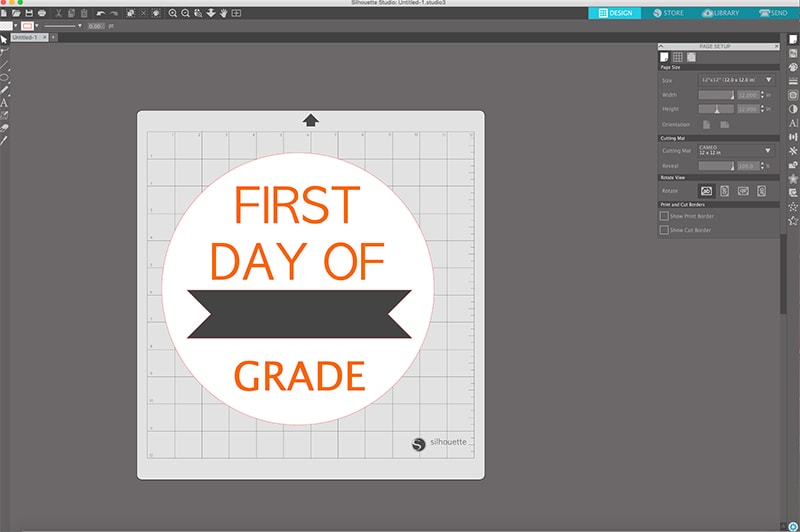
Step 1. I used the Silhouette Cameo again, and come up with my first day of school sign phrase. I didn’t need to use the Silhouette library for this sign since I kept the phrase simple.
Once my design was ready, I measured the wood circle and then resized my design in Studio to make sure it would fit.
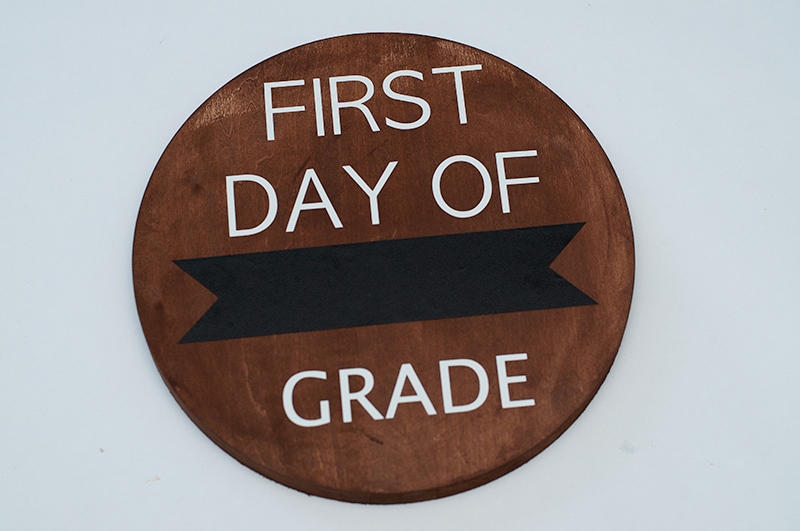
Step 2. I went over the entire wood circle with a paper towel and my gel stain. Just wiping the stain on the wood. Let dry 20 minutes.
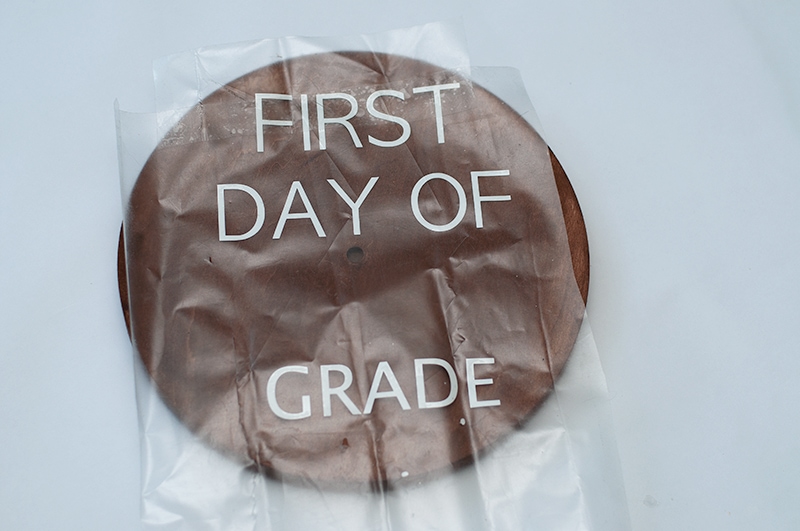
Step 3. As with the first sign, I needed to cut the “First Day of and Grade” separately then the chalkboard banner. I used my “trusty” transfer paper to add my phrase once it was weeded.
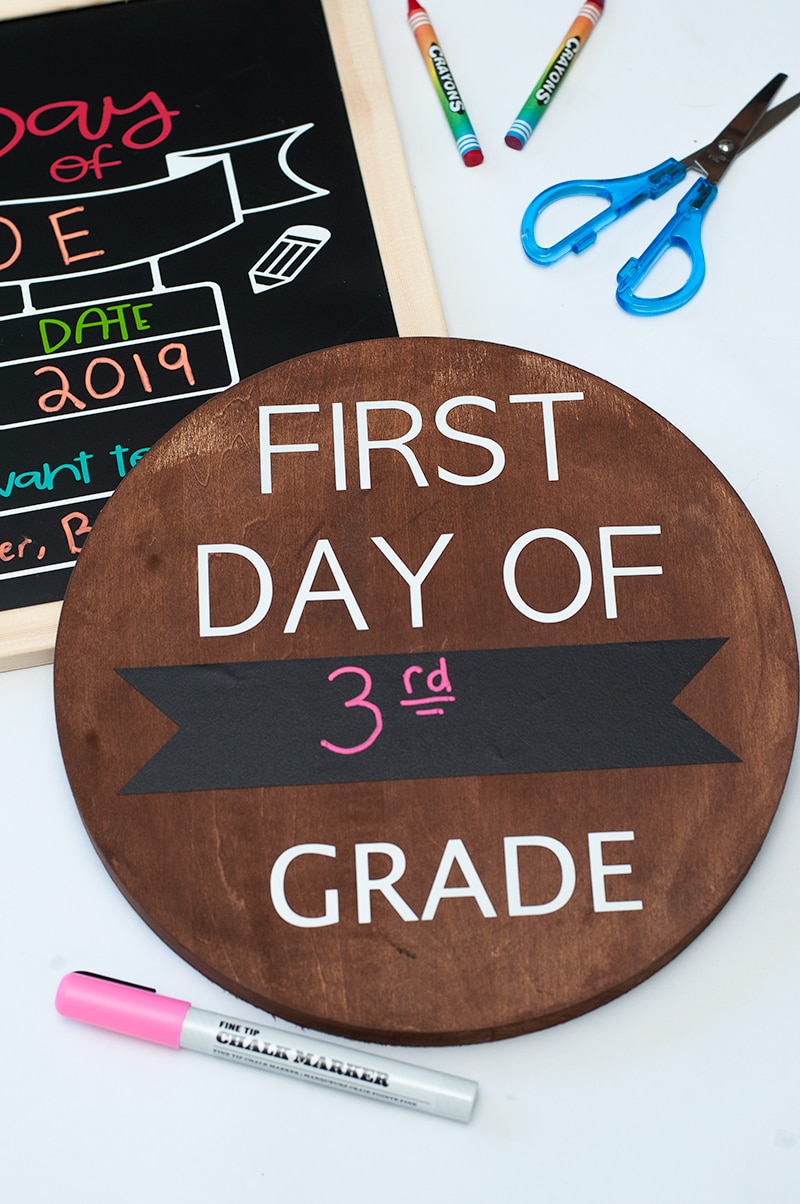
Step 4. Next I cut, weeded, and added the chalkboard banner. This is where you will write the grade every year with a chalk marker.
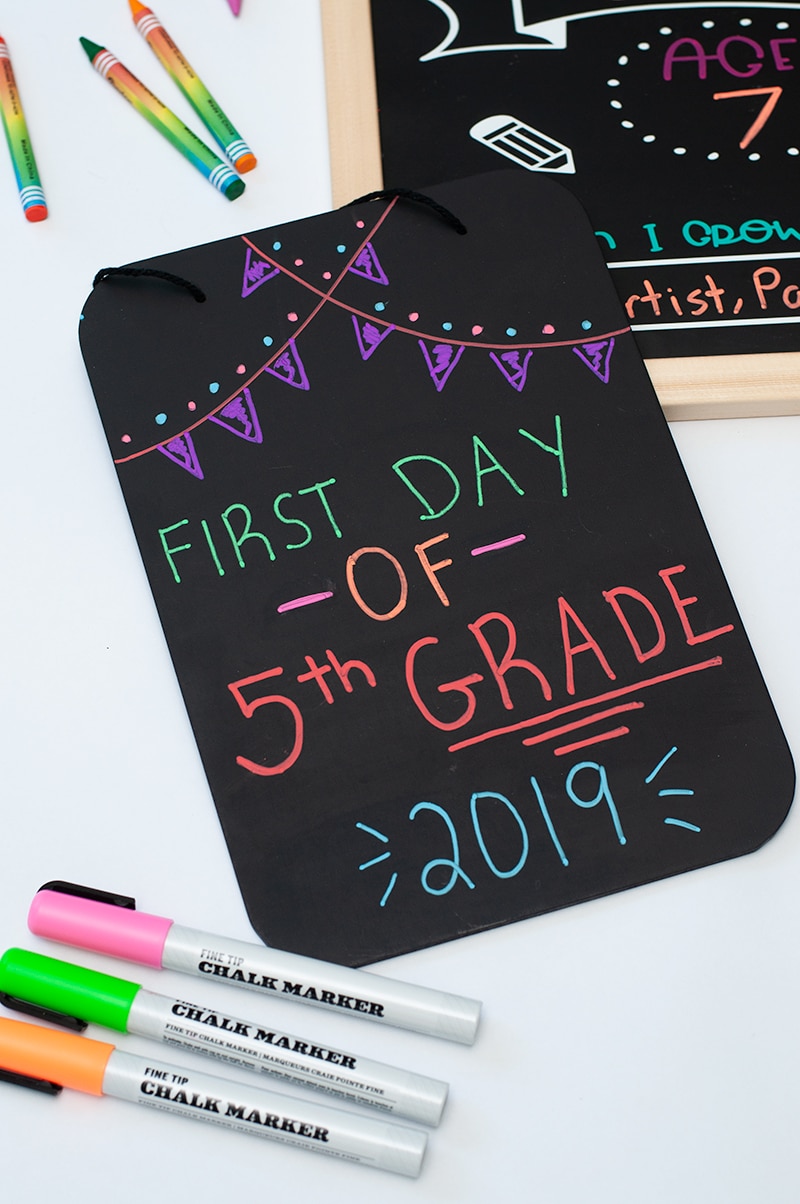
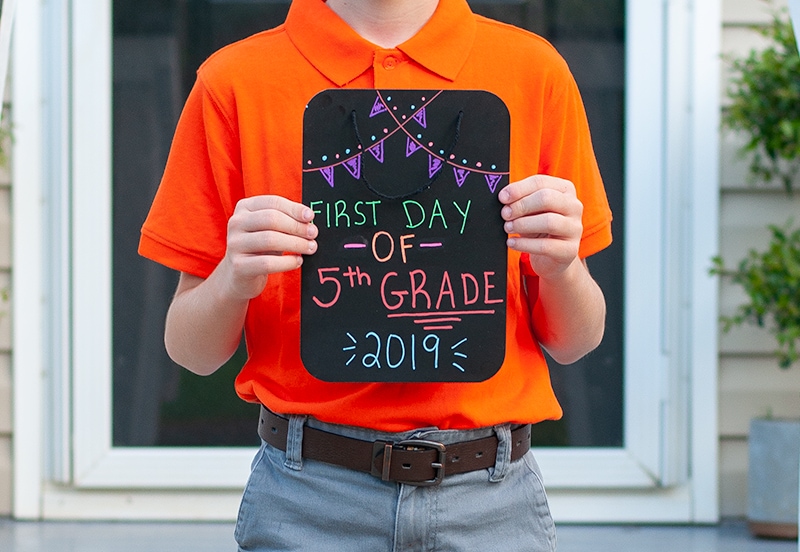
DIY Back to School Sign 3
Finally, I will show you a simple sign you can make in 5 minutes.
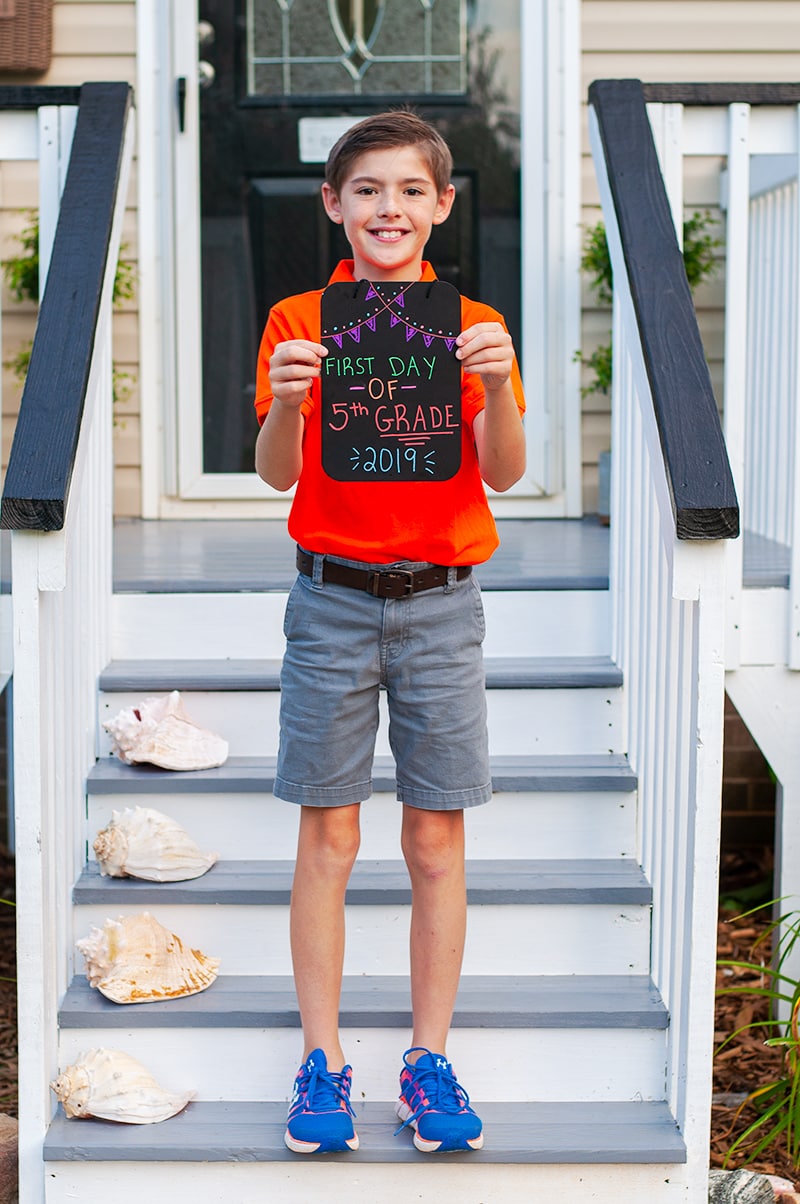
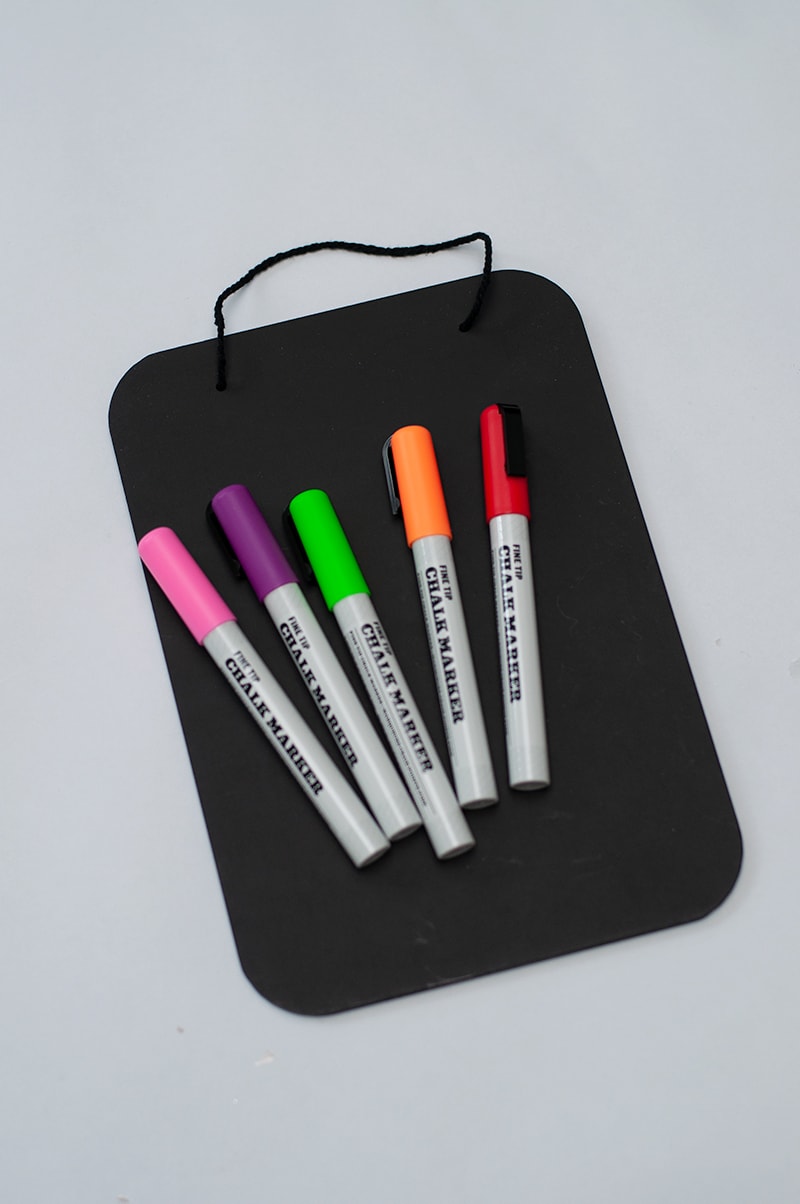
Materials Needed:
- Chalkboard
- Chalk Markers
All I needed to do for this sign was get a simple chalkboard sign and chalk markers. You can get as creative as you want. My oldest is starting 5th grade and he likes to keep things simple, so I knew this sign was for him.
As always thanks for stopping by, I’m looking forward to the first day of school to show these signs off!
Please let me know if you have any question on making these signs, I’d love to answer them!
More Back to School Ideas
Love, Courtney