Hey everyone!
I’m so excited to share with you a new project I just finished. I teamed up with Country Chic Paints for a coastal furniture makeover on my bathroom cabinet (which really needed a makeover). They gave me the opportunity to look through their site and pick out some paints and accessories.
A week later it arrived on my steps, I was so excited!!
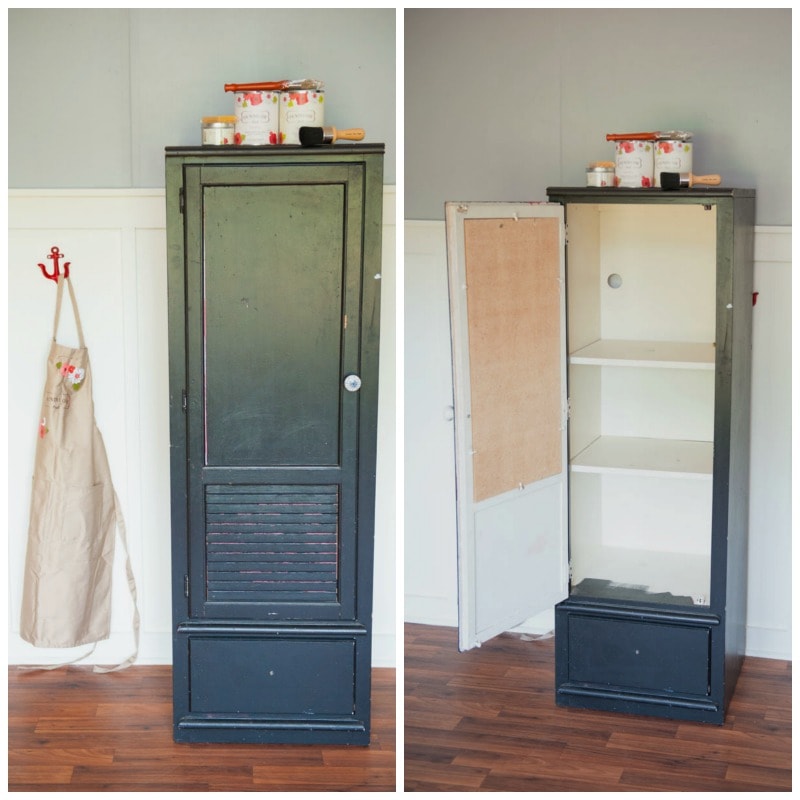
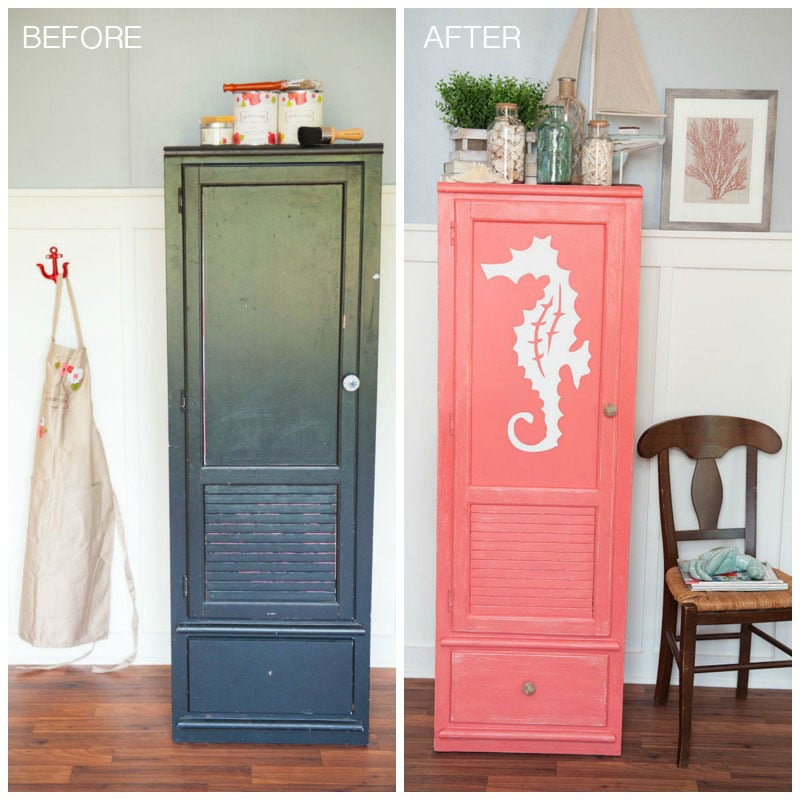
As you can see from the “before” picture this piece was in pretty bad shape. My Mom found it at Goodwill for $30.00 and knew with a little TLC is would be a great piece.
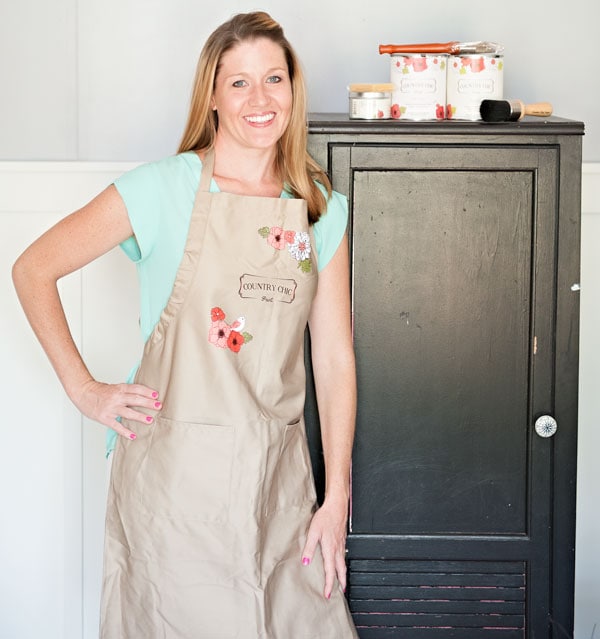
One of my favorite things I received was the apron, I thought it was so cute that I just had to take a picture in it!
Getting Started
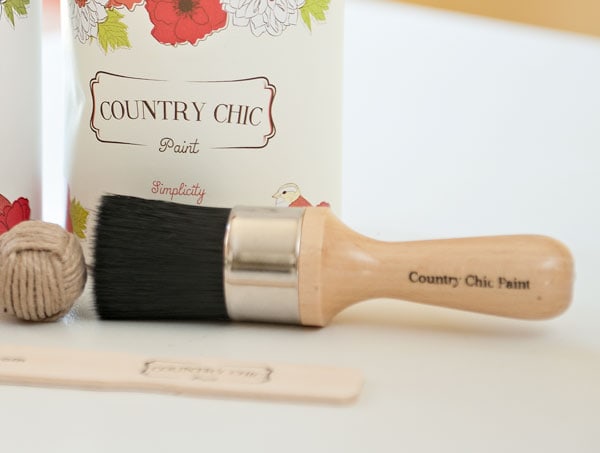
I felt like a kid on Christmas morning opening the box of goodies. Here’s everything I got in my goody box.
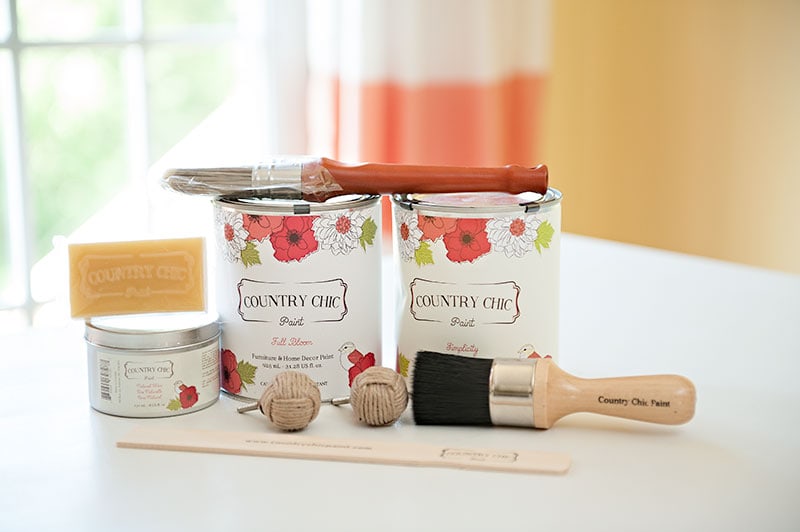
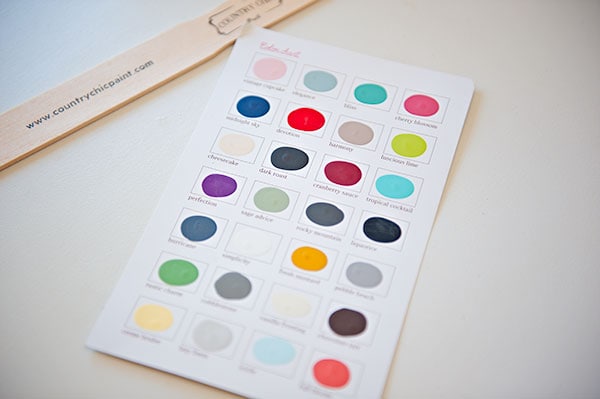
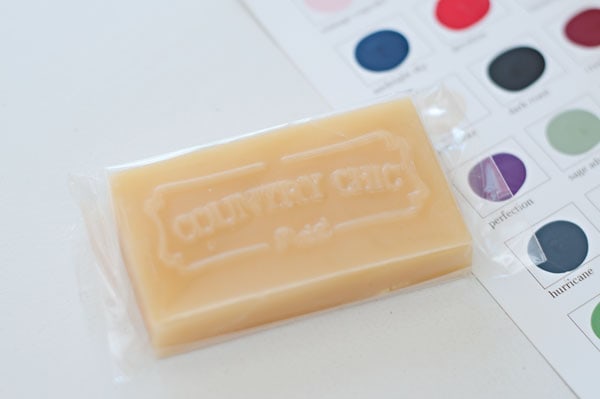
Here’s some samples of all their amazing colors. There are several more on here I want to try out.
Step 1 – Paint on First Two Coats
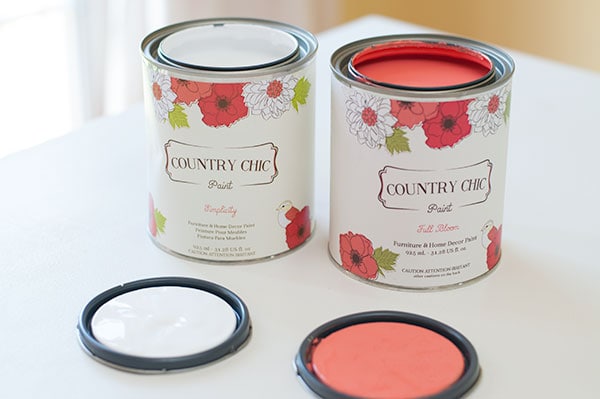
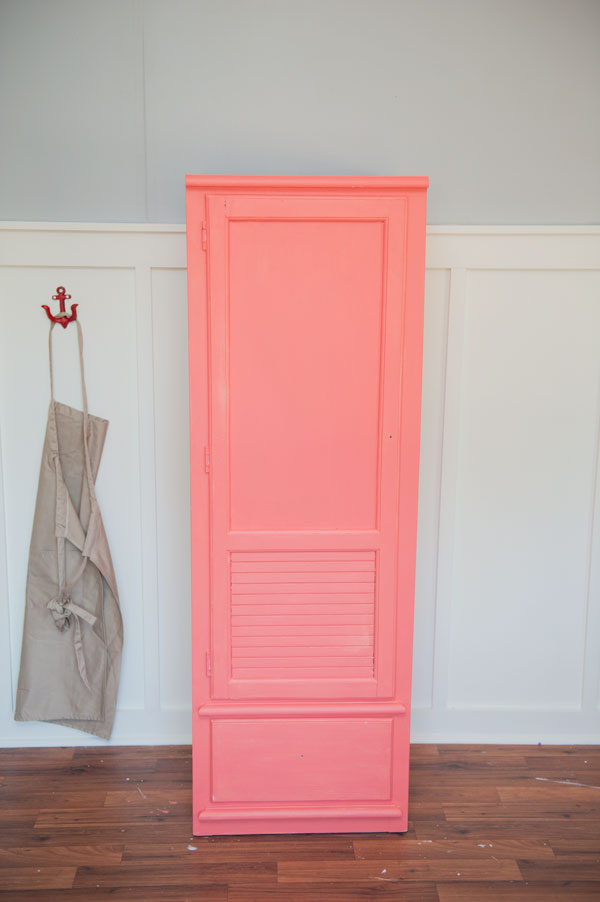
I choose the Full Bloom and Simplicity. I have been wanting to do a coral piece of furniture for awhile now and this was the perfect opportunity.
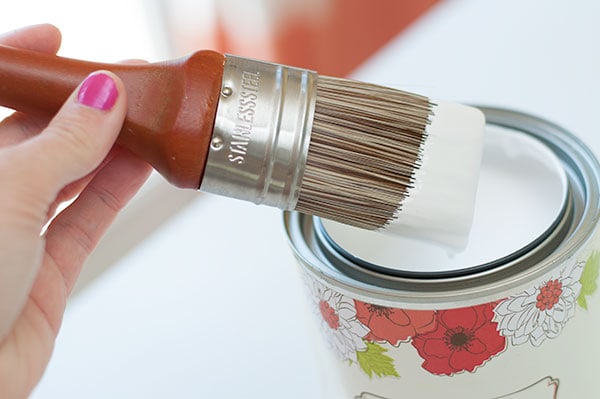
I did a total of 2 coats and let each one dry for half an hour. I painted the inside and outside of the cabinet using the simplicity. It went on so easy and covered the black well. 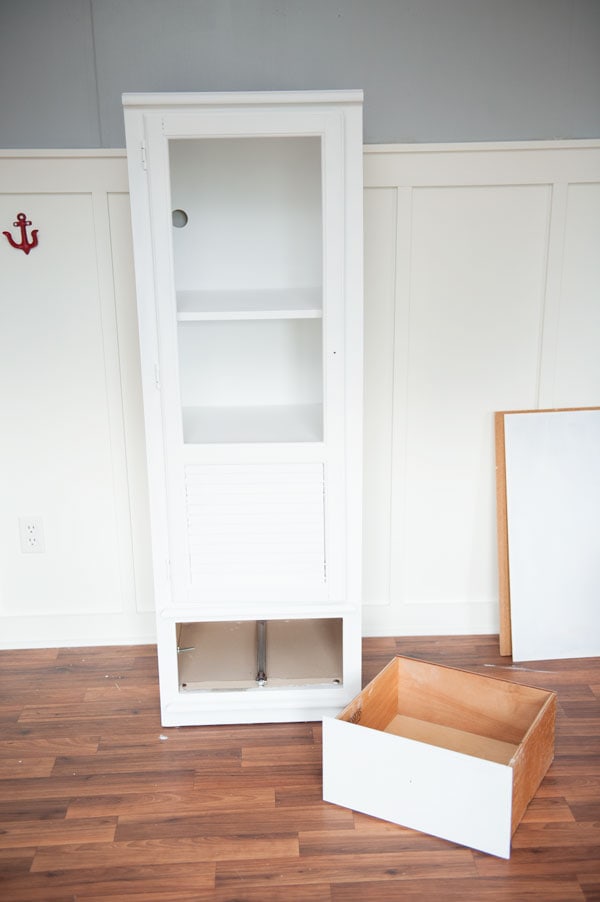
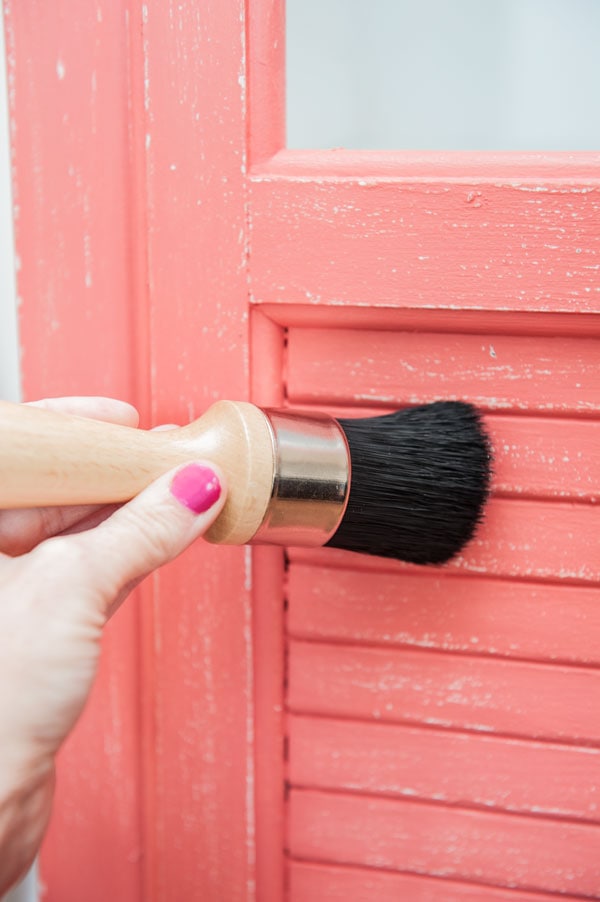
Step 2 – Use Your Distressing Bar
I planned on painting the coral over the white and distressing it. BUT, first I needed to use the Distressing Bar to help me accomplish that.
I went around all the corners and edges that I planned on distressing. I watched their video tutorial and it said this bar helps when distressing. Since the piece was originally painted black, it helps keep the black paint from showing through and only showing the white paint. 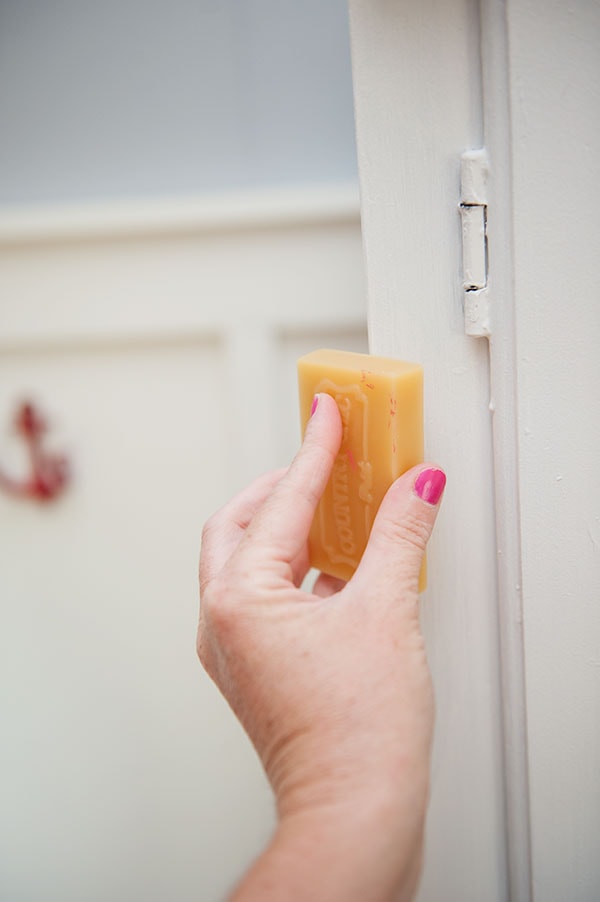
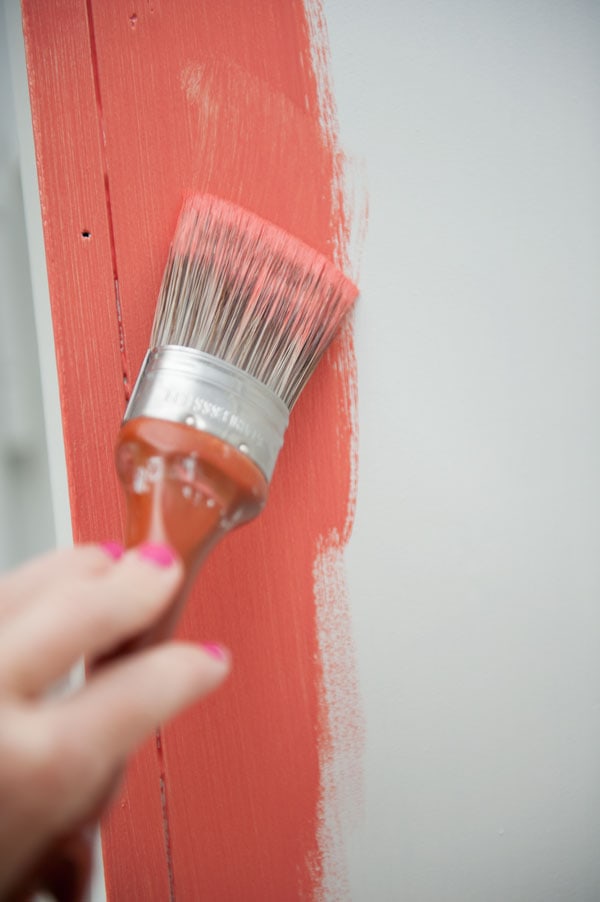
Step 3 – Paint on Final Color
Next, I painted on 2 coats of the Full Bloom paint color. I used the Oval Paint Brush which works amazing. I let the piece dry 2 hours before I started to distress it.

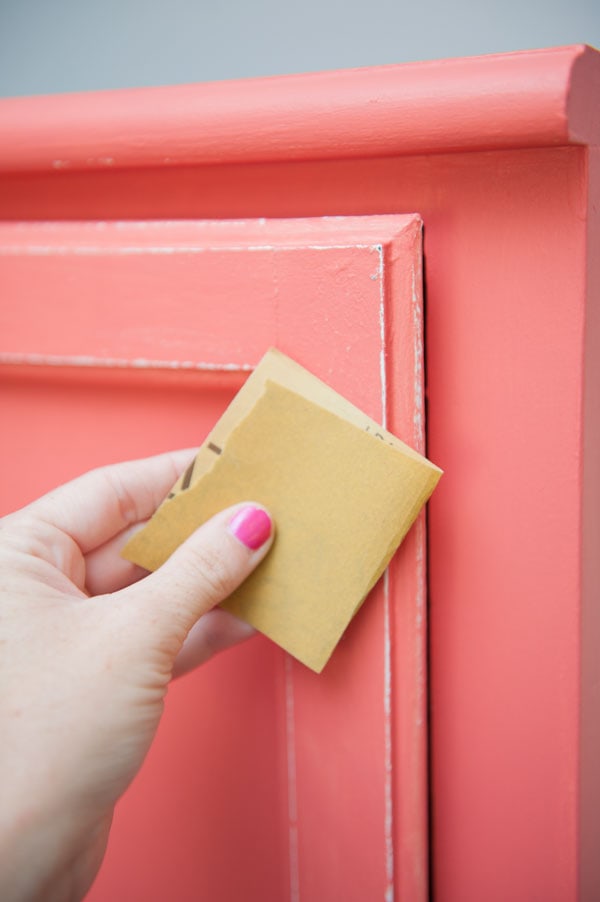
Step 4 – Distress Your Piece
Now it’s time to distress my piece with some very light sand paper. Since I used the distressing bar already, I just went over all those areas. It really helped with the black not showing through. Next time I plan on going a little heavier with the distressing bar. I wasn’t sure how heavy I needed to go.
Step 5 – Add Some Fun Detail
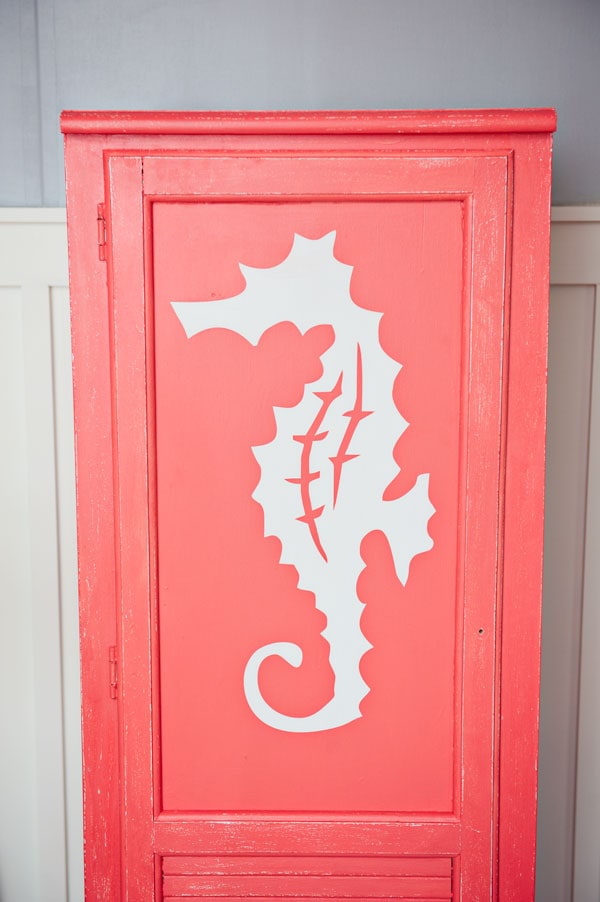
I really felt like the piece needed something extra and I also wanted to try something I’ve never done before. I pinned this piece of furniture awhile ago and was inspired by it for my seahorse.
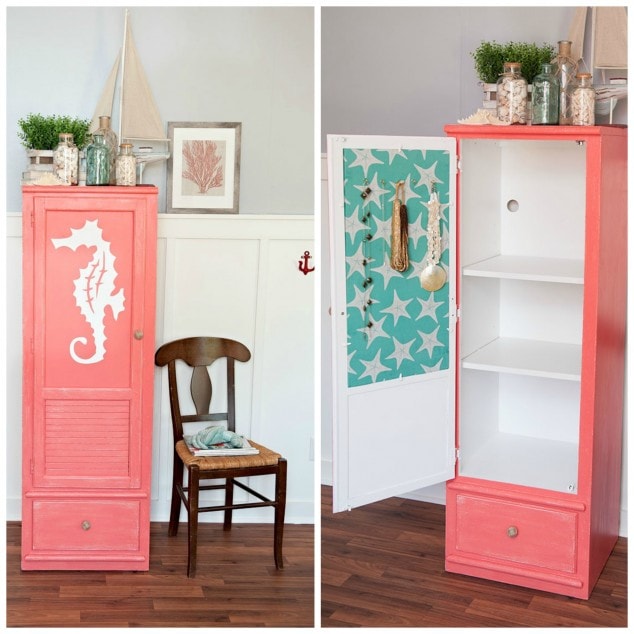
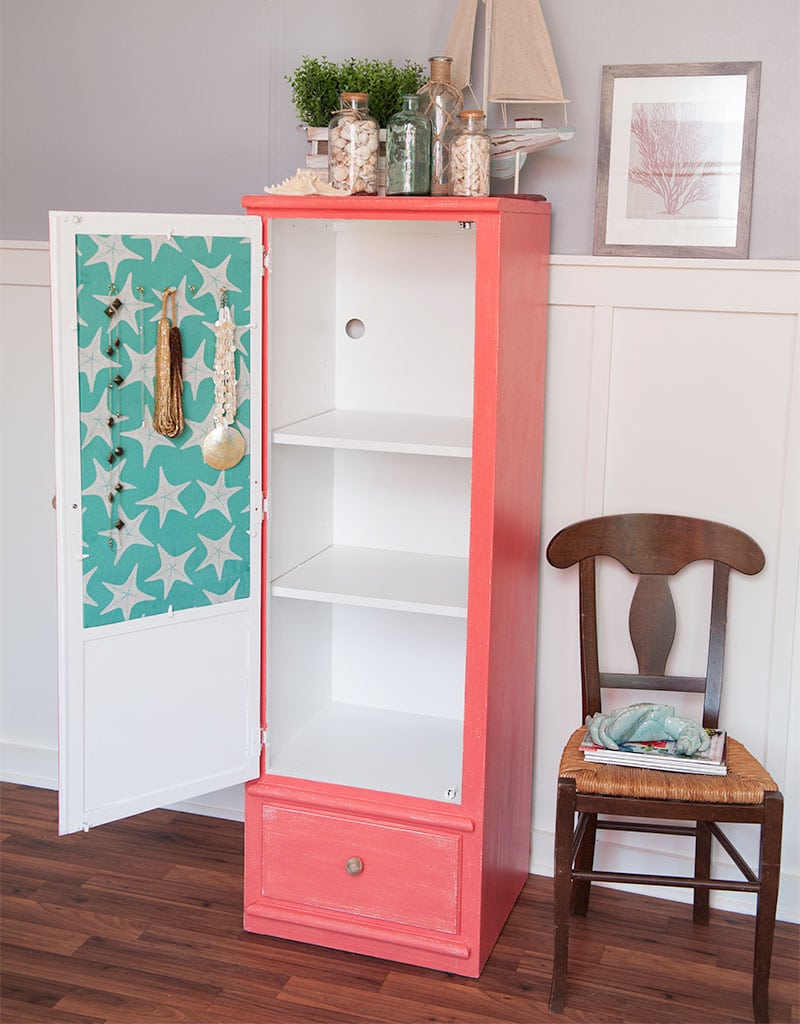
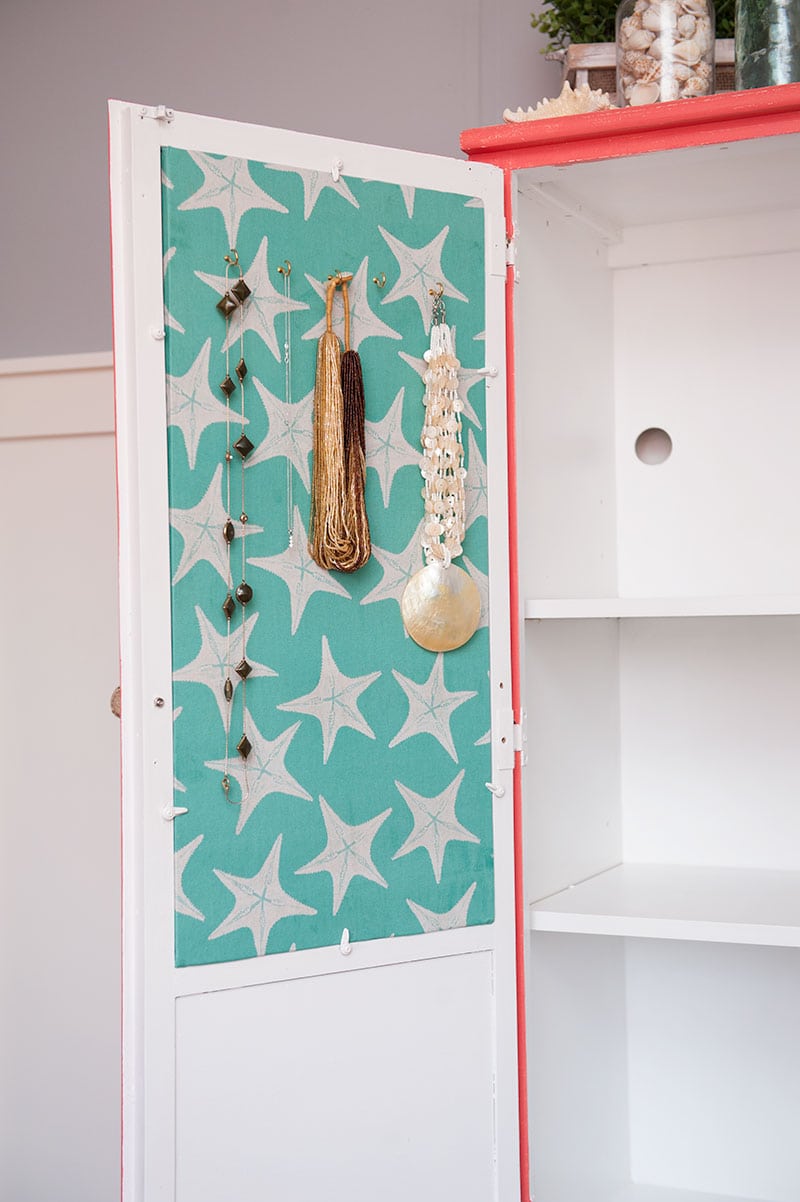
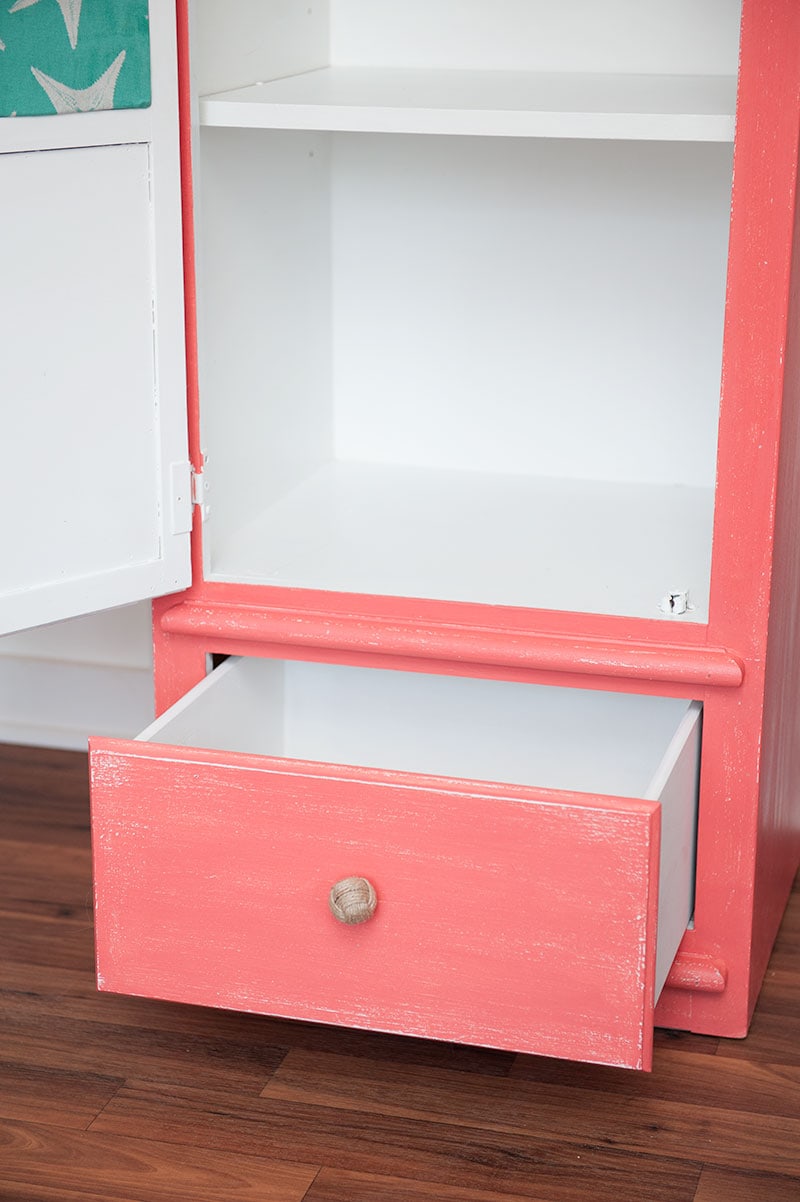
The middle part of the cabinet can easily be removed. On the other side, it’s a corkboard.
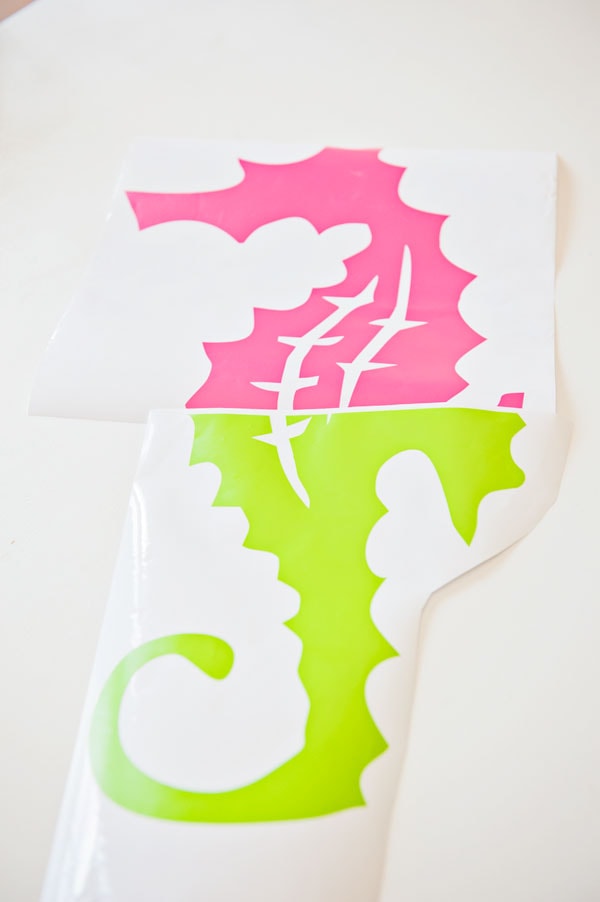
I went into my Silhouette Studio and found the perfect seahorse for my project. I measured the size I needed and cut it in two. I used some vinyl and cut the two pieces out.
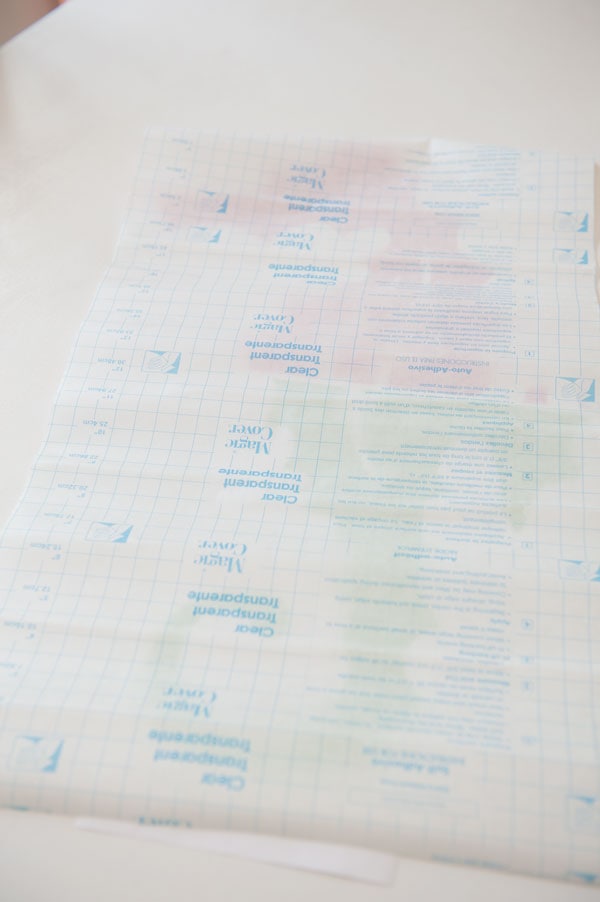
I covered the top with transfer paper so I can easily add it to my piece of furniture. 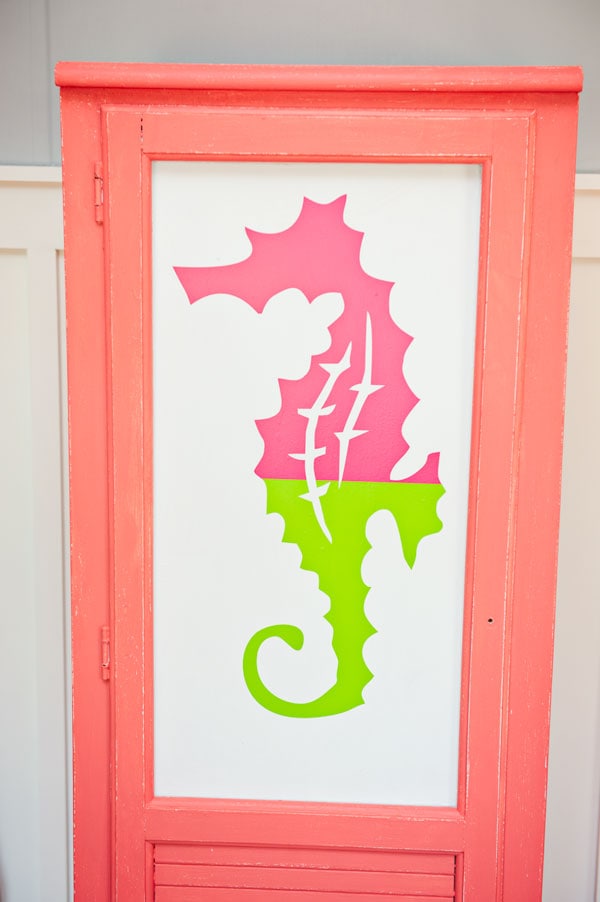
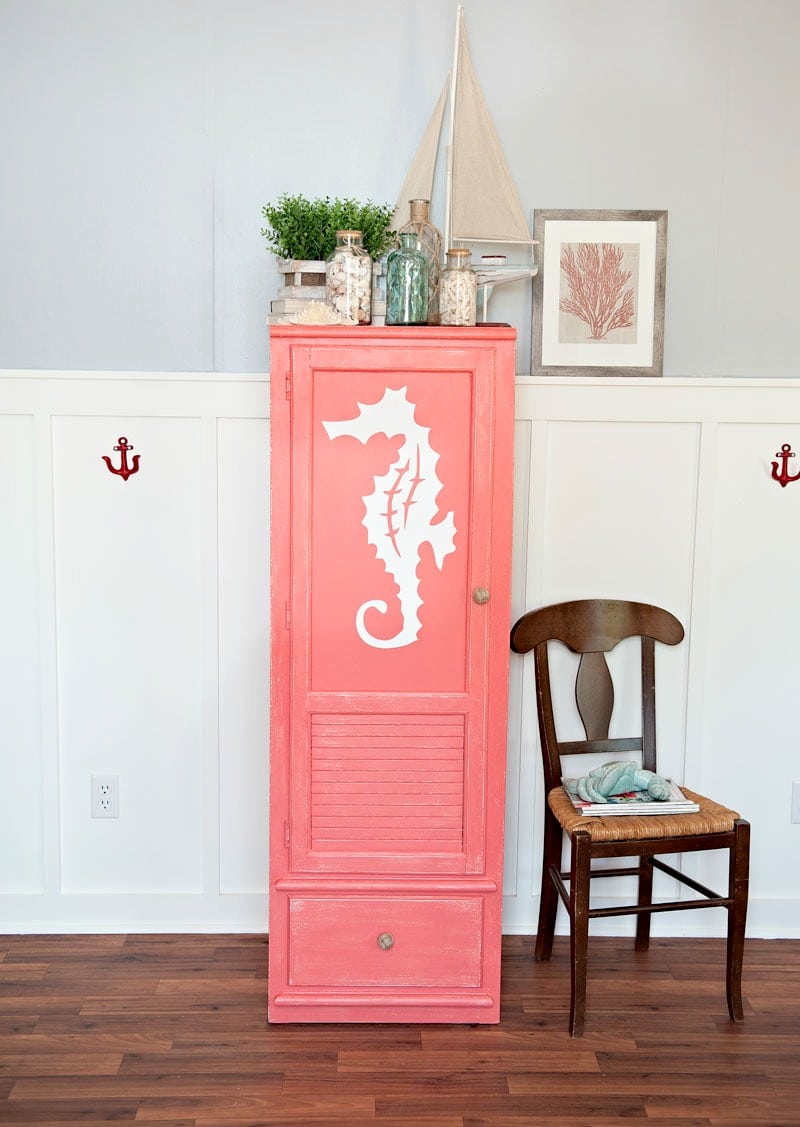
I painted over the seahorse with two coats of the Full Bloom. Once the paint was dry I peeled up my vinyl to reveal my SEAHORSE! Woohoo, I was so excited to see it. Turned out perfect! Don’t you think?!?
If you need more details on how I did my seahorse just let me know!
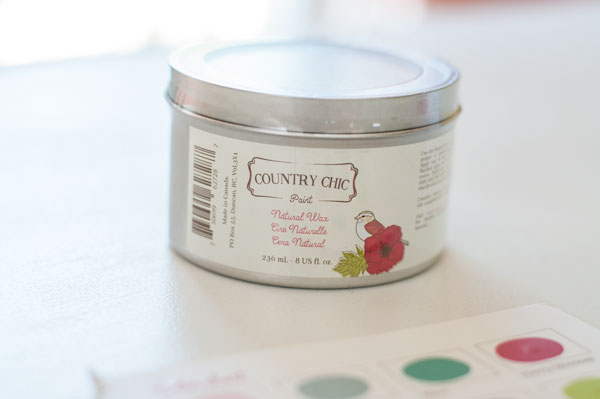
Step 6 – Wax Your Piece
Finally, it was time to cover the piece with some natural wax. I went over the whole piece with the wax using their wax brush. I only needed to add one coat, and once I was finished I went over it again with a cloth to wipe up any extra wax.
Finishing Touches
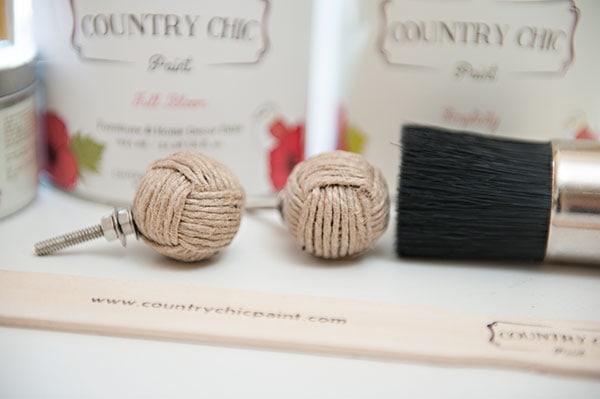
One of the last touches I did was adding these Twine Knobs I got from them as well. I LOVE these knobs! They are so pretty.
Here’s the finished piece!!
I wrote up the tutorial on how I covered this with fabric for Mod Podge Rocks. Once that tutorial is up I will add the link!
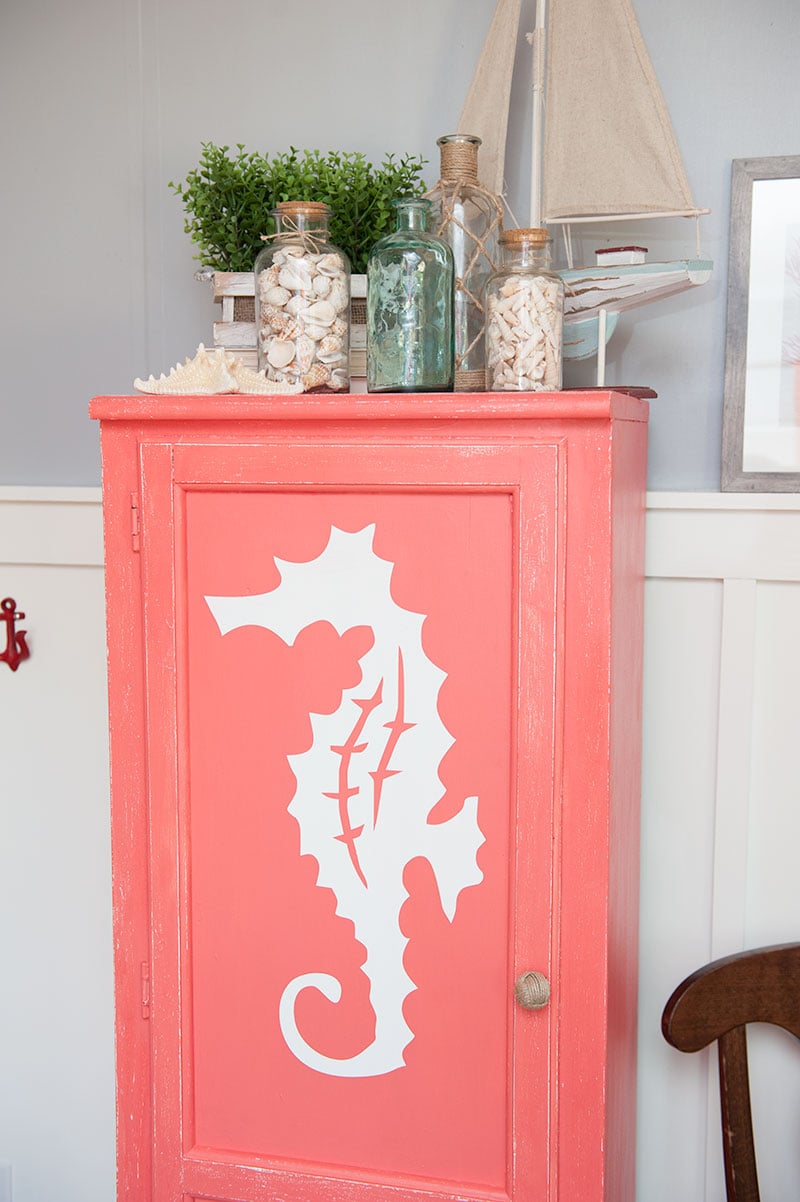
What a difference this piece turned out to be. I’m so happy I added the seahorse.
I plan on adding this piece to my bathroom! It’s perfect for storing towels, toilet paper and any other odds and ends.
A BIG thanks to Country Chic Paints for contacting me! I’m a big fan of their products.
Sponsored Post: Financial compensation was received from Country Chic Paints for this post. Project idea and any opinions expressed here are our own.
Love, Courtney