Crafts by Courtney

How-to Crafts and DIY Parties

  • Home
  • How-to Crafts
    • Home Crafts
      • Holiday
      • Seasonal
      • DIY Decor
    • Kids Crafts
      • Holiday
      • Seasonal
      • Educational
      • Clean
      • Messy
  • DIY Parties
    • Birthdays
    • Just for Fun
    • Holidays
  • Blog
    • My Thoughts
    • Hubby’s Corner
  • About
  • Contact

Create Toilet Paper Roll Rabbits for Easter

Toilet paper roll Easter rabbits craft

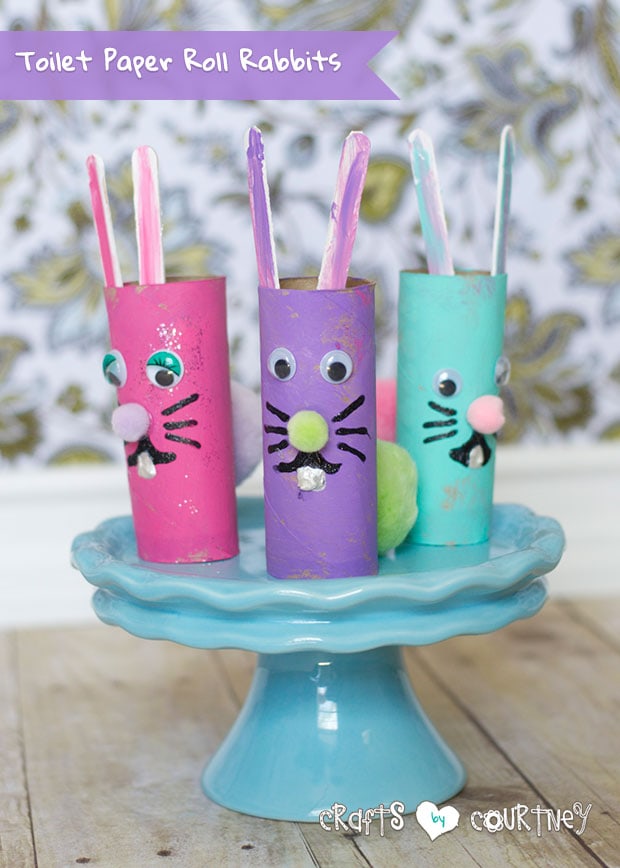
I saw the idea for these cute toilet paper roll rabbits on Pinterest. I just had to make them today’s craft with my 4 year old. We love a toilet paper roll craft!

I have a box full of toilet paper rolls in my garage. We really had a great time with this one. My little guy got pretty serious about making his rabbits.

Getting Started

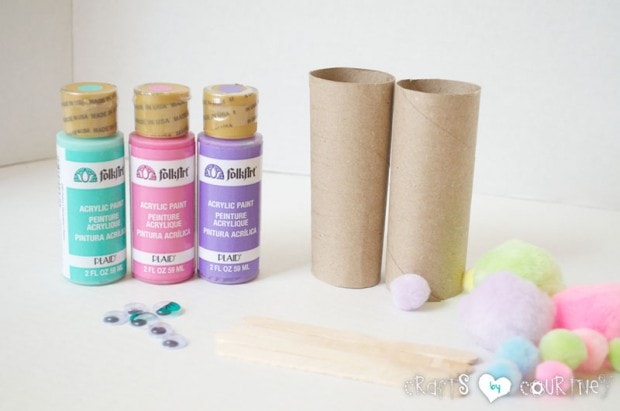
I was already stocked up on my supplies, but your local craft store or even Wal-Mart will have all the items you need.

For the pom pom balls, I got a large bag of assorted ones at Michael’s. I used my “Handy Dandy” 40% off coupon of course.

You know me and coupons, love that 40% off. I take all the kids with me when I go out because you can use a coupon for each person that’s with you at Michael’s.

Toilet Paper Roll Rabbits: Getting Started

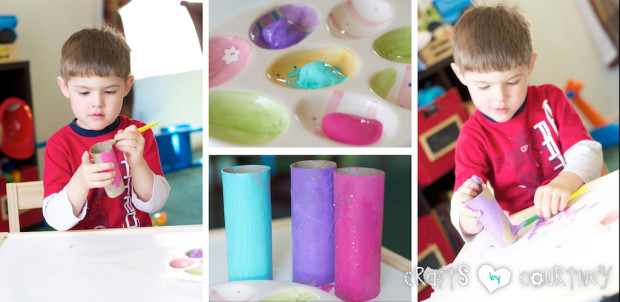
Step 1 – Paint Your Toilet Paper Rolls

I had my son paint one coat on each rabbit and make sure he painted the inside of the toilet paper roll as well.

Toilet Paper Roll Rabbits: Paint Your Toilet Paper Rolls

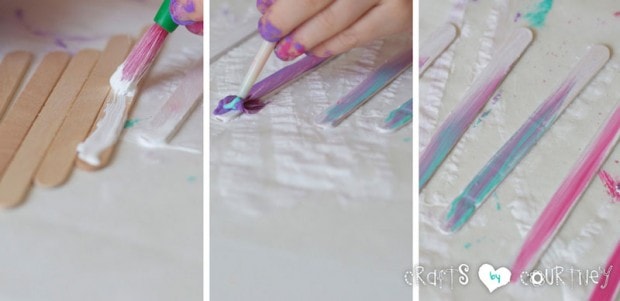
Step 2 – Paint Your Rabbit Ears

I used popsicle sticks for the rabbits ears. I had my son paint a layer of white paint onto the popsicle sticks. While the white paint was still wet, we added some extra colors in the middle.

Toilet Paper Roll Rabbits: Paint Your Rabbit Ears

Step 3 – Create Your Rabbit Faces

My little guy dabbed on some glue and gently added his eyes. Mama took over with the whiskers and mouth part. I used some puffy paint I had to create my whiskers and mouth.

Toilet Paper Roll Rabbits: Create Your Rabbit Faces

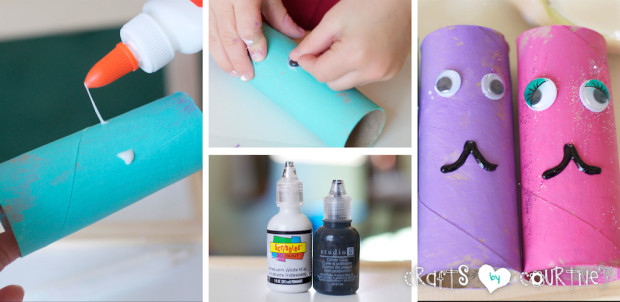
Quick Tip: After you paint the mouth, DON’T sit them upright. My mouths started drooping and teeth got messed up.

Step 4 – Finishing Touches

Once the puffy paint was dry, I went back over with my “Trusty” glue gun and added our rabbits ears, nose and bushy tails. I could have used regular glue but I love how the hot glue dries really fast.

Toilet Paper Roll Rabbits: Finishing Touches

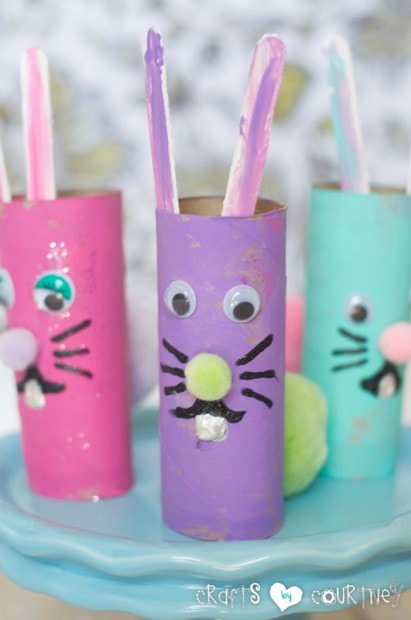
Aren’t these just the cutest rabbits you’ve ever seen? I don’t want to put them away after Easter.

This was a craft we both worked on together, he totally could have done it by himself but I really wanted to try using the puffy paint with this one. I hope you enjoyed our cute little toilet paper roll rabbits!

Love, Courtney

About Courtney Sanchez

Hi, I'm Courtney and I LOVE crafting! I am a mommy to 3 awesome boys (who keep me very busy) and wife to a loving husband. Crafts by Courtney is where I like to hang out ;)

Leave a Reply

Courtney Sanchez

Hi, I'm Courtney!

Welcome. Here is where I share the fun how-to crafts I've done with my kids and for my home. I also really love DIY parties too! Read More…

My Socials

  • Facebook
  • Instagram
  • Pinterest

Newsletter

Subscribe to my email newsletter for more craft ideas, tips and valuable resources.

The TOP 4

  • STEM Project Idea: How to Make a DIY Popsicle Stick CatapultSTEM Project Idea: How to Make a DIY Popsicle Stick Catapult
  • Terra Cotta Pot DIY Lighthouse Garden ProjectTerra Cotta Pot DIY Lighthouse Garden Project
  • Cardboard Box Craft - DIY DollhouseCardboard Box Craft – DIY Dollhouse
  • DIY GALAXY PAINTING CRAFT FOR KIDSDIY GALAXY PAINTING CRAFT FOR KIDS

Looking for more?

Over on Instagram

craftsbycourt

Another fun day at the greenhouse transplanting Ri Another fun day at the greenhouse transplanting Rivieria Midnight Blue.  These flowers are so beautiful full grown. ✨I have to say I’ve really enjoyed working at my local green house these past couple weeks.  Seeing all the amazing flowers, transplanting them and getting my hands dirty.  I just love it!! 🌿It was such a beautiful day here in NC, just makes you appreciate the warm weather so much.  Ready for Summer 🌻🌞
Salon days with Hannah are my fav days 🤍Cut a Salon days with Hannah are my fav days 🤍Cut and color by @beauty_itwith_grace
Spring is here!! Well kinda... It's been cold and Spring is here!! Well kinda... It's been cold and rainy here in NC. But tomorrow it's should be warmer weather and the sun out! I'm excited about that!Sharing a Spring project I made on the blog a couple years ago using @decoart acrylic paints!Head over to the blog for full tutorial, link below 👇
Sharing a lighthouse project I did several years a Sharing a lighthouse project I did several years ago on the blog!! Actually it's one of my favorite projects.Link to full tutorial below 👇#craftblog #craftsbycourtney #creativehappylife #homeblogger #craftblogger #diy #diyaddict #farmhousedecor #crafting #crafter #tutorials #homedecor #summerwreath #farmhousestyle #dollartreeaddict #dollartreecrafts #summercrafts #coastalliving #coastaldecor #coastalcraft #coastaldecor #coastalstyle #lighthouse #lighthousecraft #foamcraft #nautical #nauticalcrafts
Happy first day of Spring!! 🌺🌸🌼🌻🌷 Happy first day of Spring!! 🌺🌸🌼🌻🌷Ready for warmer weather here in North Carolina!
Had to stop by a cute little beach by my old house Had to stop by a cute little beach by my old house in Apollo Beach in Florida.  It’s crazy how I took all these little beaches by my house for granted when I lived there.  I’d be at them everyday now if I could. 🌊😩🐚✨😉
Follow on Instagram

Who I Work With

Crafts by Courtney   ·   Copyright © 2013 - 2023