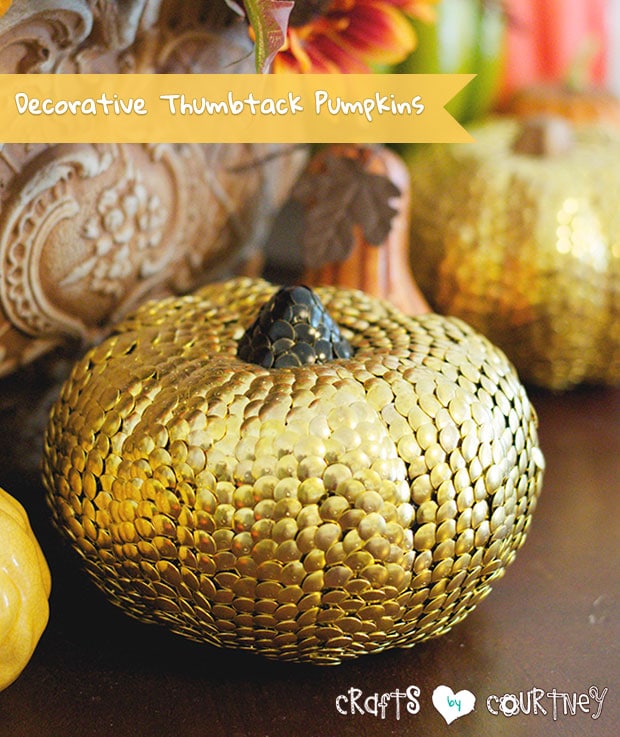
I have been browsing holiday Pinterest boards and came across these beautiful pumpkins. If you can believe it, they are made from thumbtacks!
I found the idea at Madiganmade.com. She has some amazing ideas for the house. I definitely have become a fan of hers.
But you know me, I have to do my project on a budget. I got several $1.00 pumpkins to start this project of right. I’m so excited about this project! I just think these pumpkins look so elegant and expensive (when they only cost a couple dollars each).
Getting Started
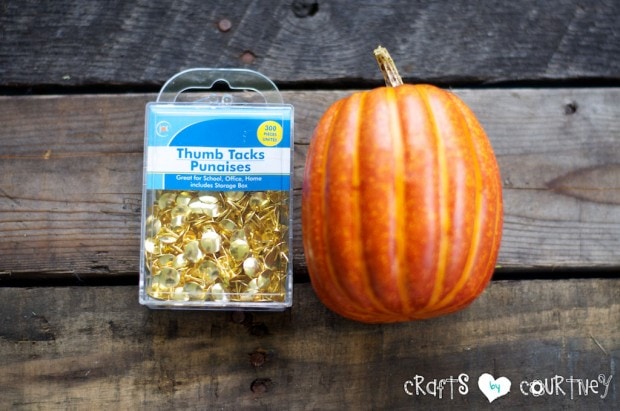
I started my project by making a trip to my local Dollar Tree (I think they know me by name). I got a couple different size pumpkins and loaded up on the tacks.
When I say load up, I mean get like 10 boxes! You can make a few pumpkins with that many thumbtacks.
I basically used 2 and a half boxes on each pumpkin. If you plan on making one pumpkin, just get 3 boxes so you know you will have enough.
Better safe than having to run back to the Dollar Tree halfway through your pumpkin. But if you’re like me, you’d make any excuse to go there ;)
Step 1 – Tack Your Pumpkins
I started at the top of my pumpkin. Placing the tacks around the stem and just made my way to the bottom depending on the shape of the pumpkin. If the pumpkin has ribs (yep that’s what they’re called, I even Googled it), then outline the ribs and fill them in.
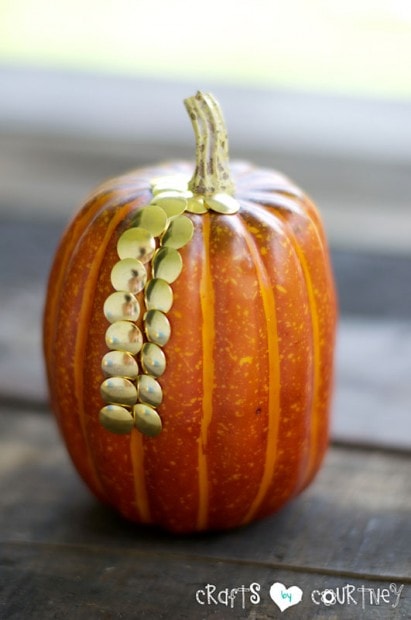
Quick Tip: Be sure you keep your tacks close together so you don’t have any bare spots.
Step 2 – Finishing Touches
Once you’re done with your pumpkins, you are ready to display! Making these can get pretty addictive. I would sit all night after the kids went to bed and catch up on some shows while tacking pumpkins.

I’m so happy with the results. They look so expensive and chic, but cost less than $4.00 each. Now that’s my kind of holiday craft!
Love, Courtney