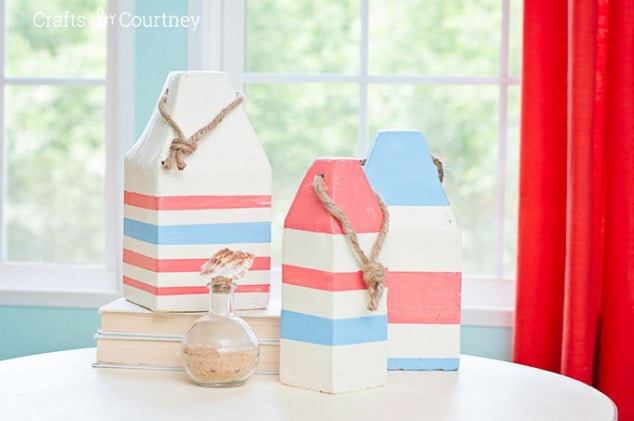
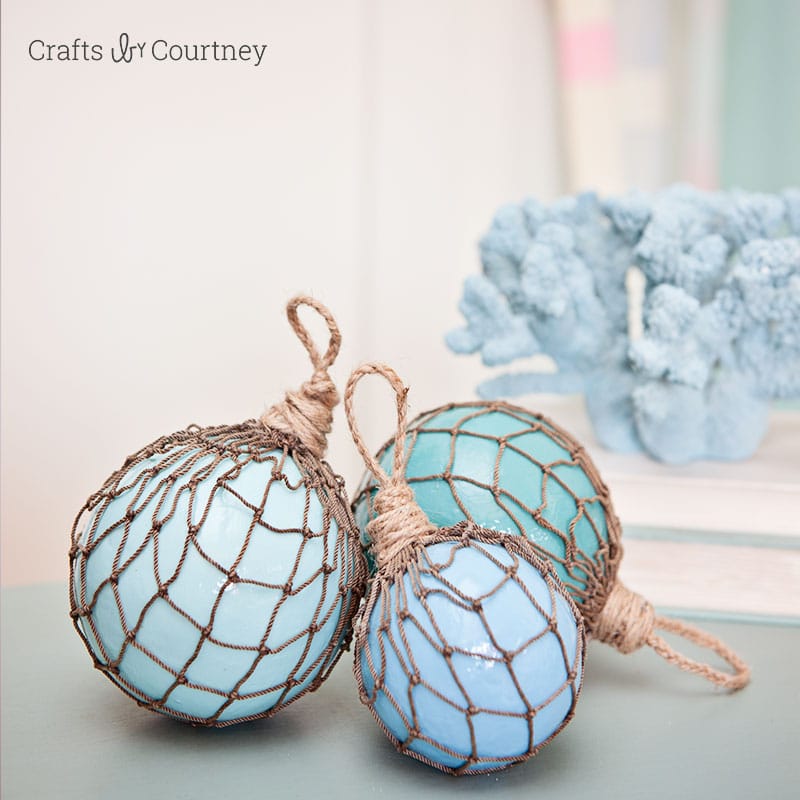
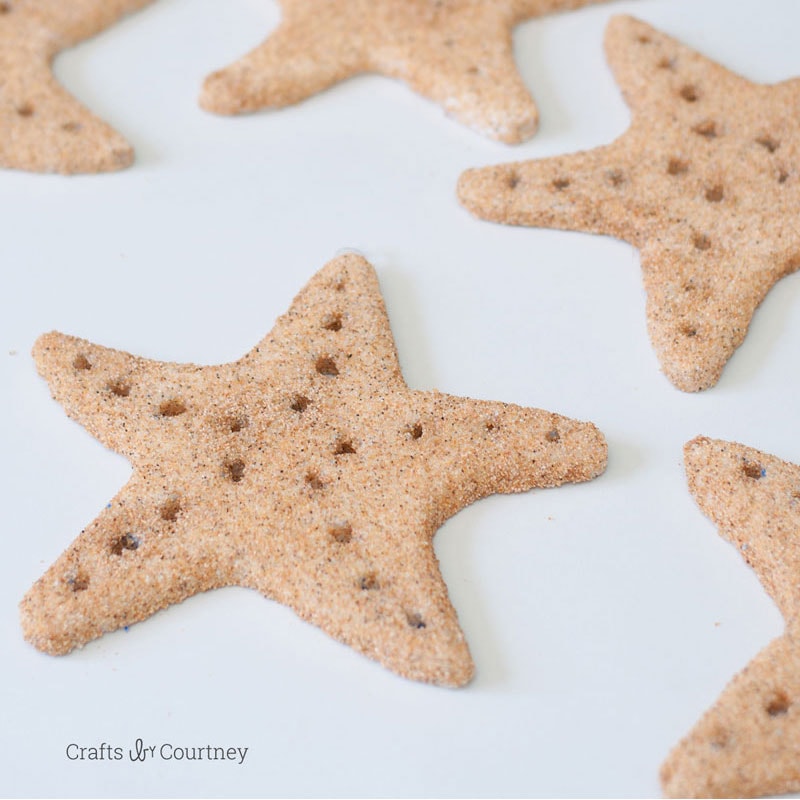
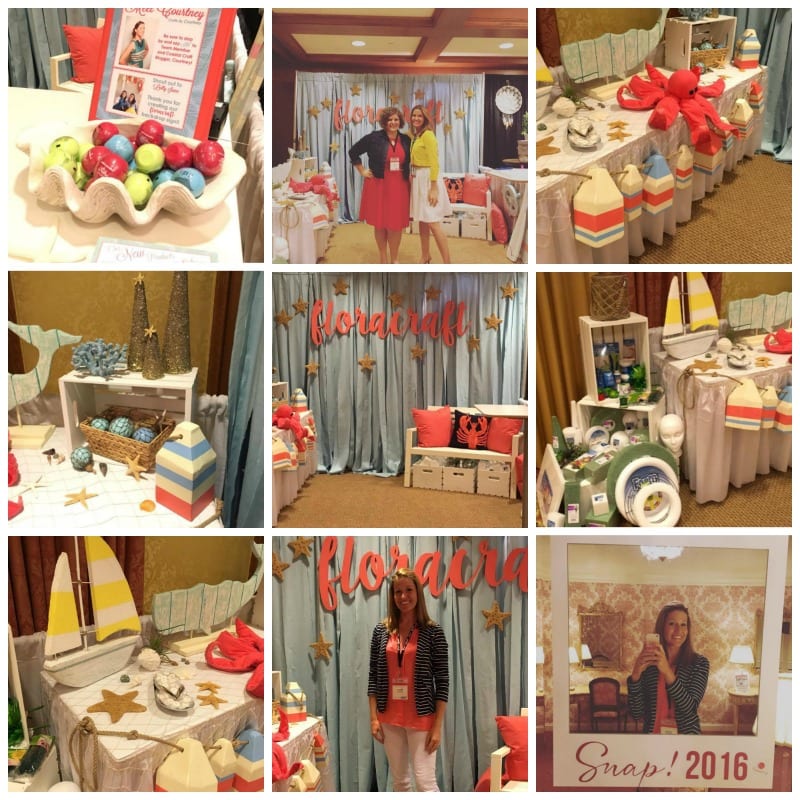
I’m very happy to finally be writing this post up for this project I made several months ago. I worked with FloraCraft, on decorating their booth for SNAP back in April. It was a cool coastal theme booth and totally my style. I made “Faux” Glass Floats and Foam Starfish specifically for their booth and the Foam Buoy craft was my last project.
I’ve had this project in mind for while now. I’ve seen DIY Buoy’s and loved them. But unfortunately I don’t have the tools to cut the wood. So my next best option was using my “trusty” foam blocks!! They worked PERFECT!! Everyone at SNAP loved them and couldn’t believe they were made of foam. Plus they are not as heavy as the wooden ones.
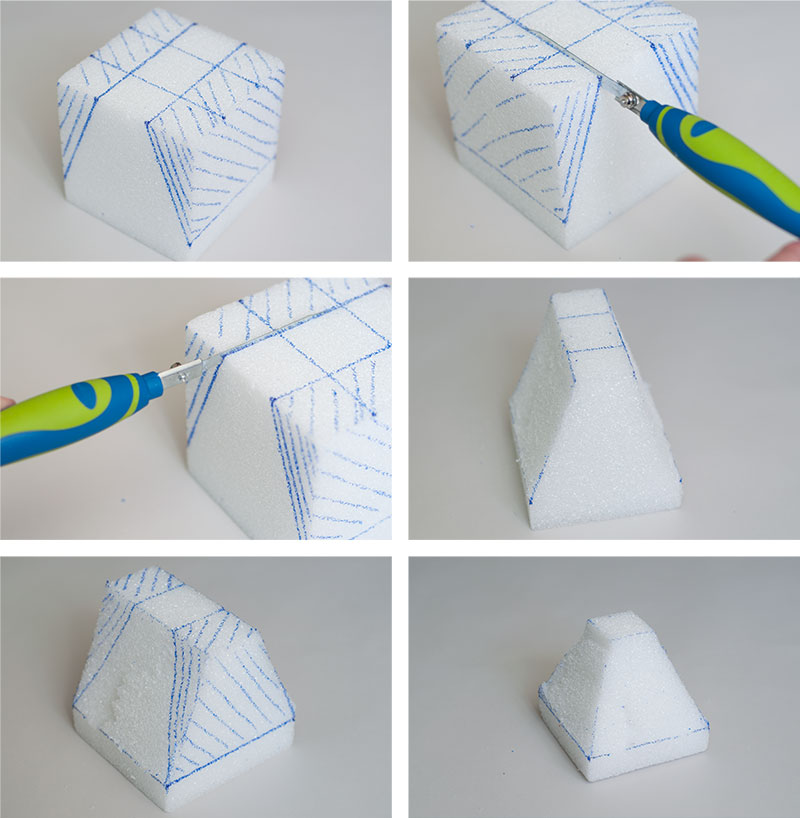
Step 1 – Cut Top of Buoy Shape
My first step was grabbing all my foam blocks! For the large buoy I used 2 foam blocks and for the smaller one I used three foam blocks.

I had my super crafty husband measure out the top part of the buoys. I’m so bad at that part…
I used my “trusty” FloraCraft® Make It: Fun® Foam Cutter to cut this part out. It worked super easy, especially since my hubby drew the outline for me. If you have any questions on this part, please let me know and I’ll be happy to answer.
I had to make a total of 9 of these buoy’s so my kitchen looked like snow was everywhere during this whole project!! Crafter problems, am I right!? ;-P
Step 2 – Glue Cubes Together
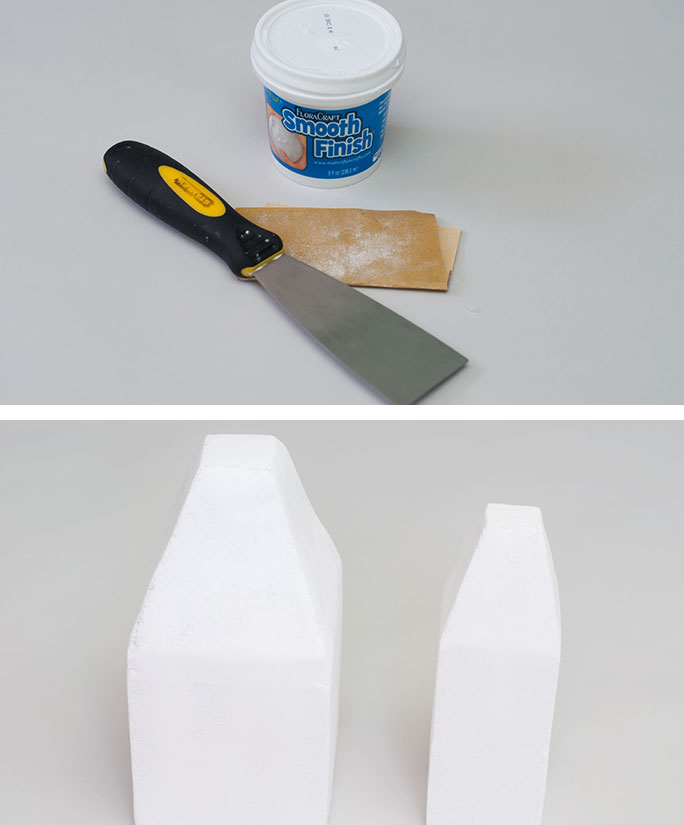
Next I pulled out the StyroGlue and glued my foam blocks together. An hour is a good amount of time to let these dry before adding your Smooth Finish.

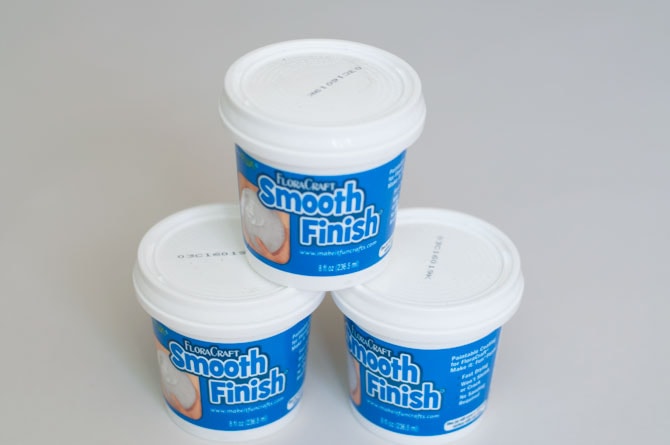
Step 3 – Add Smooth Finish
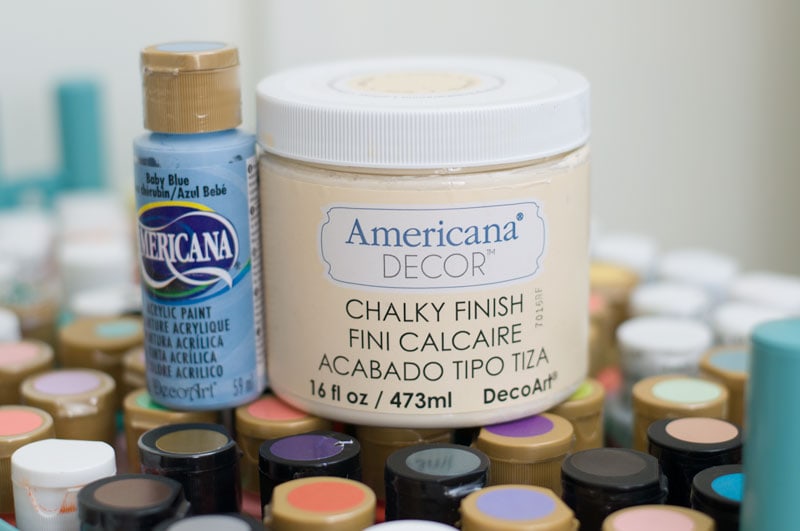
Now my favorite part, adding my SMOOTH FINISH!! I love this stuff, it just transforms my foam projects into something beautiful.
I did a total of three coats, letting each coat dry 2 hours. When spreading the smooth finish, the first two layers I just used my fingers, but the last coat I used a putty knife.
I let the smooth finish dry overnight, to make sure it was 100% dry before I sanded.

Step 4 – Sand Down Buoys
I was so excited to start sanding my buoys and really see the shape of them. I used a light sandpaper, and just worked my way around. I didn’t want it to be completely smooth. I wanted them to have a weathered feel.
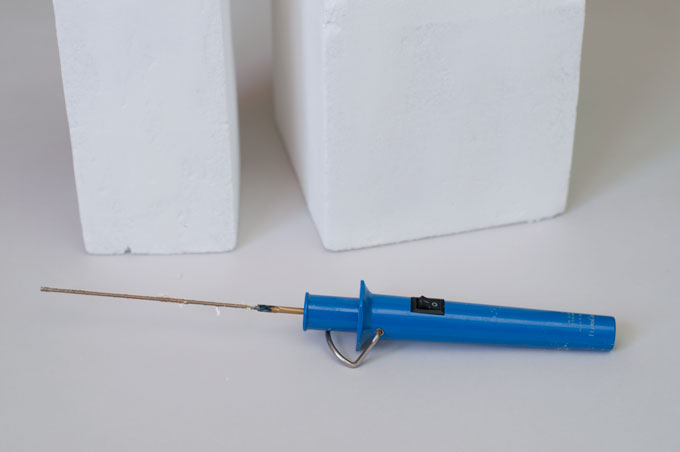
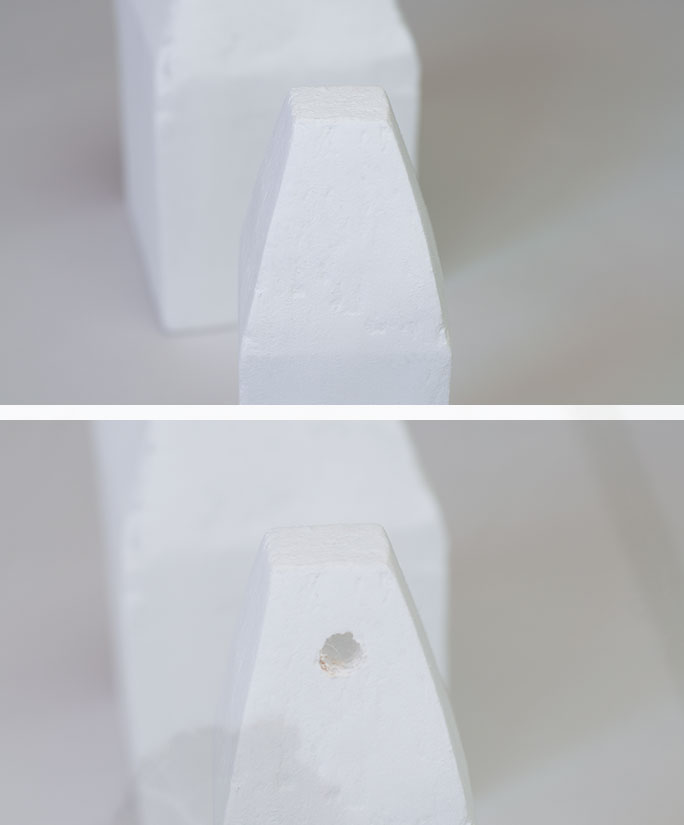
Step 5 – Make Your Hole for Rope
Next I needed to add my holes on the sides to slip my rope through. I used my “trusty” FloraCraft® StyroCutter® Plus. This tool is awesome! It cuts through the foam like butter, you don’t even have to push hard. I started my hole small and working the cutter in circles until I was satisfied with the size.
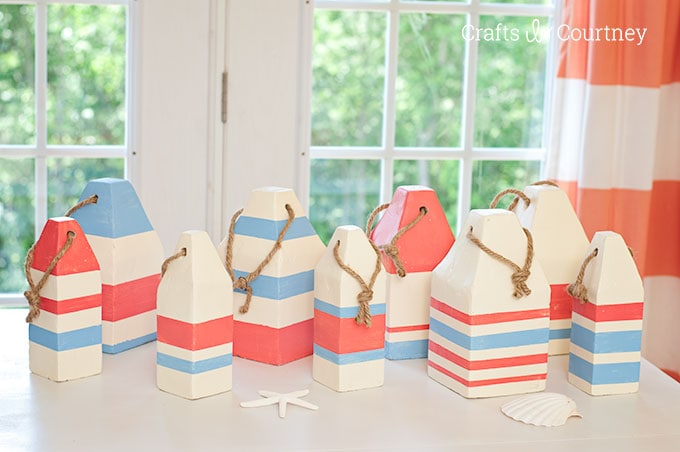
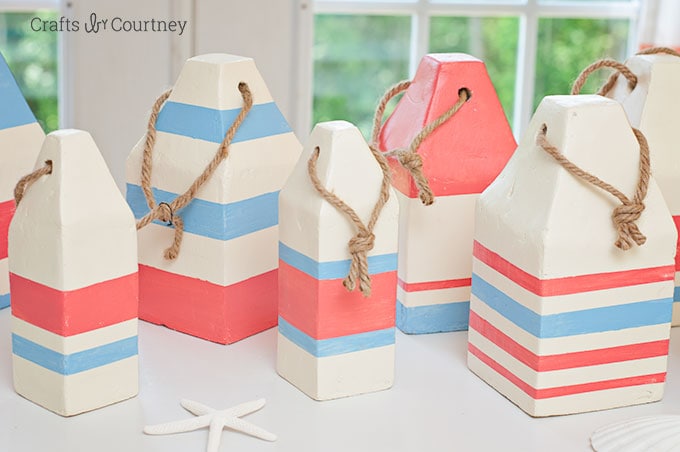
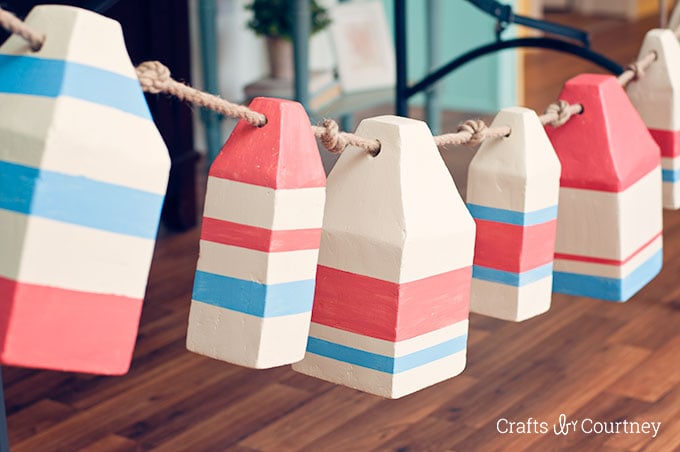
Step 6 – Paint Buoys
Now it’s time to paint, woohoo!!! I used some of my favorite colors and looked online for some inspiration. I taped off with some washi tape and got started!
The coral was a custom color I had to get made from Lowes to match a pillow.

Finishing Touches
Once they were done, I added some decorative rope! Right now I have them on top of my china cabinet until I can find the perfect spot for them. They really turned out so cool, don’t you think?!?
This is probably one of my favorite projects I’ve EVER worked on!
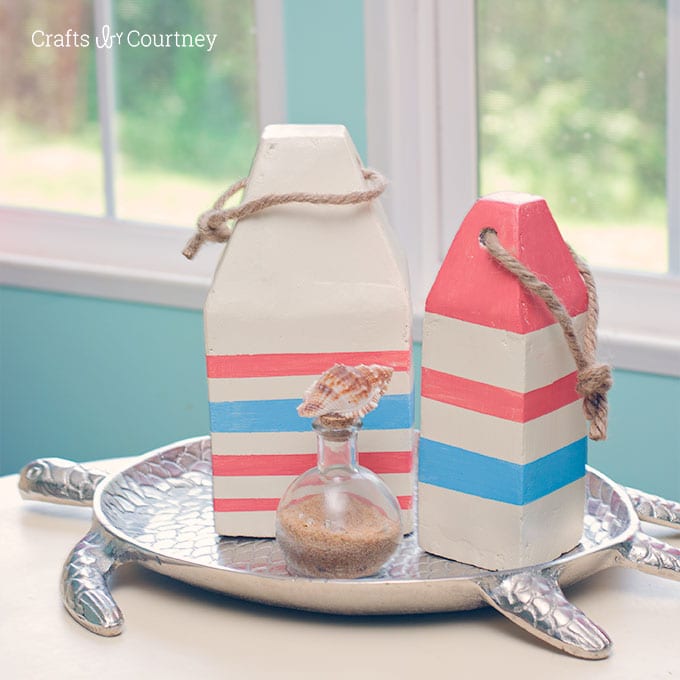
I even tried another style and I loved how that turned, perfect to put on front of a table.
Here’s a picture of the FloraCraft booth and all the fun crafts I made (except the octopus which is pretty cool!)
I think this is a perfect craft for any occasion, a nautical theme party or even home decor.
I just love that they are so lightweight and you can paint them any color you want. I plan on adding some numbers to the fronts of some later on. I bet if you added a little outdoor Mod Podge or some kind of sealer you could hang them outside. I’ll update you if I try that out!
As you can see it’s a pretty easy project, it might look a bit intimidating but I’ve done all the hard work and testing now it should be easy for you!!
Let me know if you have any questions!!
Love, Courtney