Sponsored Post: Financial compensation was received from FloraCraft® for this post. Project idea and any opinions expressed here are our own.
Hey everyone, it’s been awhile since I’ve actually written a post on my own blog. I’ve been working on some big projects and I can’t wait to tell you about them when I’m finished.
But they have kept me pretty busy. So I was excited when we had some distraction this past week. It SNOWED here in NC!! The boys were so happy, and I was pretty excited too. I grew up in Florida so snow it pretty new to me too. We went sledding, threw snowballs and even made a snowman. We made some great memories and got some great pictures of the boys.


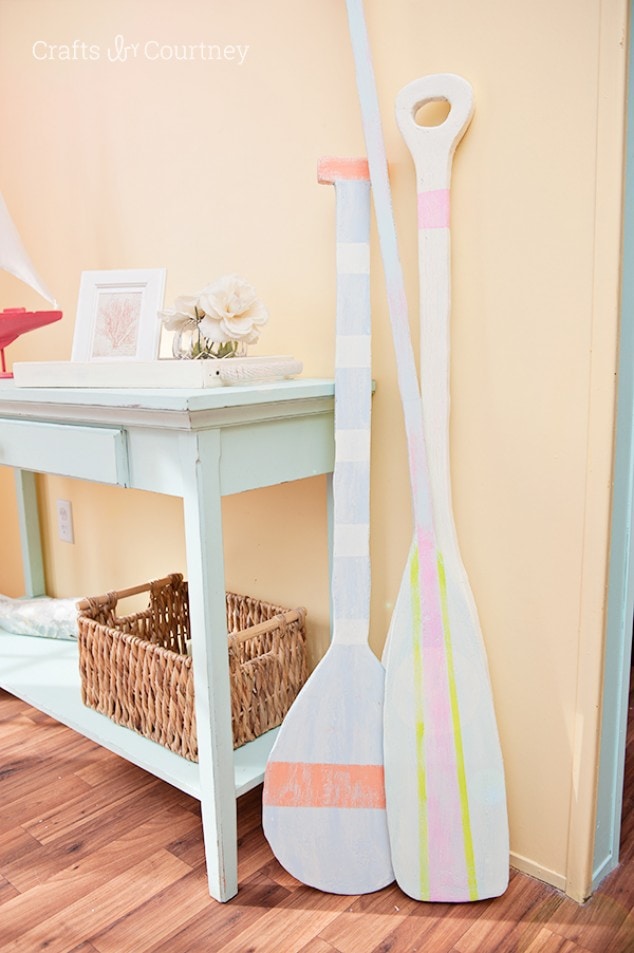
But I had to get back to work and get started on a new project. Every month I have a Make It Fun Crafts Team challenge, and this month I received a box of foam sheets. I was excited of course, because I knew exactly what I wanted to make. An Oar craft, to go with my coastal decor. I’ve been wanting to make them for awhile and was waiting for the right challenge.
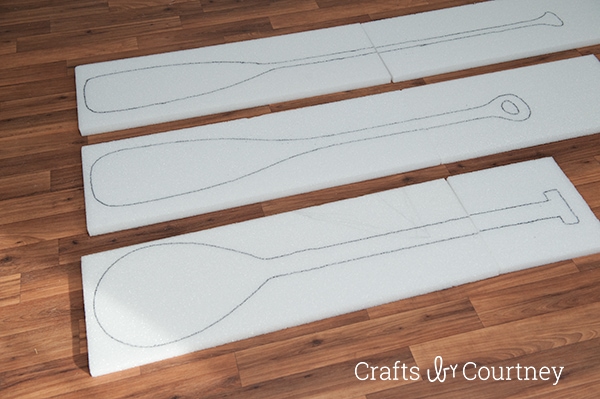
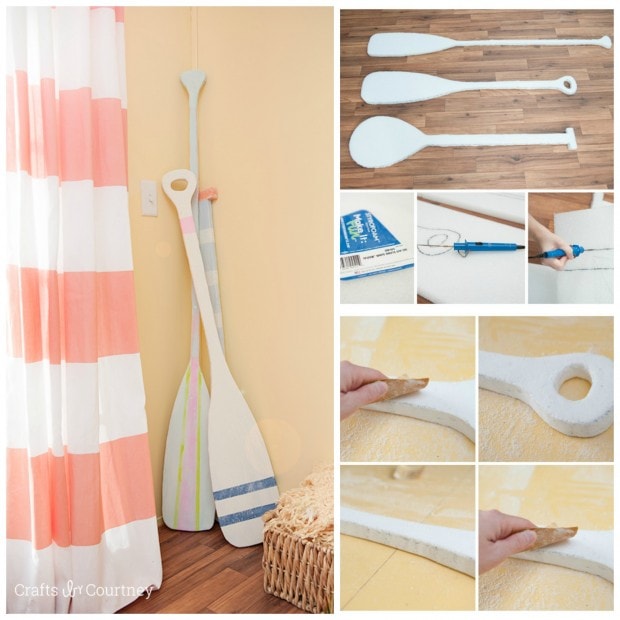
Step 1 – Trace out Oars
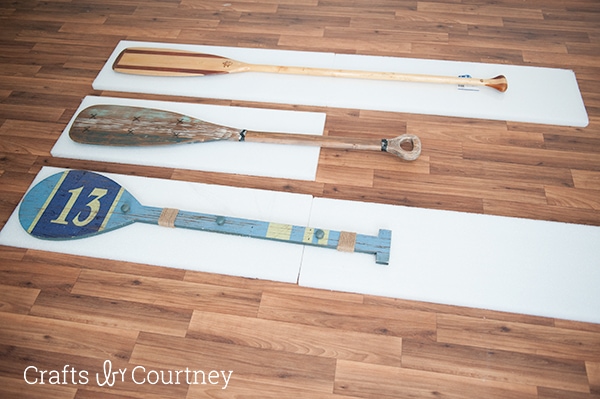
I used a 1x12x36″ piece of foam sheet. They weren’t long enough, so I had to use two pieces.
I’m not good at freehanding stuff, so I pulled out some oars that I already had and traced them out.
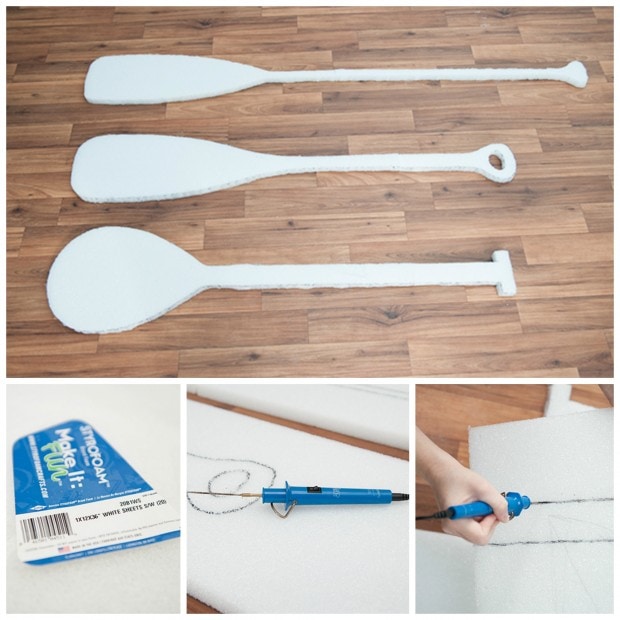
Step 2 – Cut Out Oars
Next I used my “Handy Dandy” FloraCraft® StyroCutter® Plus to cut out my oars. This cutter is awesome. Cuts right through foam so easily.
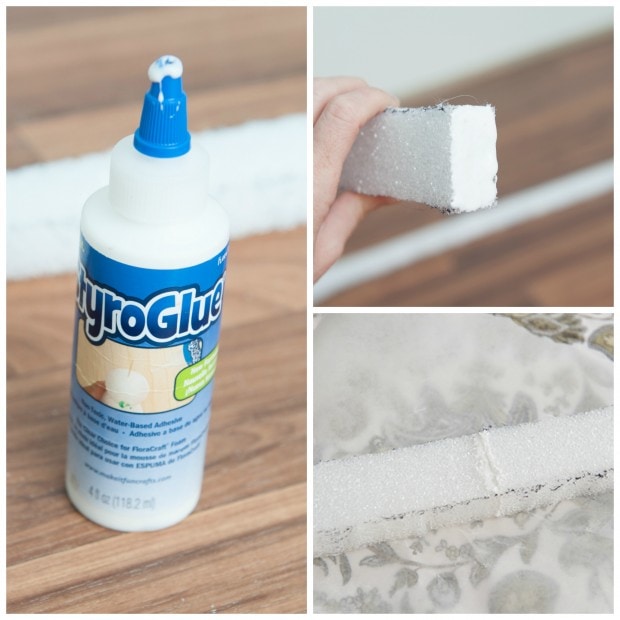
Step 3 – Connect Pieces
Then I needed to connect the two pieces of foam to create my oar. I used the StyroGlue and it worked perfectly. I just needed to let it dry for 2 hours.
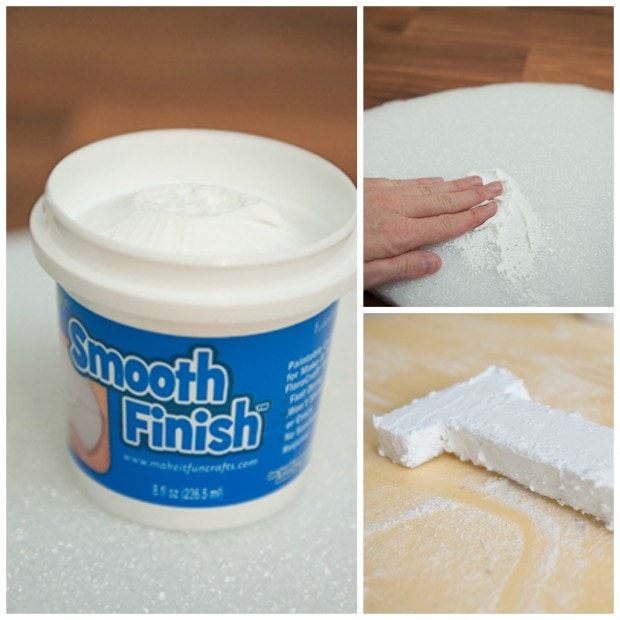
Step 4 – Add Smooth Finish
Finally I was ready to add my Smooth Finish!! I added two layers and let each layer dry 8 hours.
All I needed to do was rub it all over the foam, smoothing it down. As you can see it’s pretty bumpy so it will need sanded down..
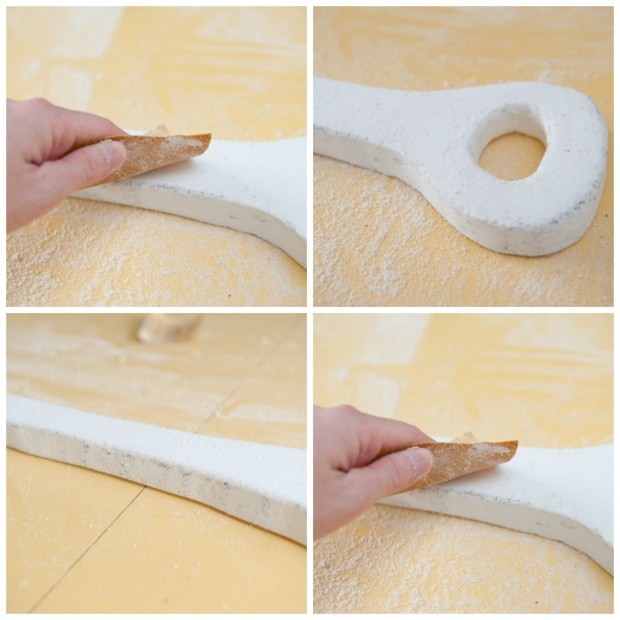
Step 5 – Sand Down
Time to sand it down! Make sure the smooth finish is completely dry before sanding.
I used a heavy sandpaper to smooth down my oars. It was a really simple process, I was even able to make the edges rounded. But be prepared for A LOT of dust!!
Finishing Touches – Paint
Now the fun part… PAINTING!!
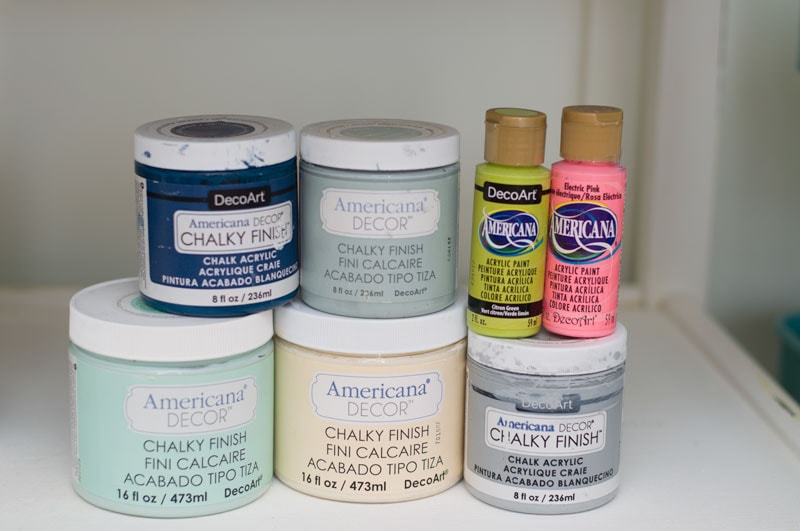
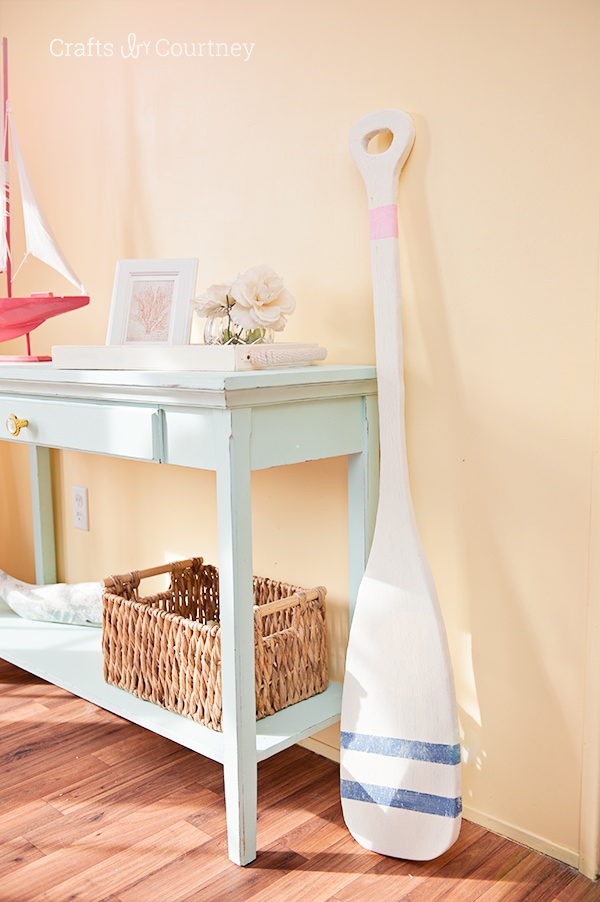
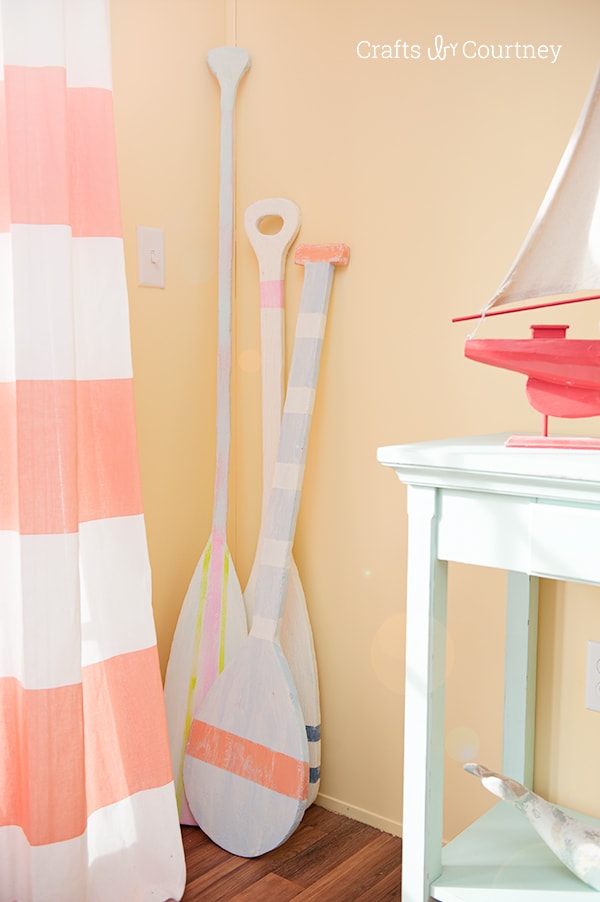
I picked out some fun colors for this step. I lightly brushed on my paint to get the weathered look I wanted. I think I’m still going to add numbers to the front of them when I have some extra time.
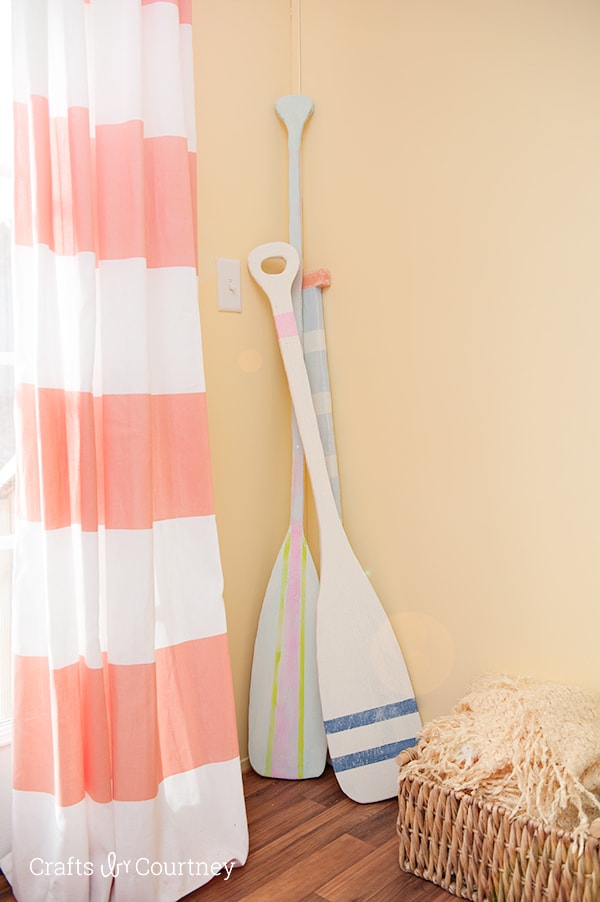
I’m not 100% sure where I’m going to put them yet. Since they are made of foam, I’m thinking I might hang them on the wall with some command strips. Just to keep them safe from this kids.
So if you haven’t already guessed, I’m so happy with how they turned out! They are a perfect addition to my house and I was able to customize them the way I want. I haven’t seen any with these colors at any store, have you?!?
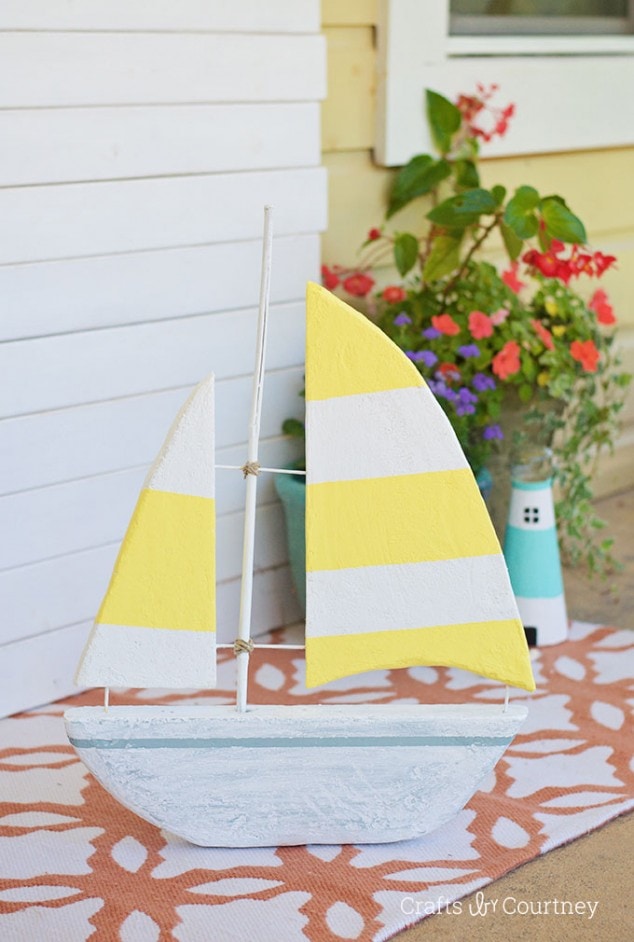
Here’s a Foam Sailboat I did back in the Summer! Still one of my favorites!
This was my very first foam project with FloraCraft. Fred the Faux Wood Whale. This is one of my favorite crafts I’ve ever done!

Love, Courtney