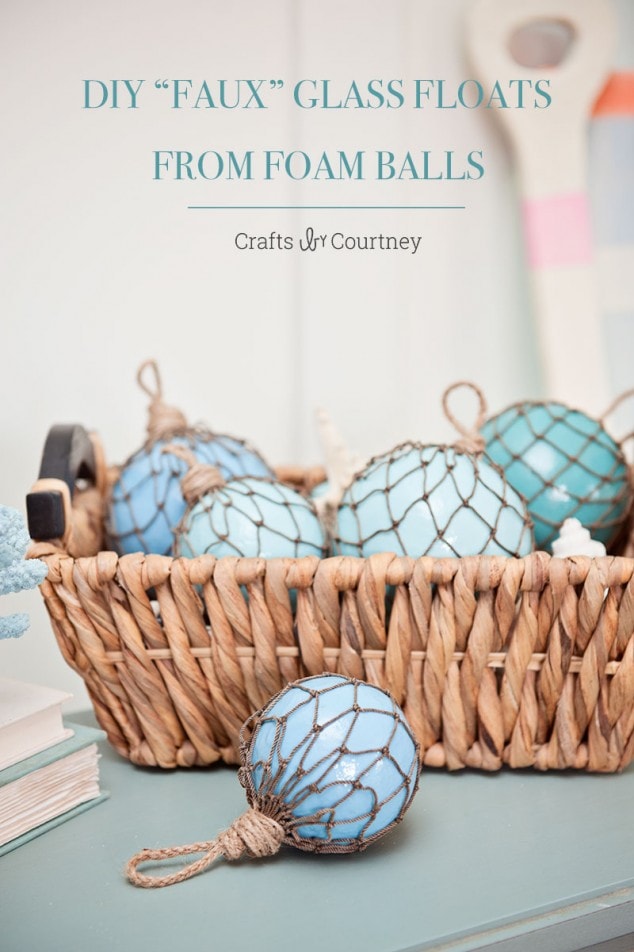
I have been so EXCITED to write this post on these cool “Faux” Glass Floats. I recently went to a blogging conference (SNAP) with FloraCraft. I’m part of their Make it Fun team and since they were a sponsor at SNAP, they asked me to come help with the booth. We had a coastal theme booth so they used some of my existing foam projects and had me make new ones too.
The glass floats were one of the projects I had to make (and buoys). I’ve had glass floats on my crafting to-do list for awhile now. BUT I never thought of using foam. I was super excited for the challenge, and I think they turned out great if I do say so myself.
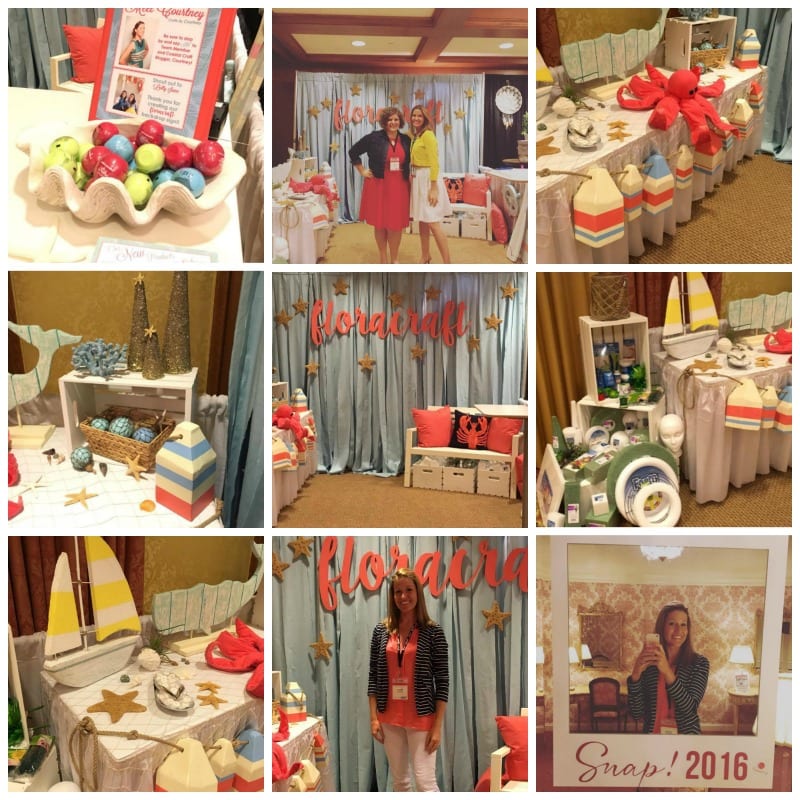
Here are some pictures of the booth, and Jamie from FloraCraft. SNAP was a GREAT experience and it was wonderful getting to know a little more about FloraCraft.
Glass Float Supplies Needed
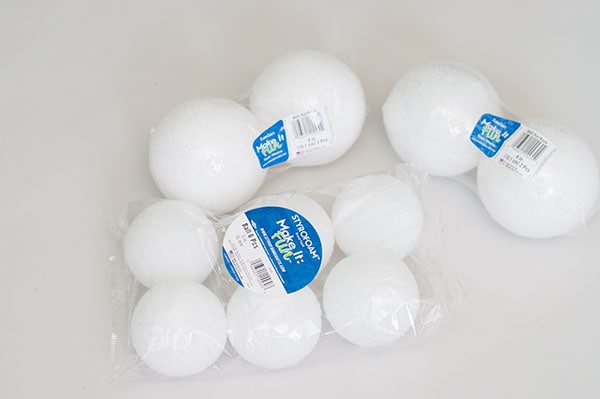
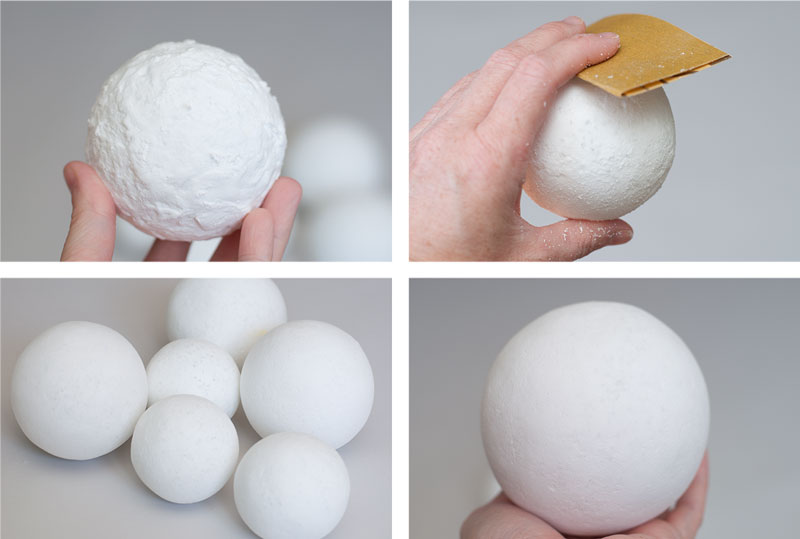
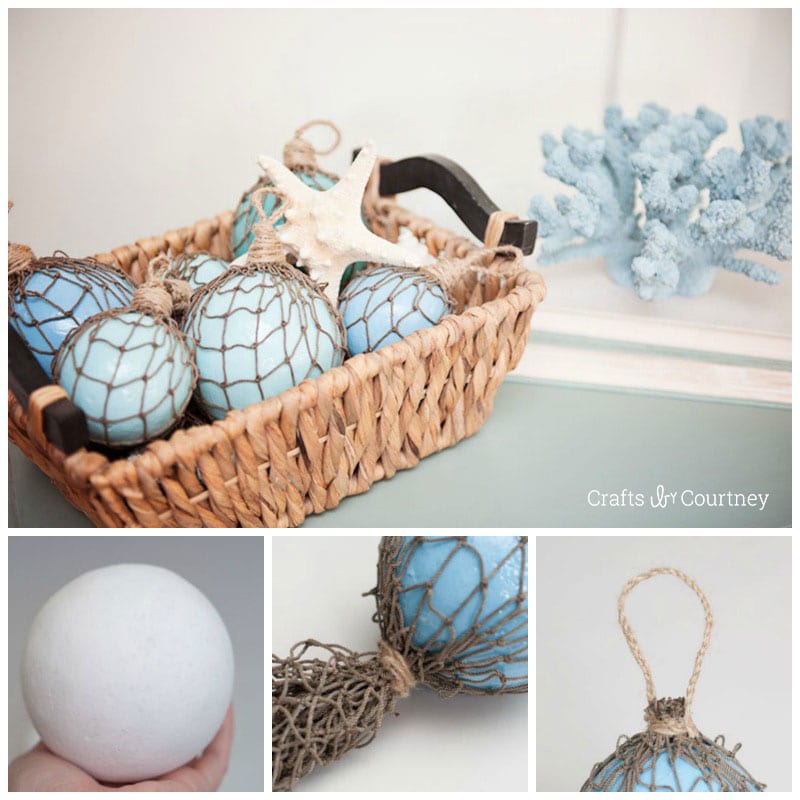
Step 1 – Pick Balls
I decided on medium and small size foam balls. They have a TON of difference sizes, which is great!
Step 2 – Cover Ball in Smooth Finish
Let’s start by adding FloraCraft Smooth Finish®. I smoothed on 2 coats letting each coat dry 2 hours. I made sure to really press it into the foam.
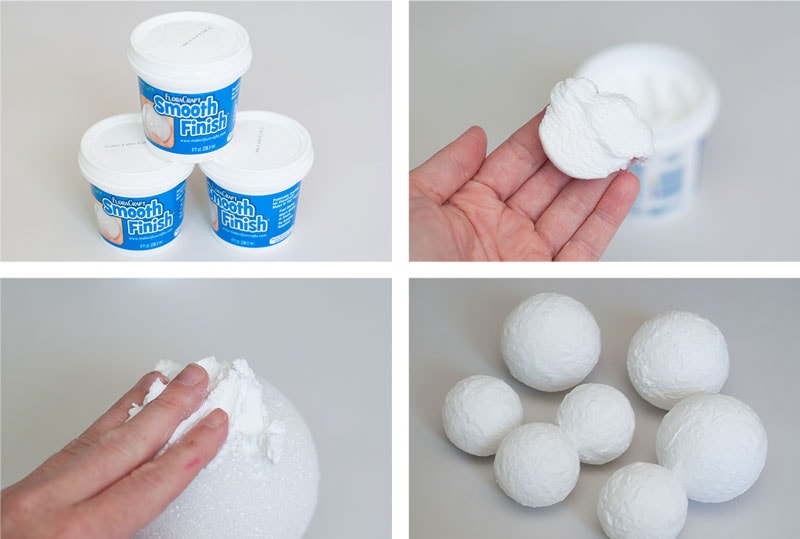
Step 3 – Sand Your Ball
Now that our smooth finish has dried, I lightly damped the balls with a wet paper towel. Then I sanded the balls down with light sandpaper until they were completely smooth. You can dry sand them, but I read the great tip on FloraCrafts website about dampening them. It worked perfect!!
Step 4 – Cover Ball in Triple Thick
Next let’s add our Triple Thick!!! When I told Jamie from FloraCraft that I wanted to attempt these glass floats, she suggested using Triple Thick from DecoArt to give the “faux” glass look.
I added one coat, before I decided to paint the foam balls. Let dry 2 hours. All you need to do is paint it on with a paintbrush, simple as that!
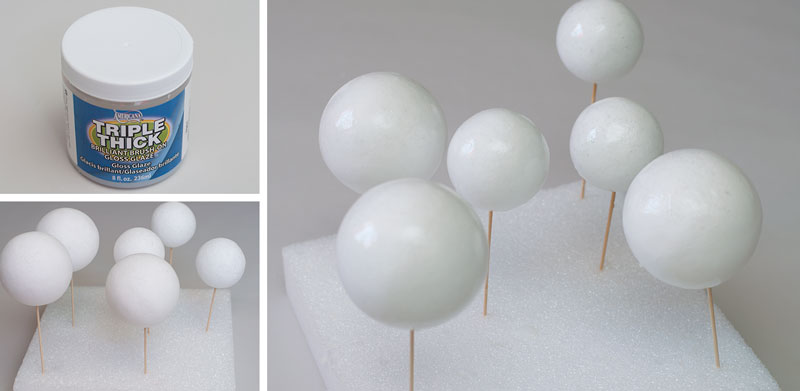
QUICK TIP: Poke a skewer through the bottom and place in a larger piece of foam. This makes it so much easier to add the Triple Thick and paint.
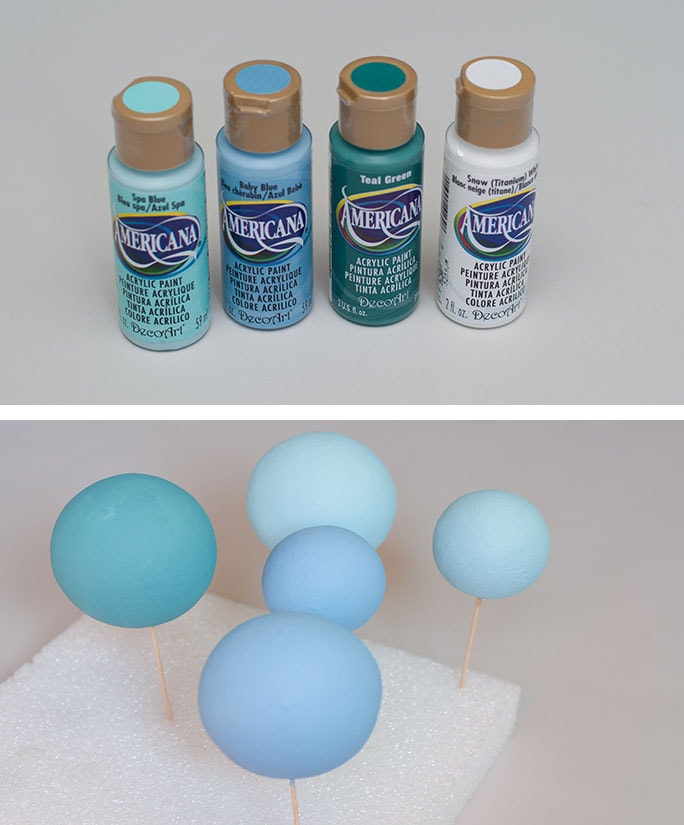
Step 5 – Paint Balls
Ok, it’s time to paint!! We found some fun colors, and painted on two coats. I let each coat dry 30 minutes. See it’s easy so far!
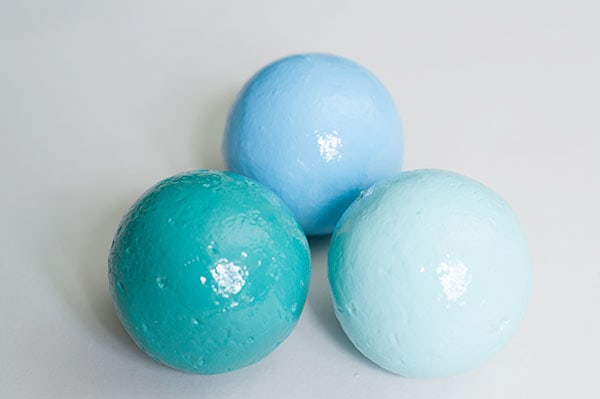
Step 6 – Add Final Coat of Triple Thick
Let’s add our last coat of Triple Thick! Again, let dry 2 hours, or you can even do it before bed and dry overnight. That’s what I did.
Step 7 – Add Fishnet
When I started this part, I really had no idea how I should attempt it. I had several craft fails. BUT finally I found the perfect way.
I really tried to take detailed pictures, just incase I didn’t explain it right, or it was confusing.
Start off by wrapping the ball in fishnet, then use your jute and tie a knot. Wrap a little of the jute around the ball (making it tight). Then cut off the excess fishnet.
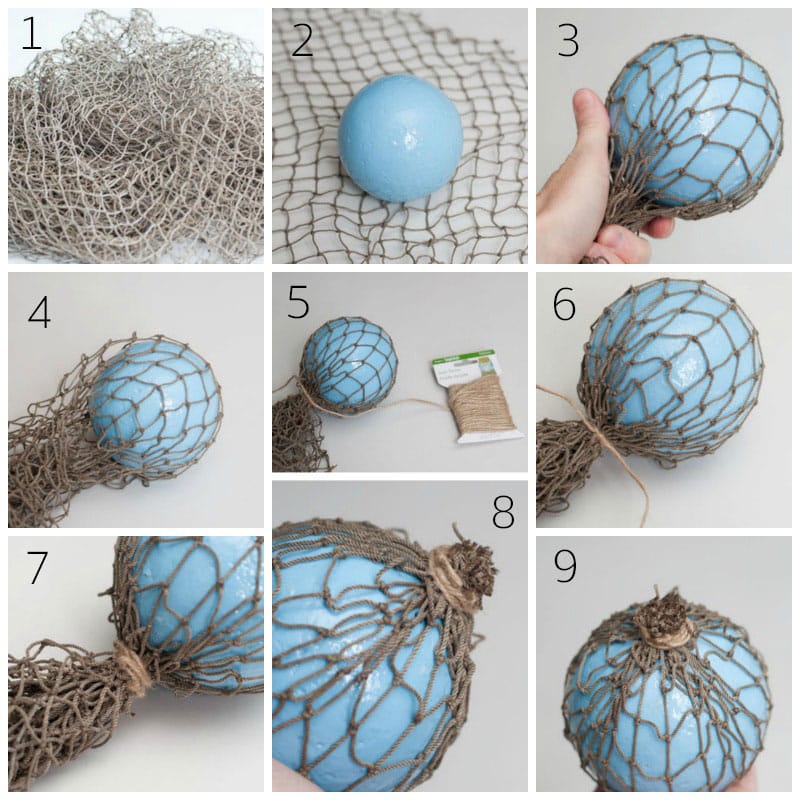
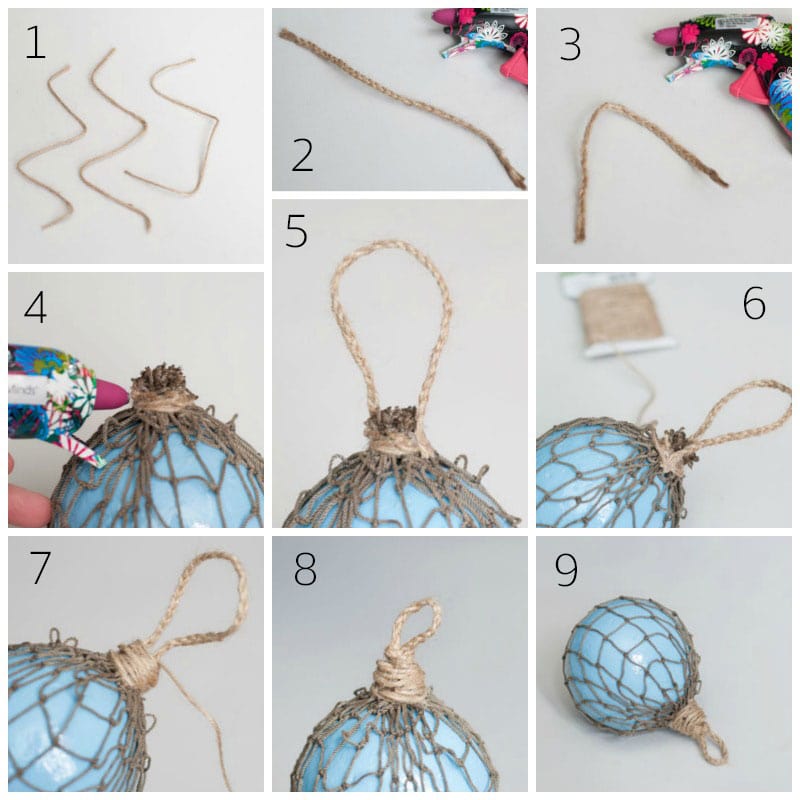
Step 8 – Add Knot at Top
For your top knot, I braided three pieces of the jute together and hot glued the ends together. Then I hot glued my braid to the sides. Finally I started wrapping my jute around the braid, adding a small amount of hot glue in places.
My first braid was a little long, so I made and knot to shorten it. I ended up loving how it turned out! So I made all of them like that.
Finishing Touches
Now the fun part, decorating with the glass floats. I created a little spot in my den for the floats and they look perfect. I absolutely LOVE the colors. It matches my coastal theme perfectly!
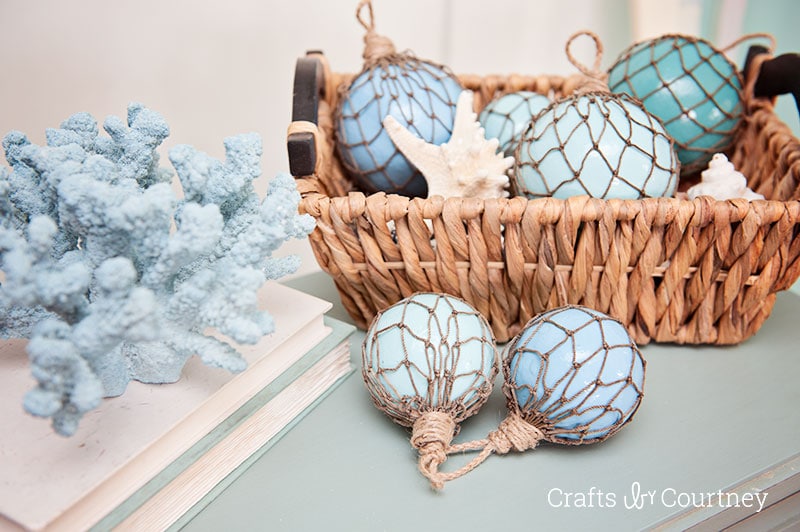
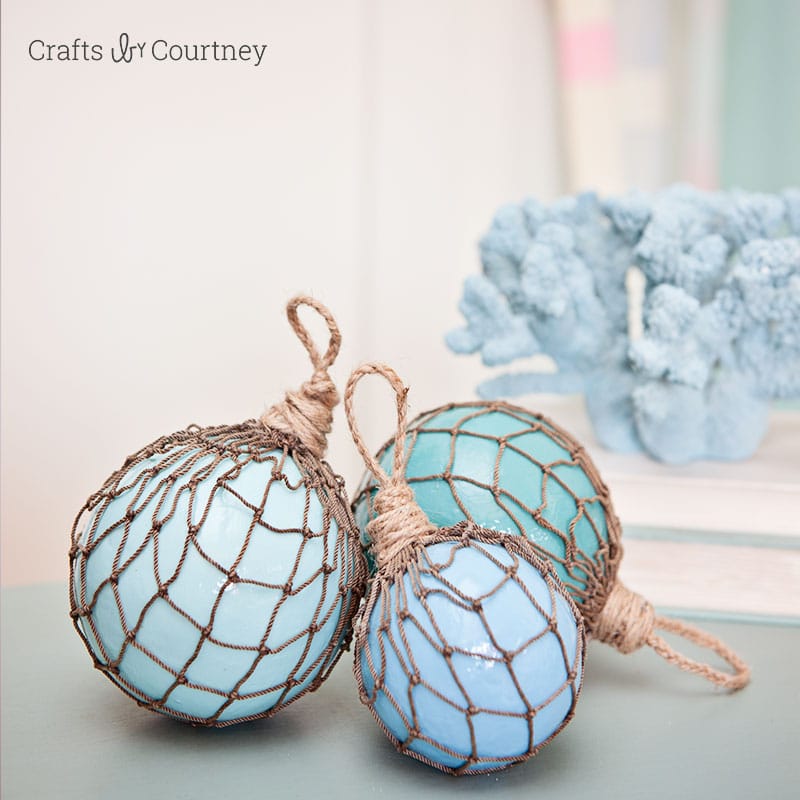
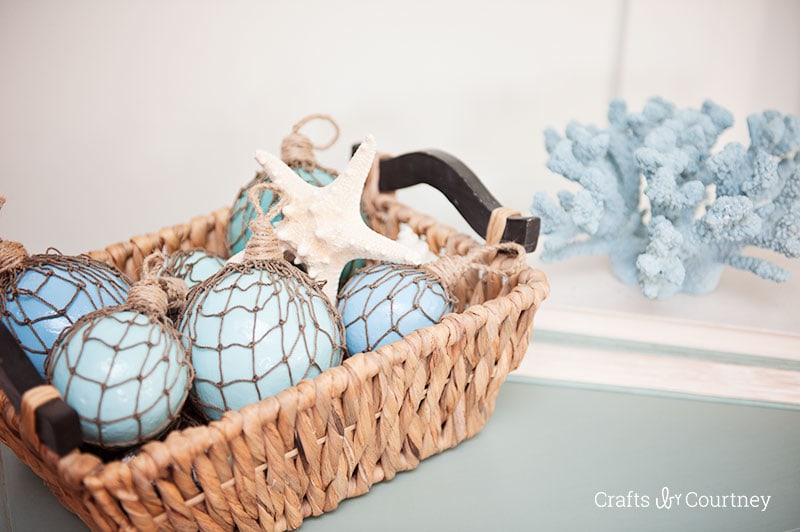
Everyone at the conference had to do a doubletake take to make sure these weren’t glass. Plus they were so much cheaper to make then actually buying real ones. I have three boys and I know if I actually bought real glass floats that my boys would play with them and they’d get broken.
So this was the next best option. You just have to take a little time making them. But I’ve done all the hard work, and hopefully my tutorial will make it easier. If you have any questions, don’t hesitate to ask!!
More Coastal Foam Craft Ideas
- DIY Starfish Wreath
- DIY Foam Oars
- Seashell Succulent Arrangement
- DIY Foam Buoy Craft
- Foam Starfish
- Foam Sailboat Craft
- Foam Summer Lighthouse
- Faux Wood What Wall Art
Love, Courtney