Since I just finished posting my St. Patrick’s Day craft roundup for kids, I was REALLY inspired to start working on a few more St. Patrick’s Day crafts with my boys.
The first one I worked on was this scrapbook paper shamrock art. I really love this TECHNIQUE and have used it for other projects as well.
Getting Started
Of course, I had to start off by making a quick trip to Michaels for scrapbook paper. It was on SALE: 4 for $1.00 (can’t beat that deal)! I found my shamrock shape at the Dollar Tree and gathered up the rest of my supplies at home.

Step 1 – Trace and Cut Your Shamrock
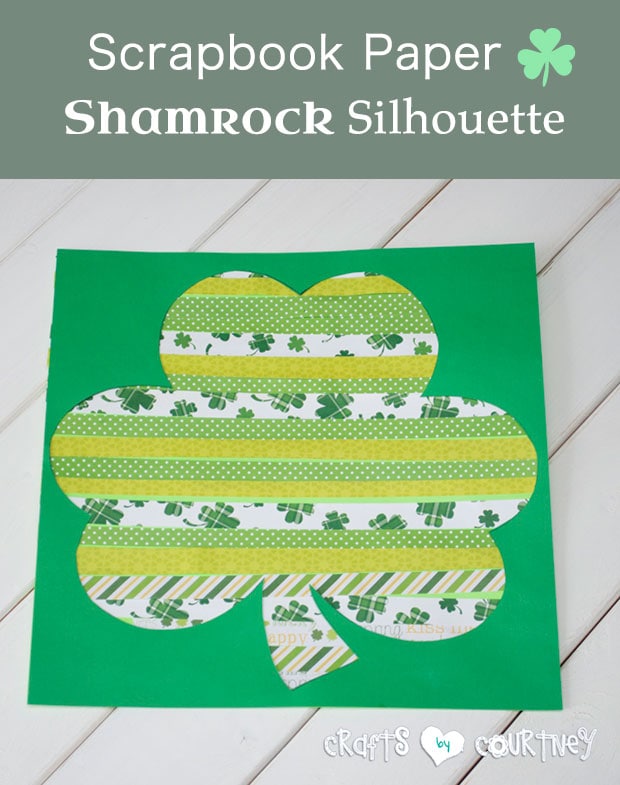
I traced out my shamrock shape with a pencil and used my “Handy Dandy” X-Acto knife to CUT out my shape. Gotta’ love that tool!

Step 2 – Cut Scrapbook Paper Into Strips
I have a paper cutter, so it’s pretty easy for me to cut my paper into STRIPS. You can always use a pair of scissors to make your paper strips.

Quick Tip: Create strips from paper with the SAME dimensions as the overlaying shamrock cut out.
Step 3 – Add Your Scrapbook Paper
Now that I got the paper for the craft prepped, my son was ready to BEGIN!!
My son put a thin layer of PASTE on his paper and added his strips of scrapbook paper. I had him cover the ENTIRE piece of paper with the strips.

Quick Tip: Use a green piece of paper for the background. In case you miss any spots, it will still look good!
Step 4 – Add Your Shamrock Cut Out
NOW it’s time to add the shamrock we traced out. This part’s easy, just cover the back of the cut out with paste and GENTLY place it on the shamrock!
To keep bumps minimal, I had my son go BACK over the paper smoothing it down with his hands (making sure there were NO bubbles).

Step 5 – Finishing Touches
My little guy did so good with his shamrock, I just LOVE it!! I made sure to add this great craft to our art wall!

We had a lot of fun outside working our are shamrock. It was a BEAUTIFUL sunny day.
I hope our little shamrock can give your little ones some good luck this St. Patrick’s Day!
Love, Courtney