Crafts by Courtney

How-to Crafts and DIY Parties

  • Home
  • How-to Crafts
    • Home Crafts
      • Holiday
      • Seasonal
      • DIY Decor
    • Kids Crafts
      • Holiday
      • Seasonal
      • Educational
      • Clean
      • Messy
  • DIY Parties
    • Birthdays
    • Just for Fun
    • Holidays
  • Blog
    • My Thoughts
    • Hubby’s Corner
  • About
  • Contact

Dollar Tree Candle Holder Makeover

Simple Dollar Tree Candle Holder Makeover with Vintage Effect Wash

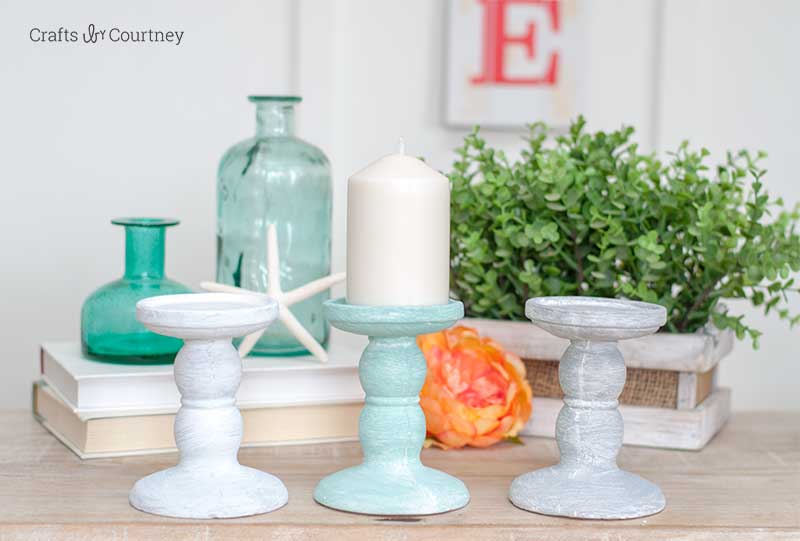
I finally tackled a project that has been on my to-do list for about a month now, Candle Holder Makeover!! YAY!!

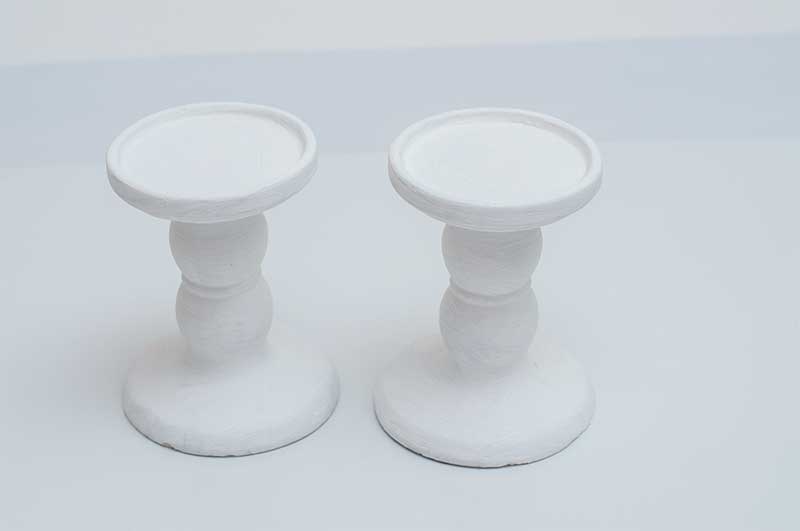
I found these great pedestal candle holders at the Dollar Tree last month.  I knew right away what I wanted to do with them using the Vintage Effect Wash.  As you know if you follow my blog that I’m all about decorating with a coastal touch.  So I decided to give these candle holders a white washed look.

Dollar Tree Candle Holder Makeover

Candle Holder Makeover

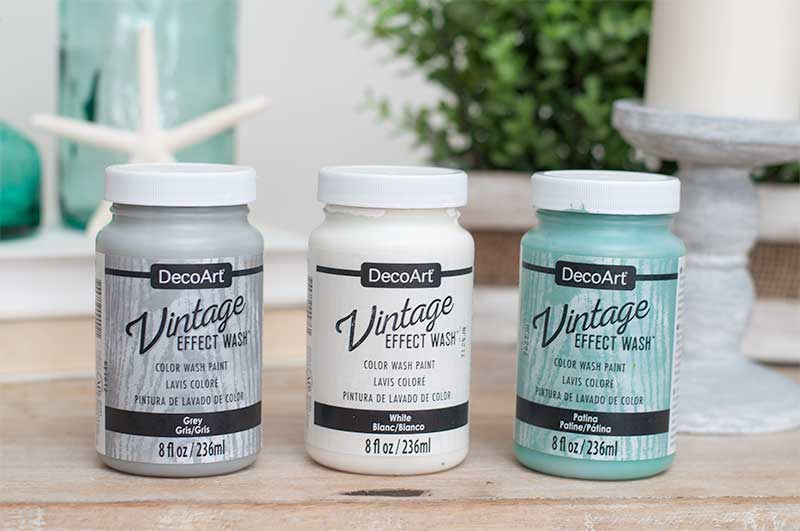
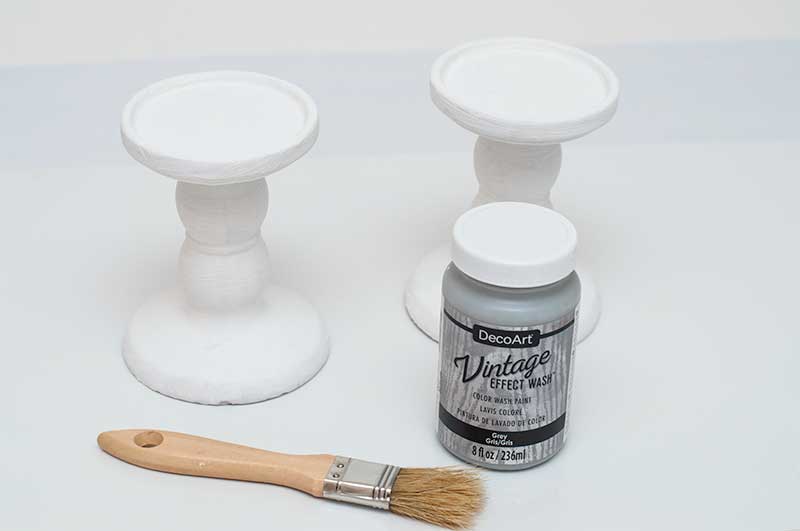
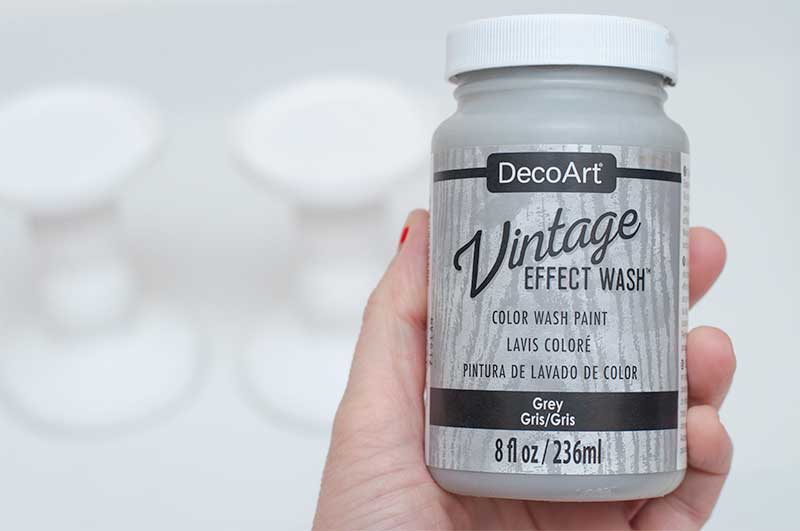
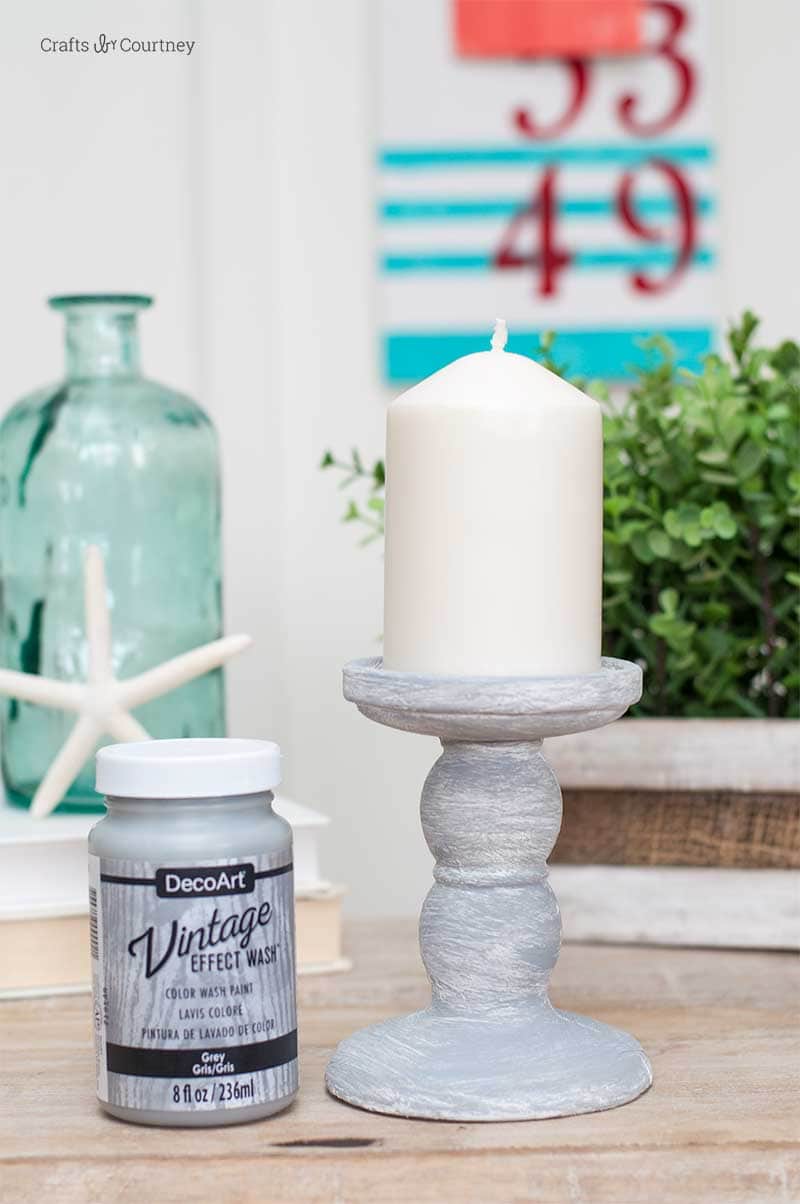
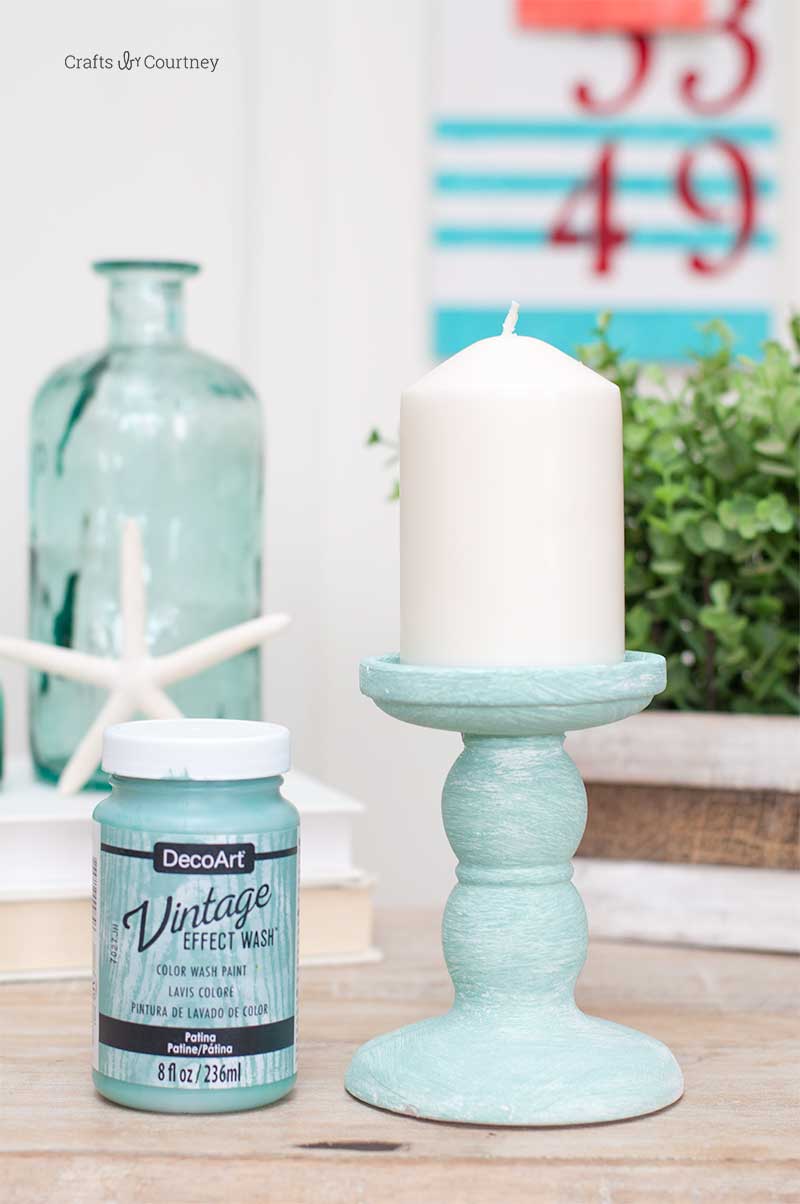
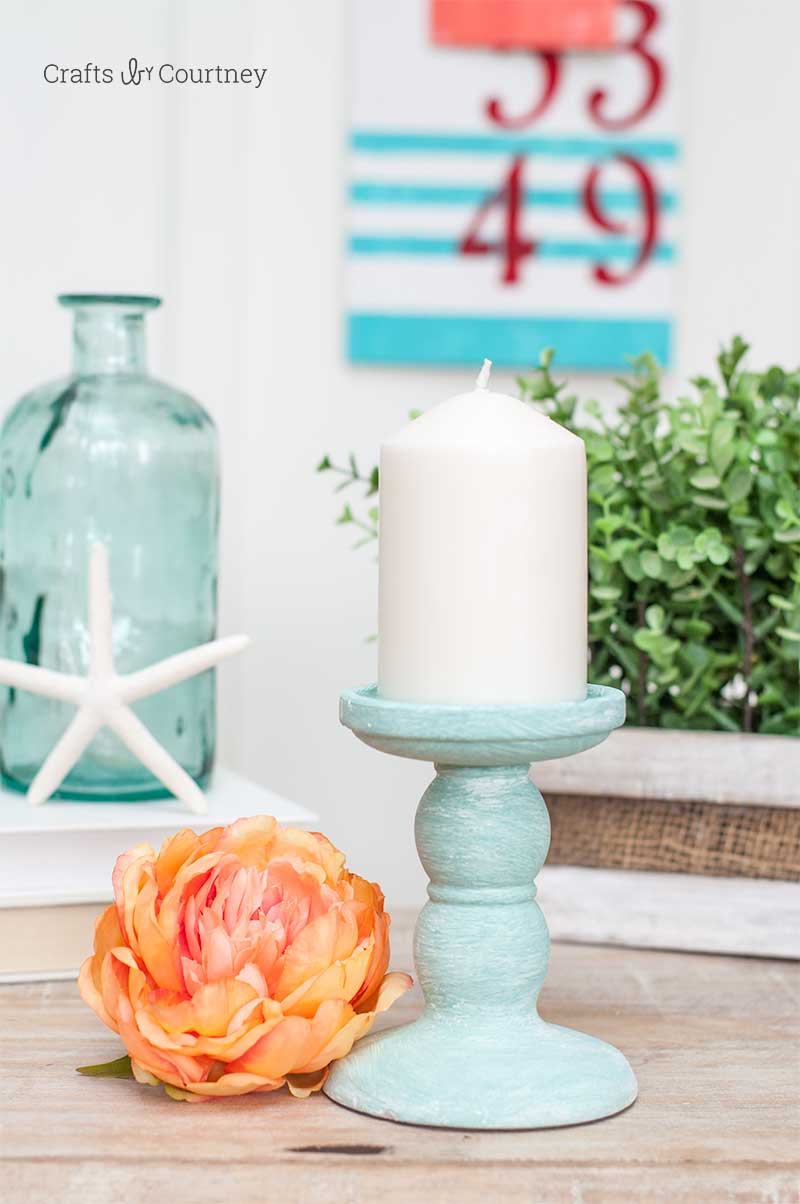
So let’s get started!!  I rounded up my paints for this project. I have a TON of Vintage Effect Wash on hand, but these two are my favorite. I thought the Patina would be perfect for a nice Spring-y feel, when I start decorating.

Dollar Tree Candle Holder Makeover

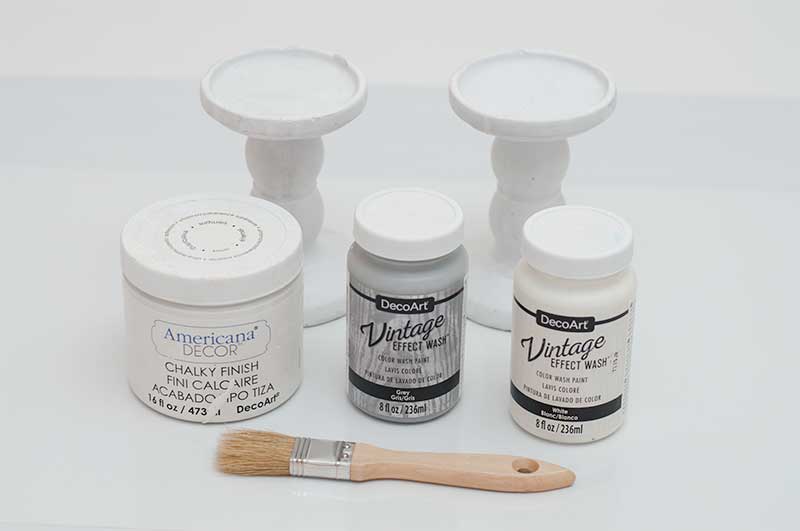
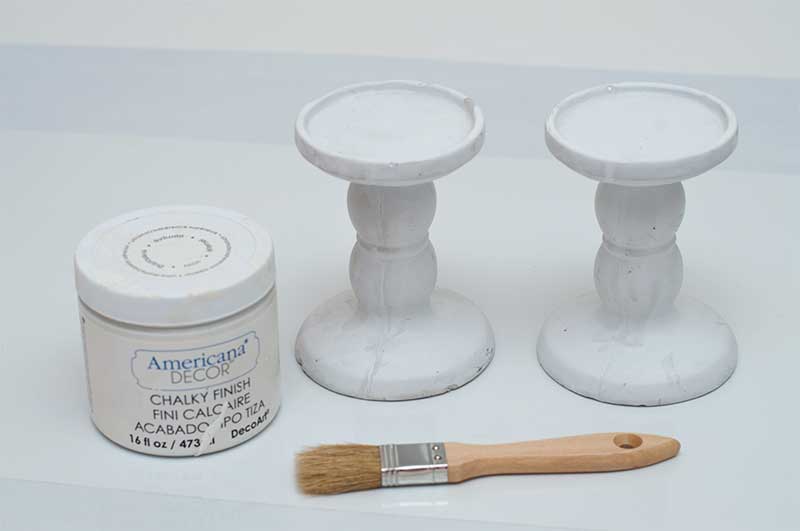
Step 1 – Paint Candle Holder

I know the candle holders were already white, but it wasn’t a pretty white.  I painted on one coat of the White Chalky Finish.  Depending on how thick you painted it on, it should dry within 20 minutes.

Dollar Tree Candle Holder Makeover

Dollar Tree Candle Holder Makeover

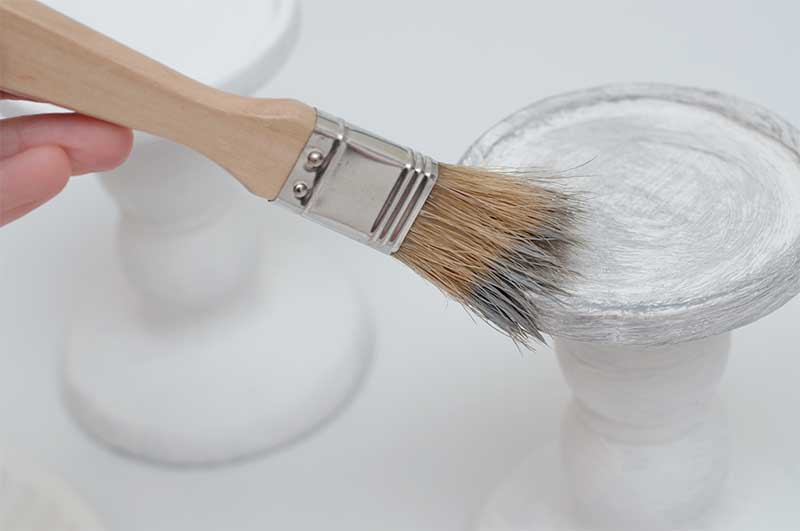
Step 2 – Add Vintage Effect Wash

Next and finally I lightly went over the candle holders with my Vintage Effect Wash.

Dollar Tree Candle Holder Makeover

Dollar Tree Candle Holder Makeover

Add a little paint to a paper plate.

Dollar Tree Candle Holder Makeover

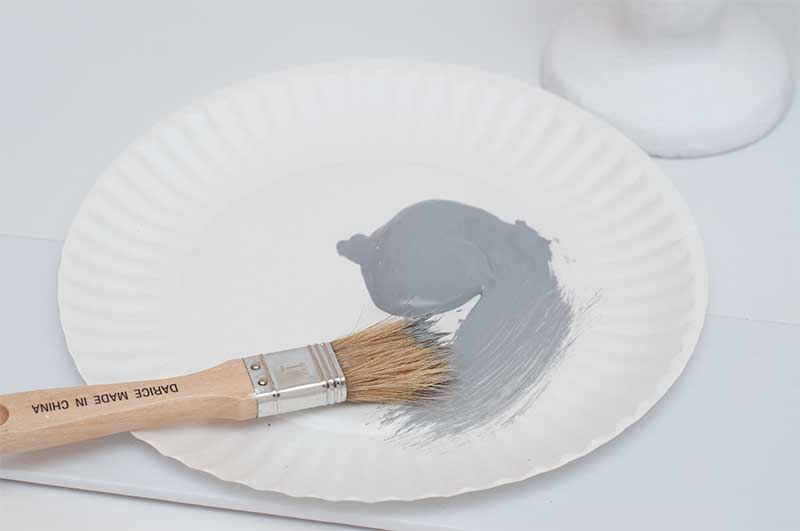
Then lightly brush your paint brush over the candle holder to create the effect you want.  You can go lighter or darker with this, whatever your personal style is.
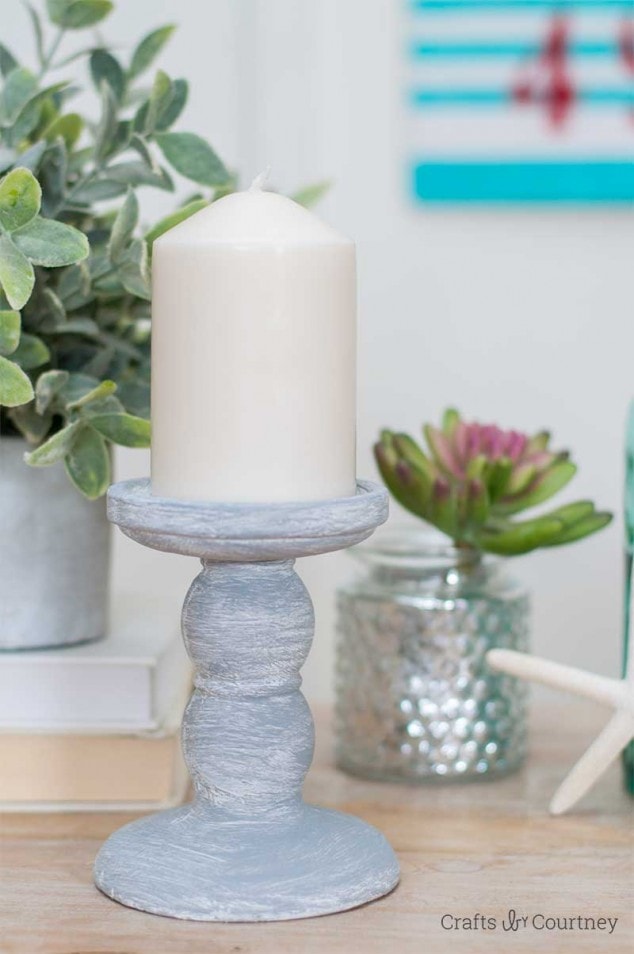
Dollar Tree Candle Holder Makeover

Finishing Touches

So there you have it! I had this project done in less then 30 minutes, woohoo!  If your looking for more ideas using the Vintage Effect Wash then check out DecoArt Pinterest page.

Simple Dollar Tree Candle Holder Makeover with Vintage Effect Wash

Simple Dollar Tree Candle Holder Makeover with Vintage Effect Wash

This was such a quick candle holder makeover.  I think I might need to grab some more next time I’m at the Dollar Tree.

Vintage Effect Wash Paint

Simple Dollar Tree Candle Holder Makeover with Vintage Effect Wash

Simple Dollar Tree Candle Holder Makeover with Vintage Effect Wash

Oh and I found this cute Mercury Glass Candle holder at the Dollar Tree too.  I got a total of 4 of them, they will be perfect for anytime of the year decorating.

Simple Dollar Tree Candle Holder with succulent

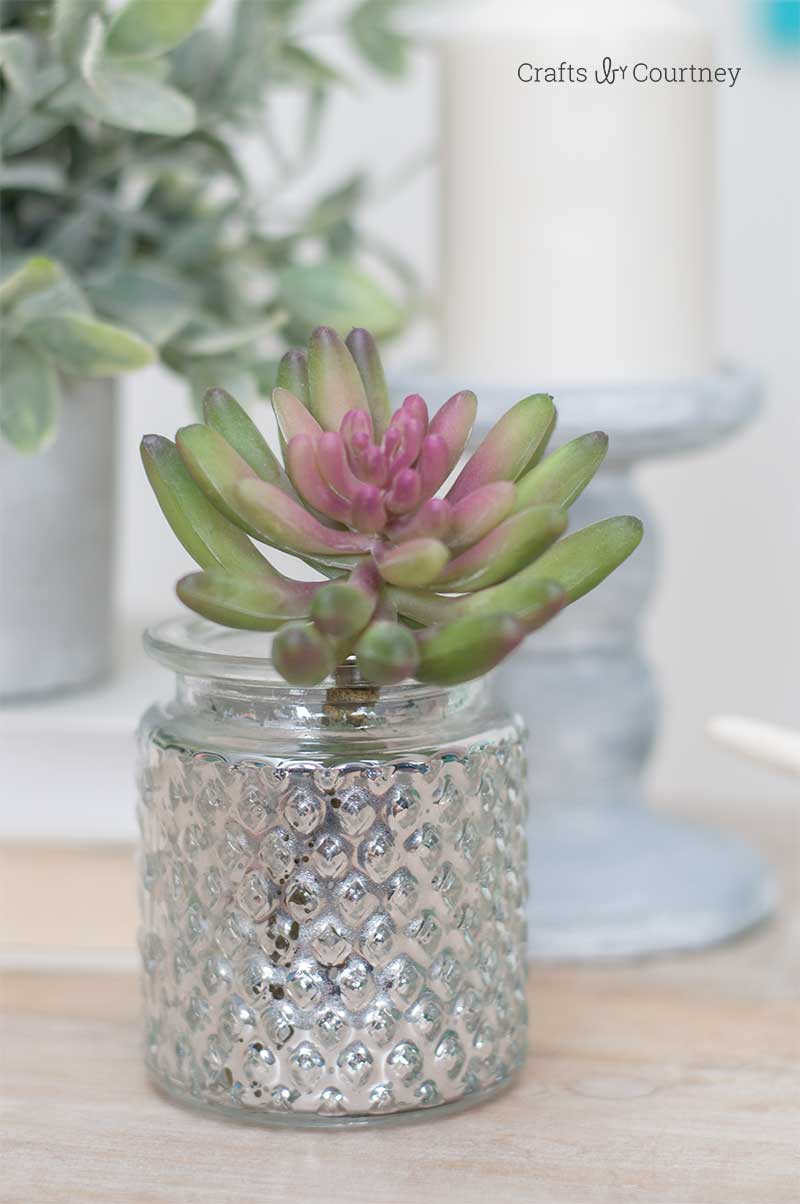
All this will look great on my mantle for Spring/Valentines.  I just love the Dollar Tree you never know what fun things you’ll walk out with!

Love, Courtney

About Courtney Sanchez

Hi, I'm Courtney and I LOVE crafting! I am a mommy to 3 awesome boys (who keep me very busy) and wife to a loving husband. Crafts by Courtney is where I like to hang out ;)

Leave a Reply

Courtney Sanchez

Hi, I'm Courtney!

Welcome. Here is where I share the fun how-to crafts I've done with my kids and for my home. I also really love DIY parties too! Read More…

My Socials

  • Facebook
  • Instagram
  • Pinterest

Newsletter

Subscribe to my email newsletter for more craft ideas, tips and valuable resources.

The TOP 4

  • 33 Awesome Birthday Party Ideas for Boys33 Awesome Birthday Party Ideas for Boys
  • Terra Cotta Pot DIY Lighthouse Garden ProjectTerra Cotta Pot DIY Lighthouse Garden Project
  • Cardboard Box Craft - DIY DollhouseCardboard Box Craft – DIY Dollhouse
  • Create a Colorful Glitter and Gel Sensory BagCreate a Colorful Glitter and Gel Sensory Bag

Looking for more?

Over on Instagram

craftsbycourt

Sorry a none decor/craft reel for today.My serio Sorry a none decor/craft reel for today.My serious guard dog for sure, barks at a leaf falling on the ground. But that face, love it!
Sharing my favorite light fixture in the house. Th Sharing my favorite light fixture in the house. The one we got from @worldmarket for our master bedroom makeover. Major before and after transformation.I just posted on the blog all the details on the light fixture. Link below 👇
Our busy Summer has come to an end, the boys start Our busy Summer has come to an end, the boys started school today. We've had so much fun and made so many special memories this Summer together. Now it's back to getting up early, sports and homework!
DIY keychains tutorial! I created these using @de DIY keychains tutorial!  I created these using @decoart  Galaxy Glitter paint.  Head over to the blog for full tutorial.
Here’s s another easy DIY Back to School project Here’s s another easy DIY Back to School project!! I used @dollartree clipboards and my @silhouette.inc to make these back to school clipboards. Head over to the blog for tutorial.Link below 👇
.
.
.
#backtoschoolcrafts #backtoschool #schoolcrafts #dollartreecrafts #dollartreecraft #create #diy #silhouette #silhouettecameo #silhouettecrafts #clipboardcrafts #tutorial #diyblogger #blogger
Celebrating our 21 years of marriage with my darli Celebrating our 21 years of marriage with my darling husband.  Where has the time gone, we met when I was 16 and got married at 19.  Had our first child at 26 and three beautiful boys later.  It has been an amazing experience and I would change it for the world. Happy anniversary Clyde!
Follow on Instagram

Who I Work With

Crafts by Courtney   ·   Copyright © 2013 - 2022