
Christmas is in full force here at the Sanchez house. I’ve been crafting up a storm getting the house ready. I love adding DIY holiday projects to the house, so of course I was excited to create this holiday Christmas Pillow. I think it’s a great addition to my holiday decor. But I really think I need a pillow that says “I just want to drink wine and watch Christmas moves” thats more my styles, ;-P But I do love some hot chocolate too!
I have worked on A LOT of Silhouette projects but I’ve NEVER done a heat transfer project before. Can you believe it?! This Christmas pillow is my first! To be honest I was a little intimated to do one, now that I’ve done one and realized it’s totally easy I will be doing a lot more. I actually have another Christmas one in the works for next week.

Here’s a picture of our trip to get our Christmas tree on Black Friday! It’s getting pretty chilly here in NC, totally the Christmas vide.

A big thank you to Silhouette for sponsoring this post! This post contains affiliate links, which help to support this site at no extra cost to you.
So let’s get started!
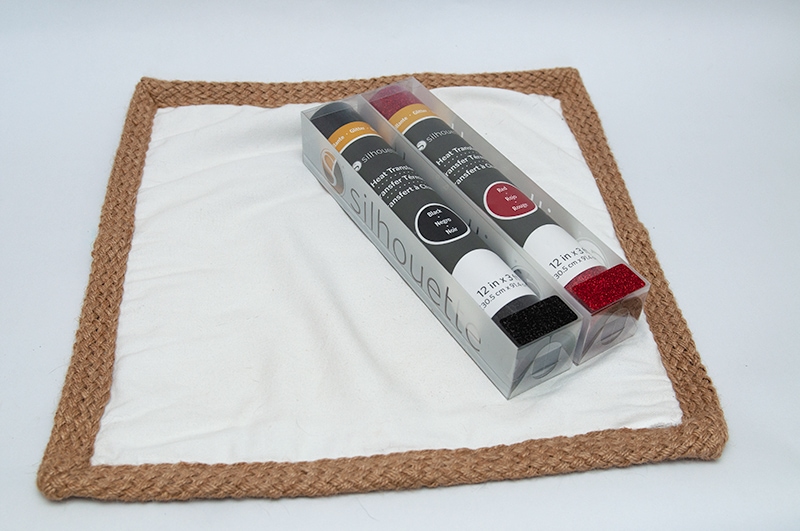
Christmas Pillow Supplies Needed:
Step 1 – Pick Out Your Design
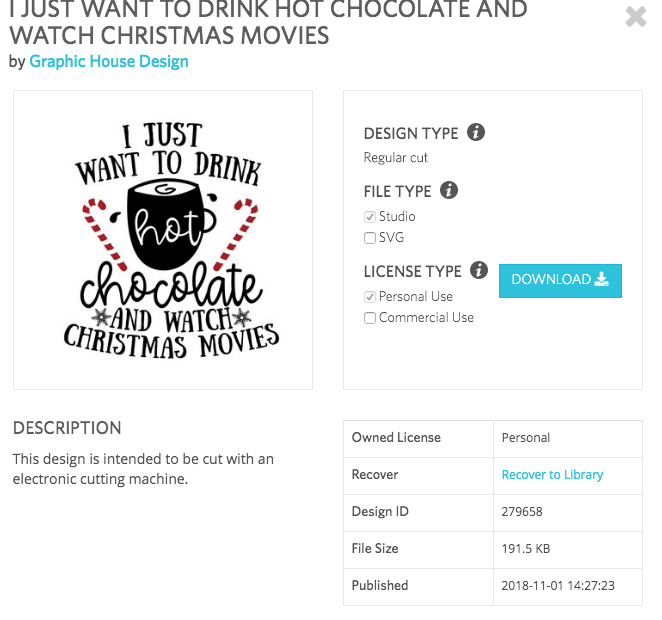
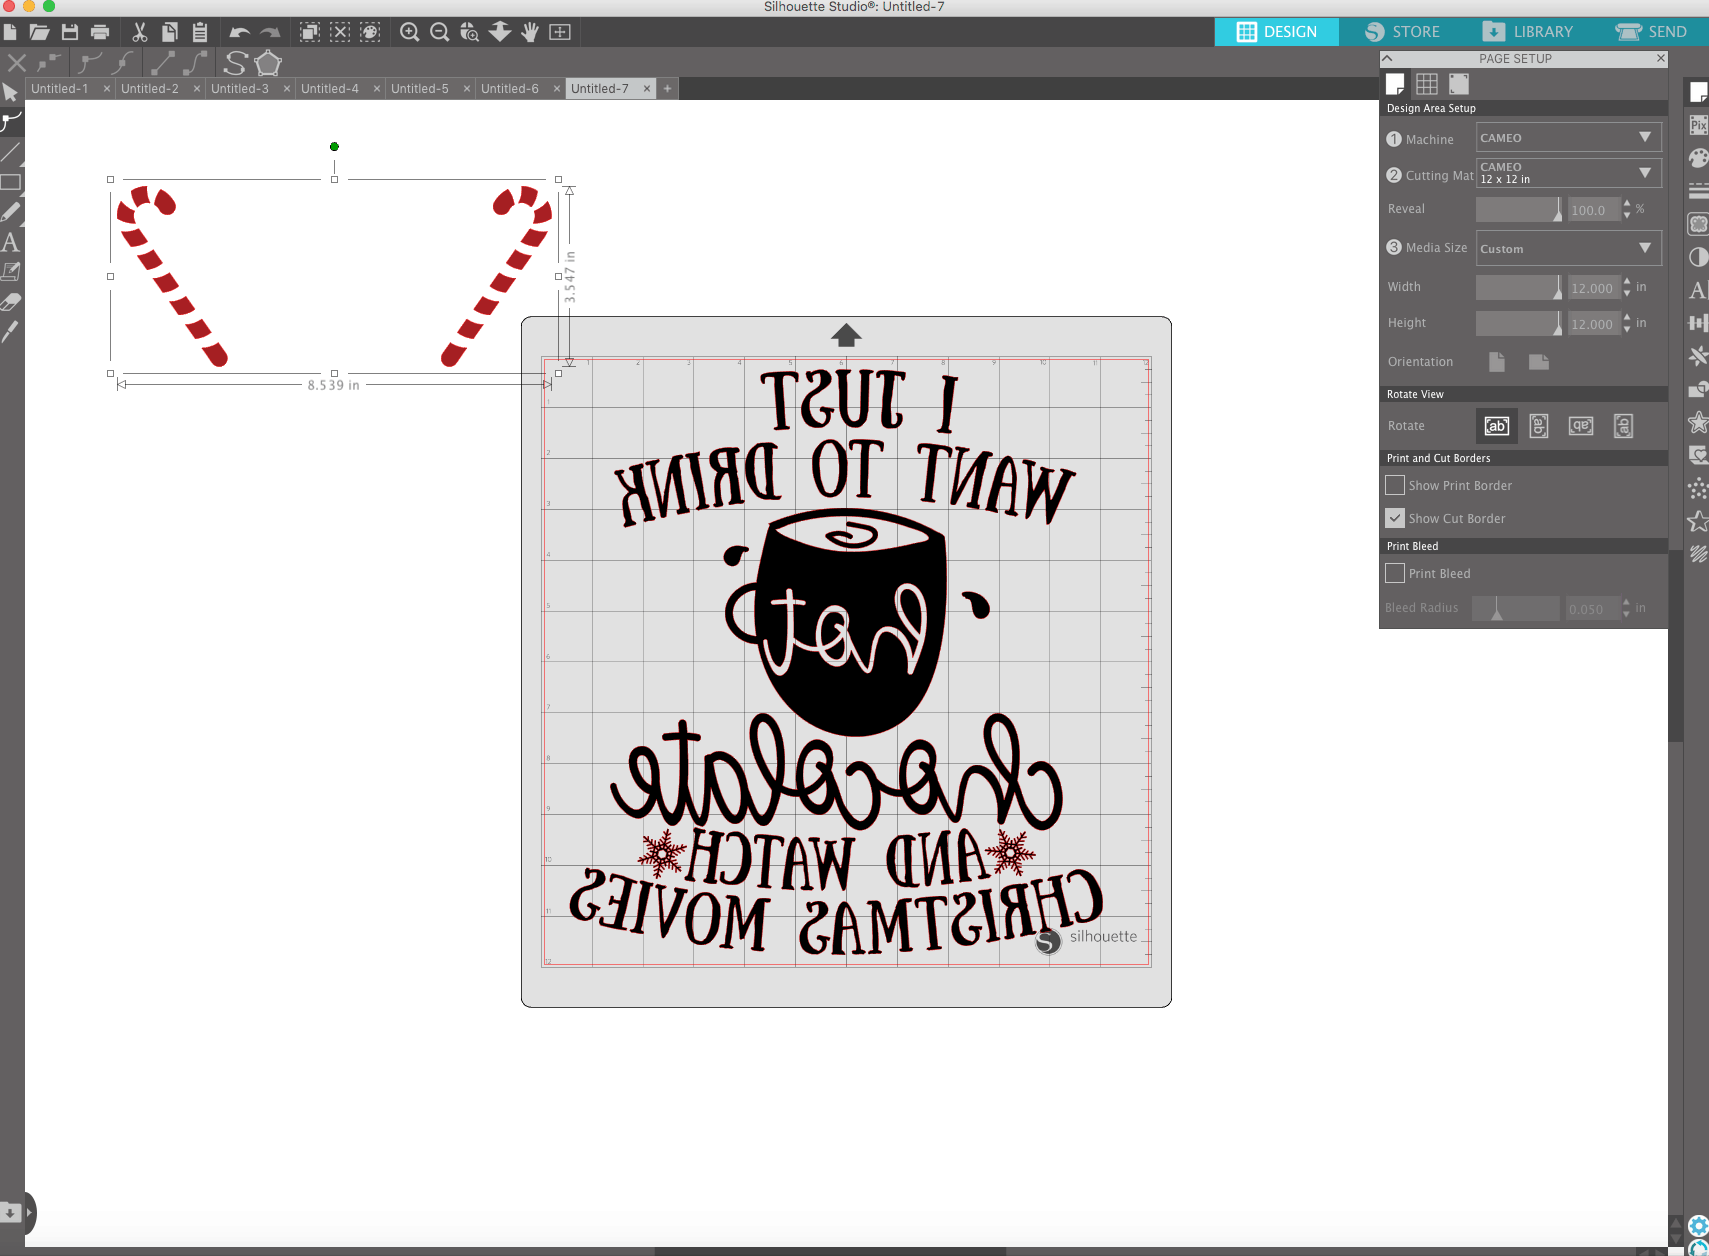
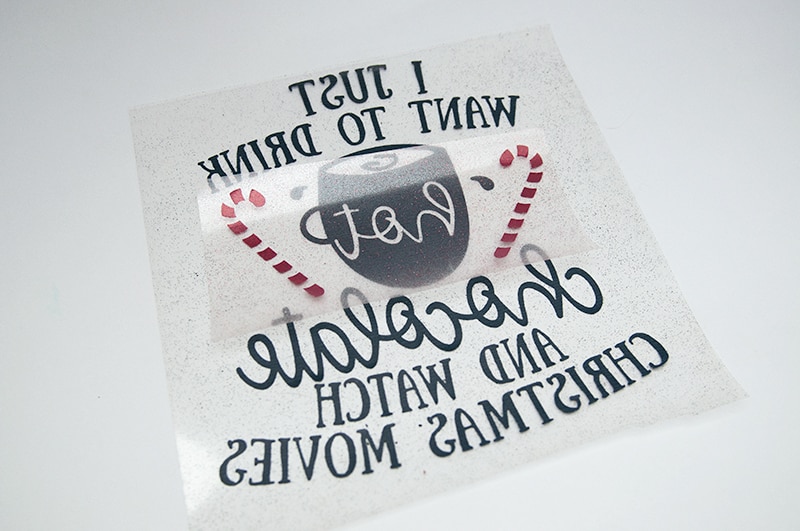
I went into the Silhouette Library to find my design or should I say the design found me. I was searching the design studio for my 2nd Christmas craft design and I stumbled across this one. It was too cute and funny, I knew I had to use it for a project. I sized it to fit my pillow 12×12.
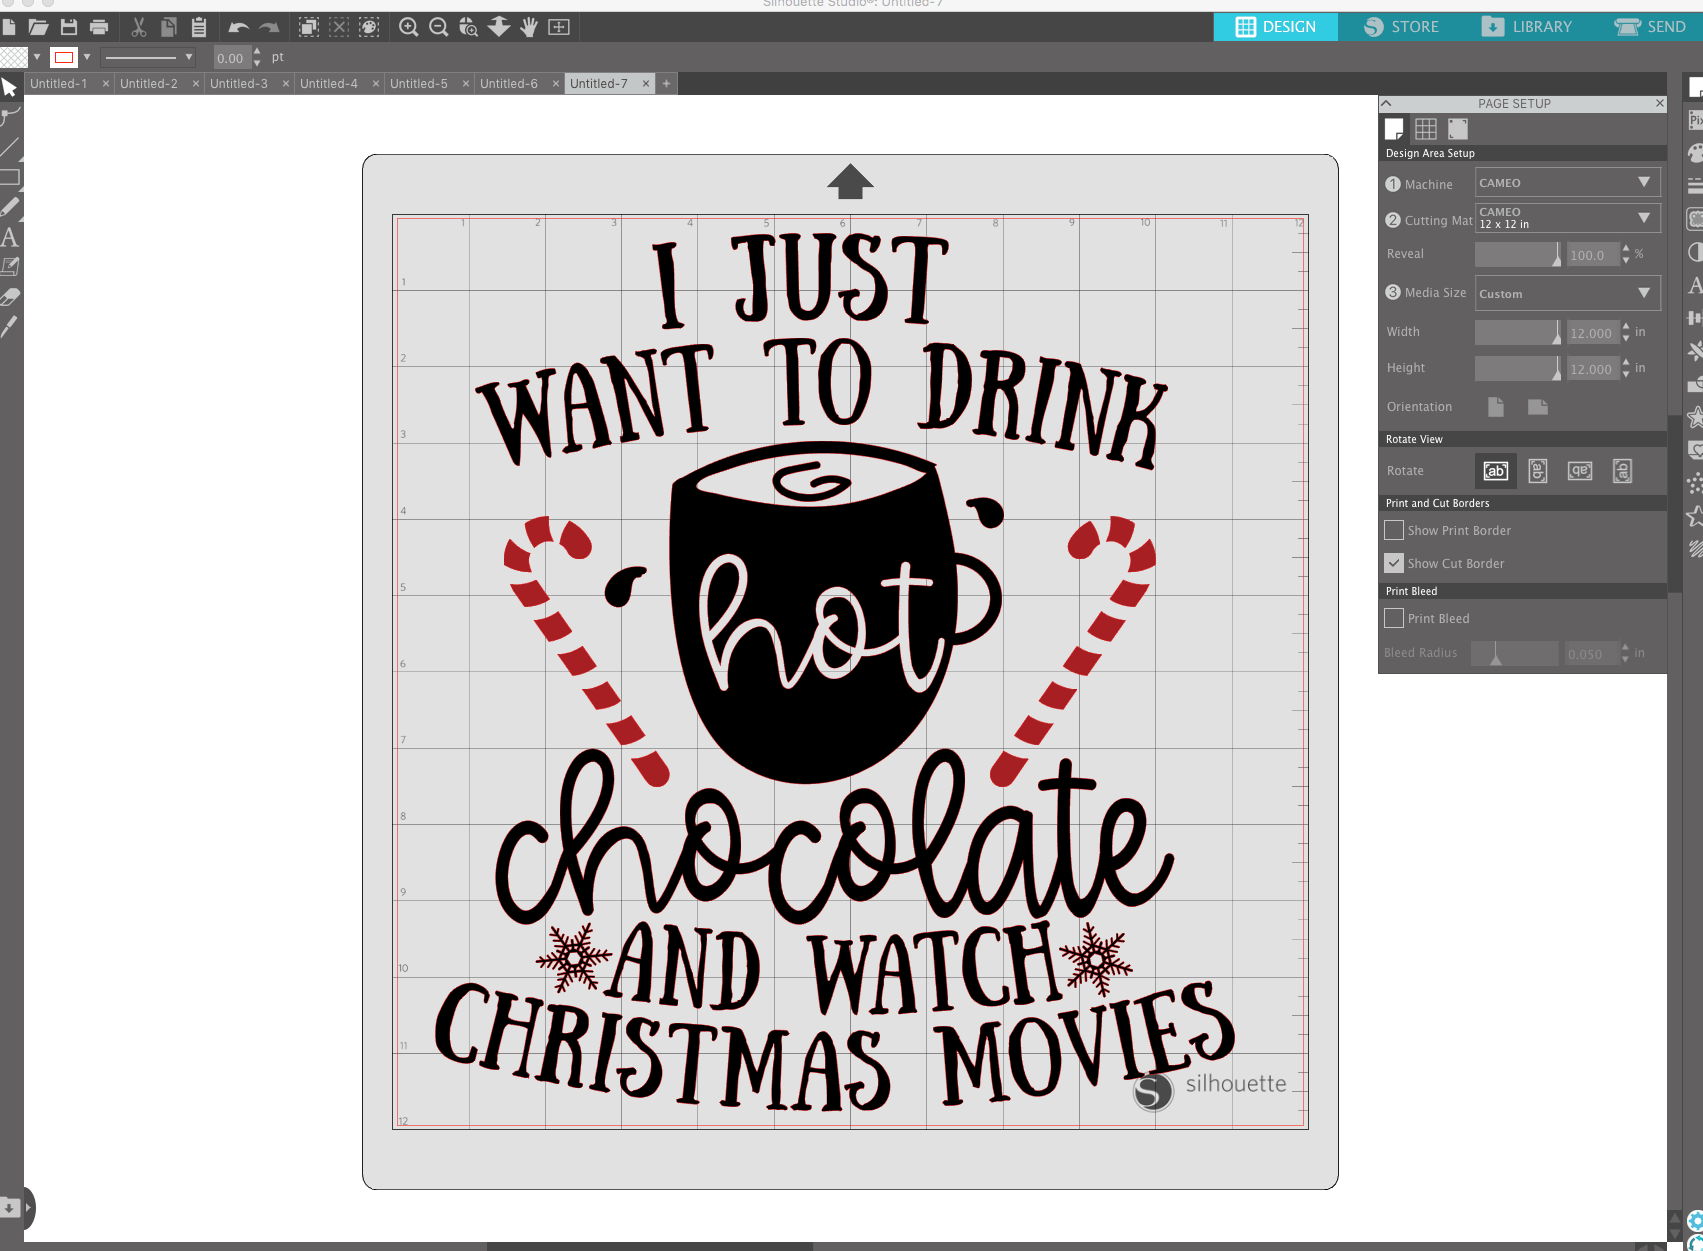
This is the design ID and designer of this design.
Step 2 – Mirror Your Design
Since this is a heat transfer project you will need to mirror your design so that it will be right side up.
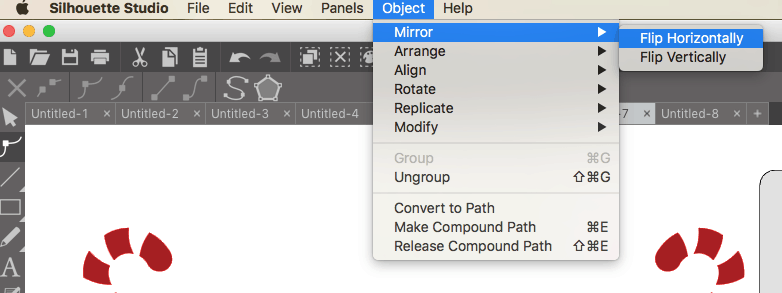
Since the candy cane will be in a separate color, I ungrouped the design to put the candy cane to the side.
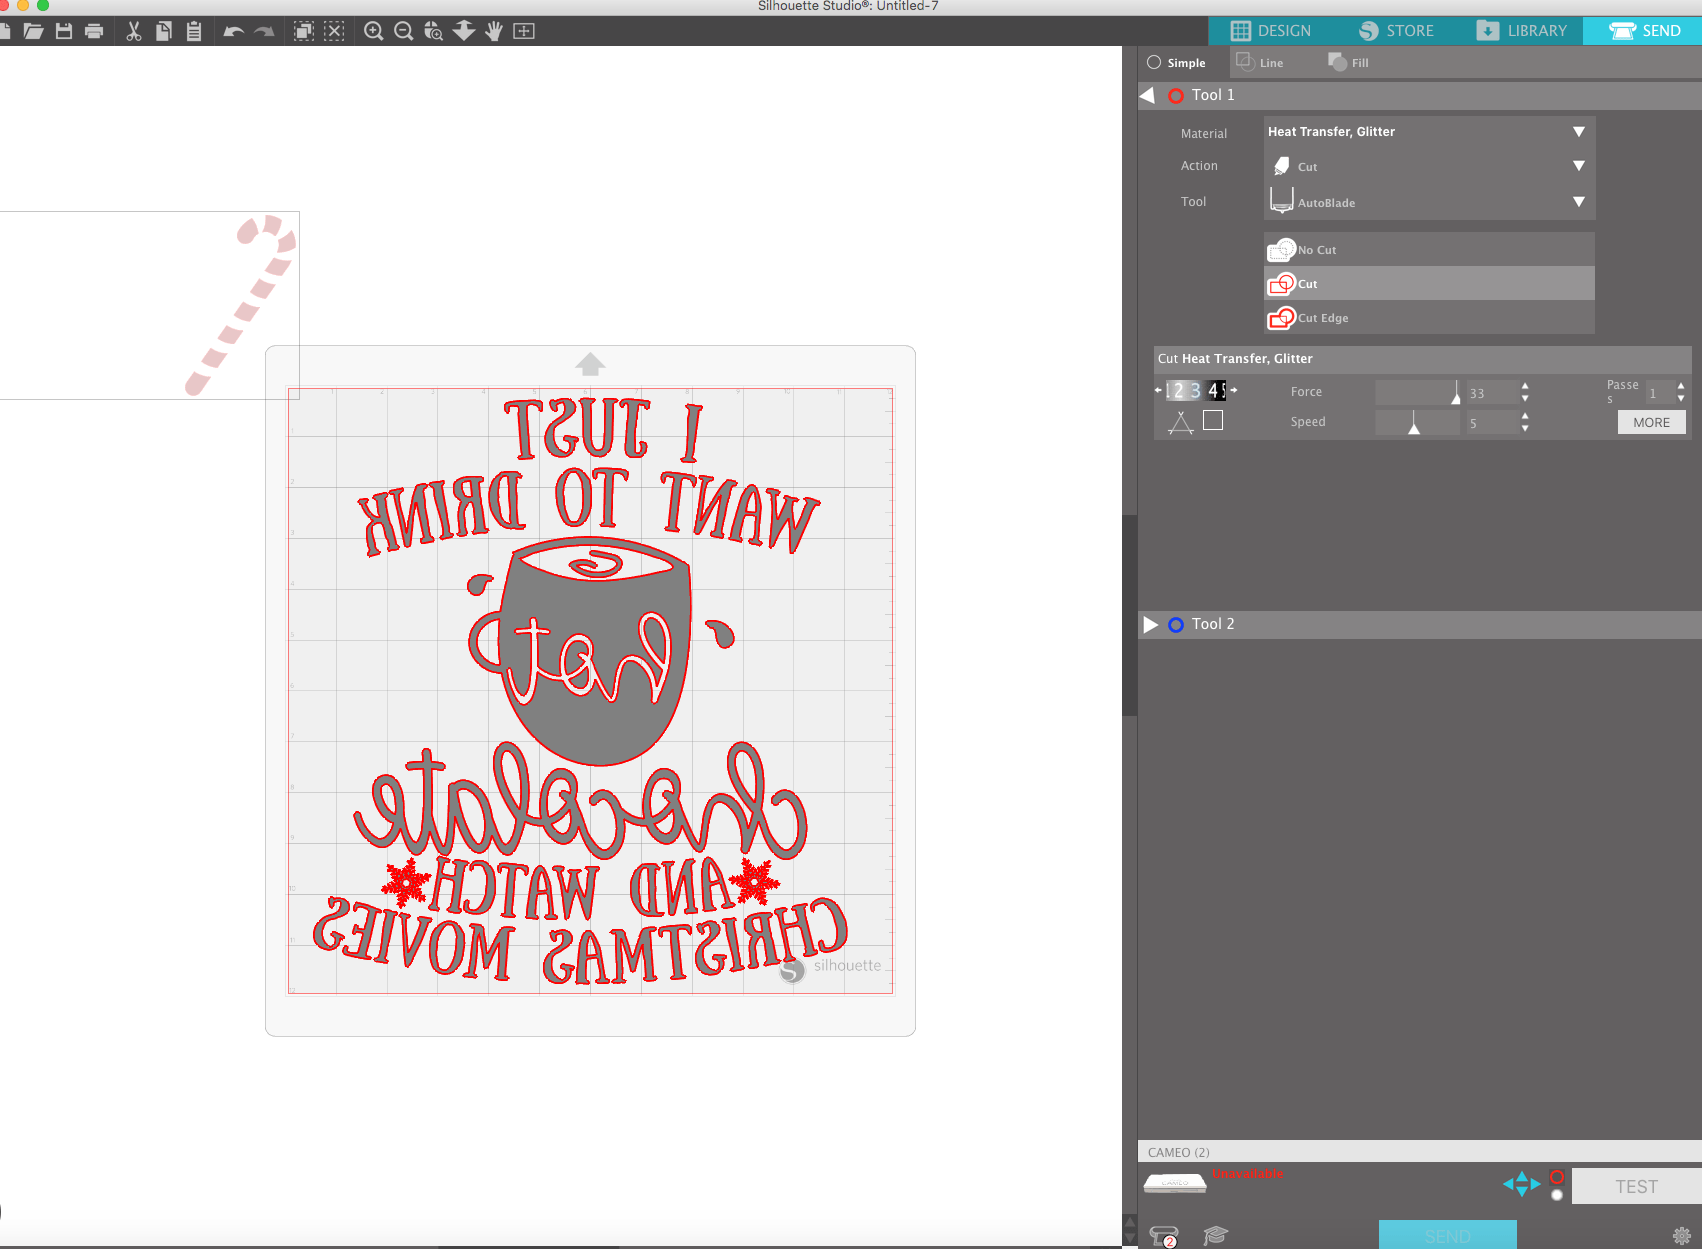
Step 3 – Cut Design
Now it’s time to cut! When using glitter you need to face the glitter side down. This is a VERY important step!
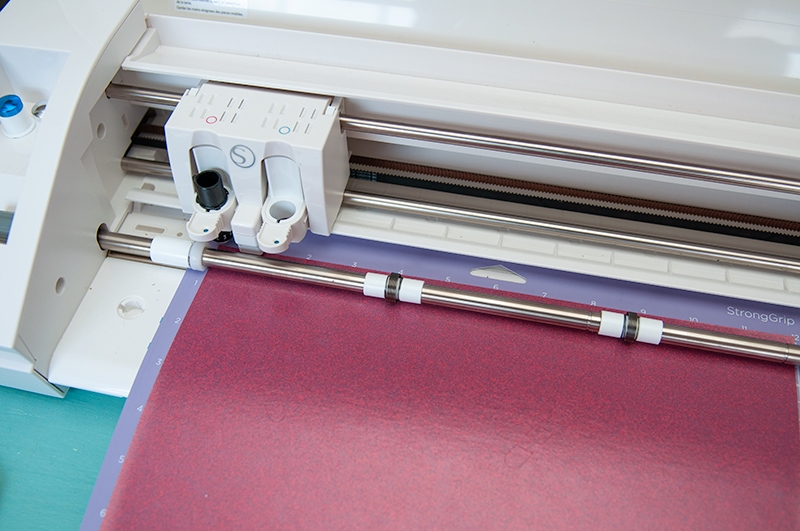
I used blade setting 3 to cut my design. Make sure to select “heat transfer” as your material.
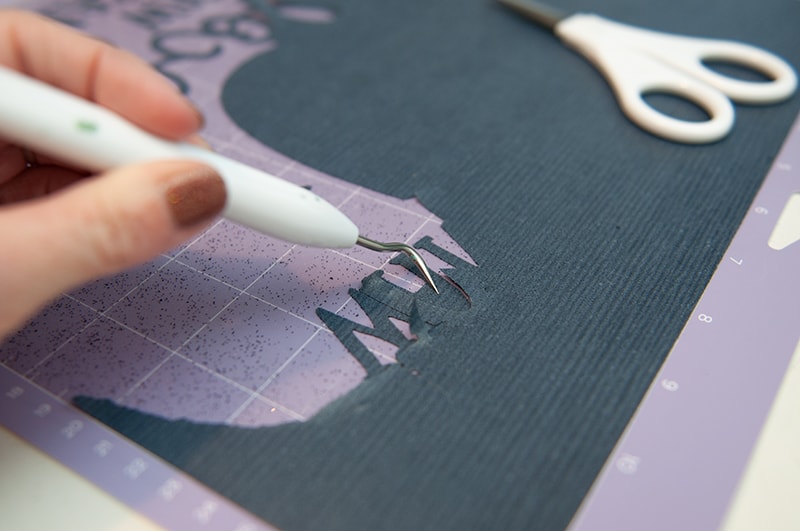
Step 4 – Weed Design
Next it’s time to weed our design. I pulled out my “handy dandy” weeding tool and got started! Just remember slow and steady, it’s not vinyl so it takes a little time to weed each area.
Step 5 – Add Design to Pillow
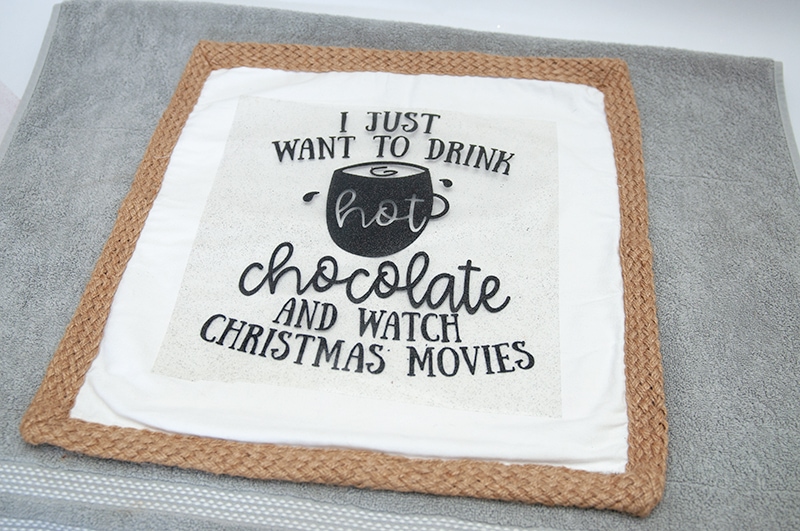
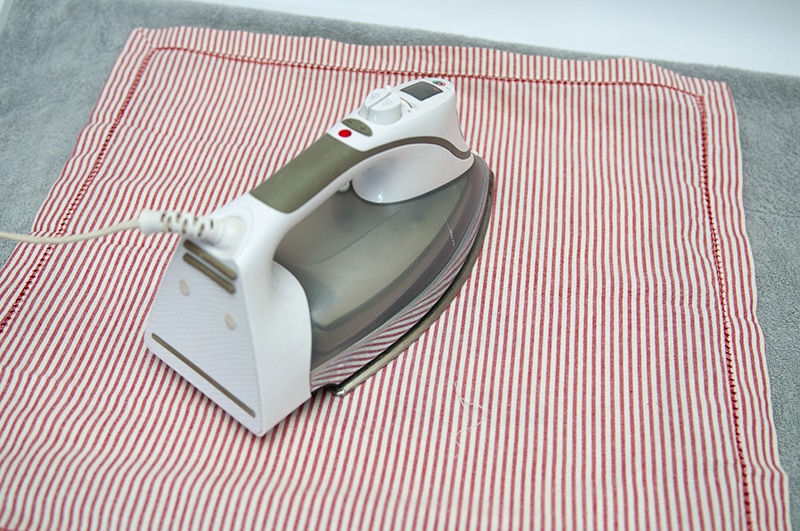
The fun part, adding our design!! I centered the design on my pillow, which I purchased at Hobby Lobby. Then I placed a thin cloth over top. I pulled out my iron and went over the whole design several times.
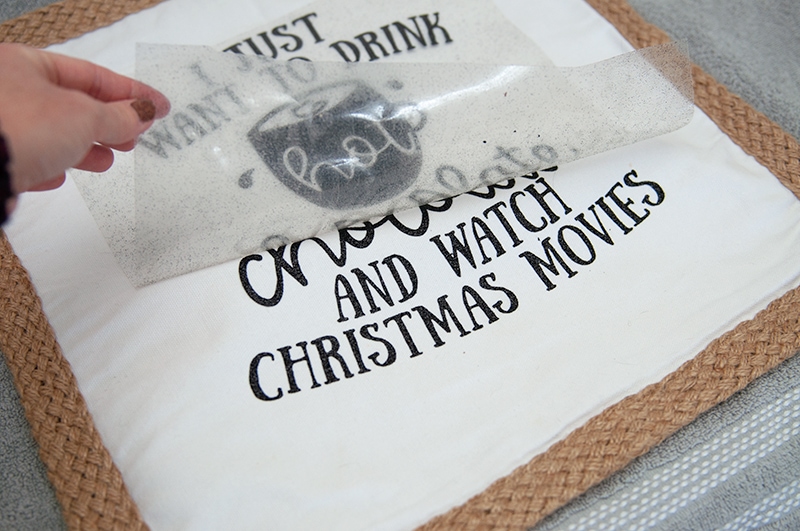
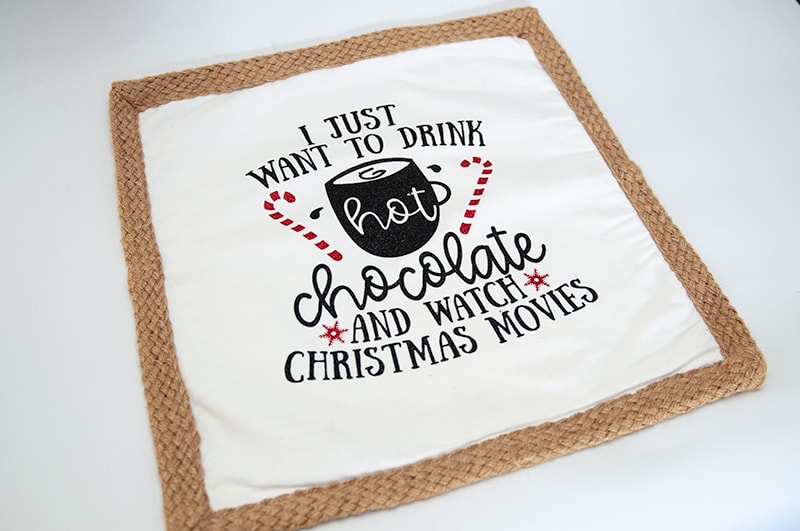
Step 6 – Remove Plastic Sheet
Let’s remove that plastic backing! If some of the letters are still stuck to the plastic, I just went over it again with the iron but not using the cloth on top. After that I had no problems pulling it up!
Step 7 – Add Candy Cane
Add your candy cane with the same process. I went back and cut the snowflakes in the red glitter as well.
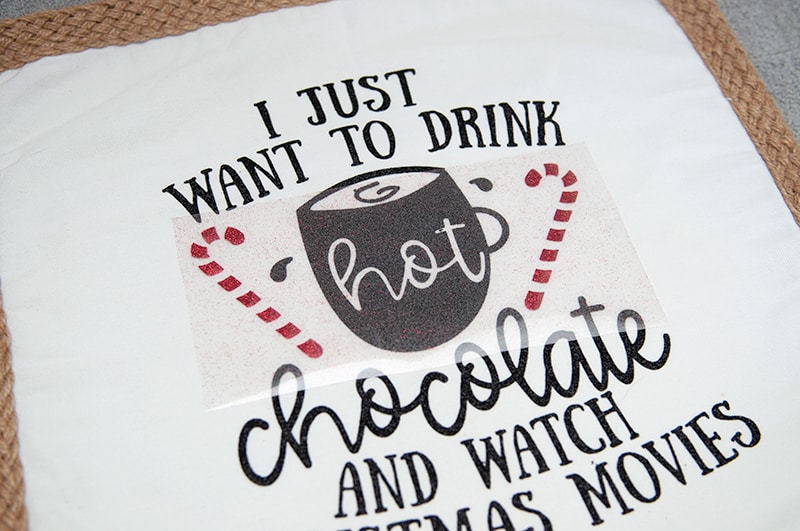
This looks AMAZING!! Now I just needed to add my pillow inside.
Finishing Touches
Have you ever had one of those projects that your like “wow this turned out AWESOME” well this was that for me. I can’t believe I waited so long to try a heat transfer project. I was sending text pictures to my friends. Their like we need a girls crafting night to make one theme-selves. I need to make a pillow that says “I just wanna craft and watch Christmas movies”. Can someone make that design for me?!

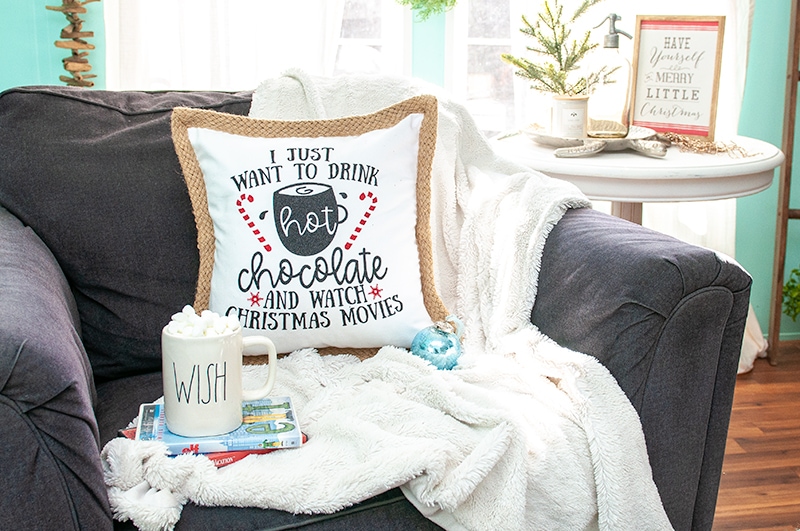

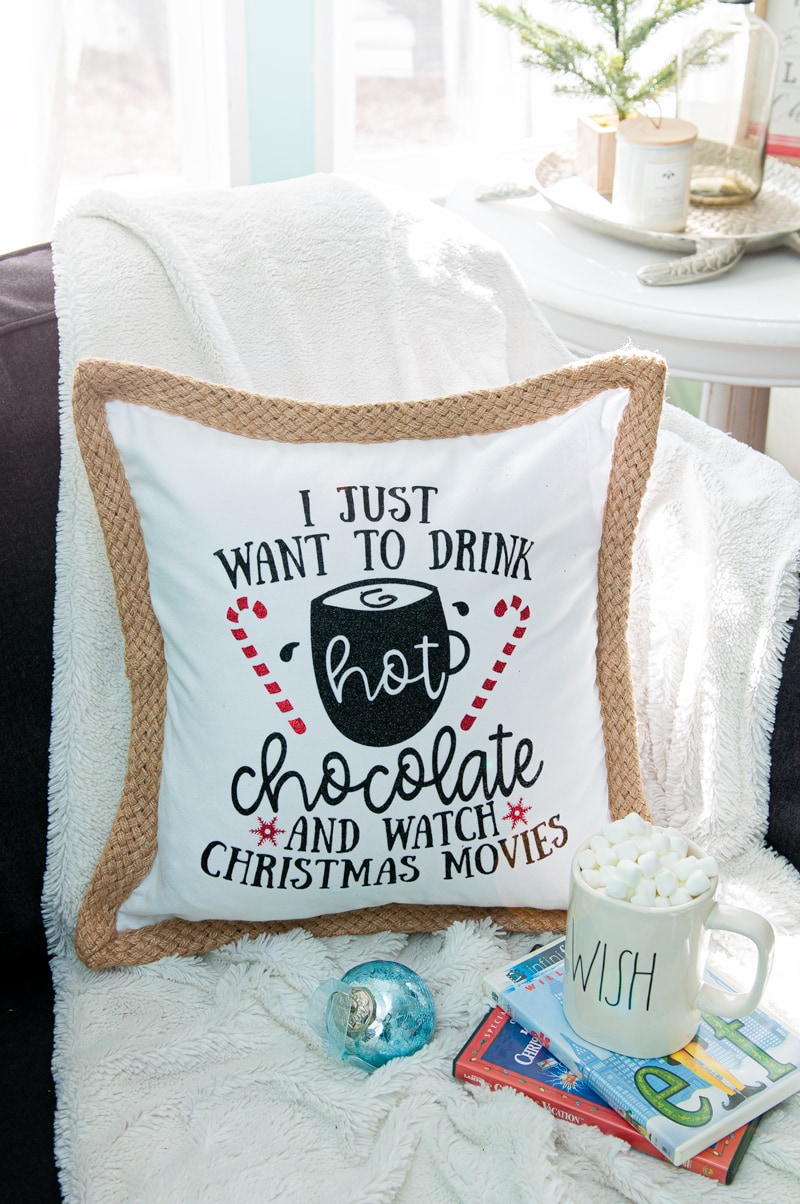
As always thanks for stopping by and checking out my Christmas pillow craft. It was a blast working on this project and doing something a little di