Spring is right around the corner, so…
I thought a fingerprint tree would be a great craft to make today (especially since all the trees here are in FULL bloom).
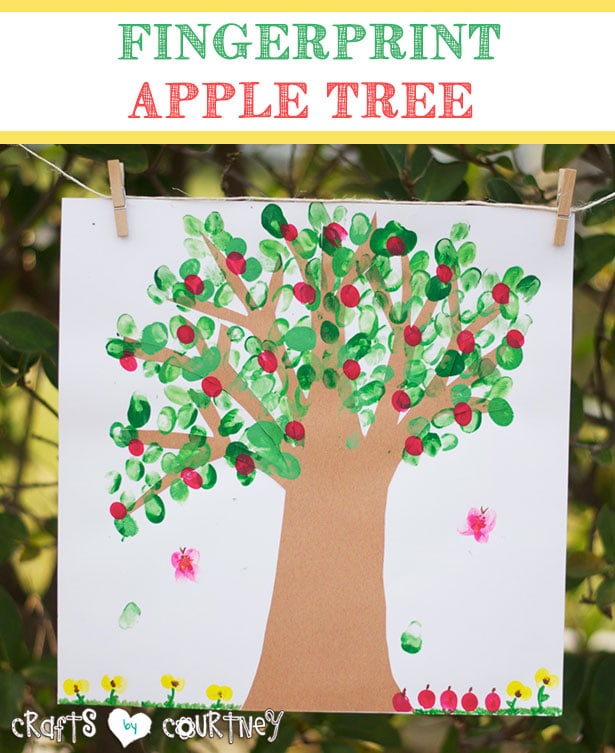
Plus, I DO love a fingerpaint craft (and this one is pretty cute…if I do say so myself)!! My son had a lot of fun working on his tree. He even added little flowers and butterflies.
Getting Started
I grabbed some brown and white cardstock and my paint colors from my craft area to get started.
I LOVE when I already have all the supplies I need for a craft project. I guess that’s what happens when you’re a craft supply hoarder ;)

Step 1 – Create Your Tree Trunk
FIRST, I got a brown piece of card stock and free handed a tree trunk (which I feel was pretty impressive on my part). Then, we cut it out. I’m pretty bummed I didn’t get a picture of the outline for the tree trunk, BUT you can see it’s a basic tree shape.
We pasted it on a white piece of paper and were ready for my son to create the leaves.

Side Note: If you liking this fingerpaint craft, why not check out my Finding Nemo handprint fishbowl?!?
Step 2 – Add Your Leaves
I had my son use his fingertips to create the leaves on the tree. We decided to do a beautiful SPRING tree and use green paint.
Once the green paint dried, we added some red paint for apples.

Quick Tip: Keep a sponge handy and wipe your little one’s fingers every couple of leaves.
Step 3 – Finishing Touches
Once we were finished, we agreed that the picture needed a little more STYLE. So, we added some fingerprint flowers and butterflies.

We were BOTH really excited how the apple tree turned out.
We can’t wait to make an Autumn tree NEXT with his handprint and arm for the branches and trunk!! It’ll be the perfect Fall kids craft!!
Love, Courtney