Sponsored Post: Financial compensation was received from FloraCraft® for this post. Project idea and any opinions expressed here are our own.
It’s that time again!! Time to team up with the other FloraCraft® ladies. This months theme is kids crafts and our materials are FloraCraft® Make It: Fun® Foam Eggs! YAY I just LOVE a challenge.
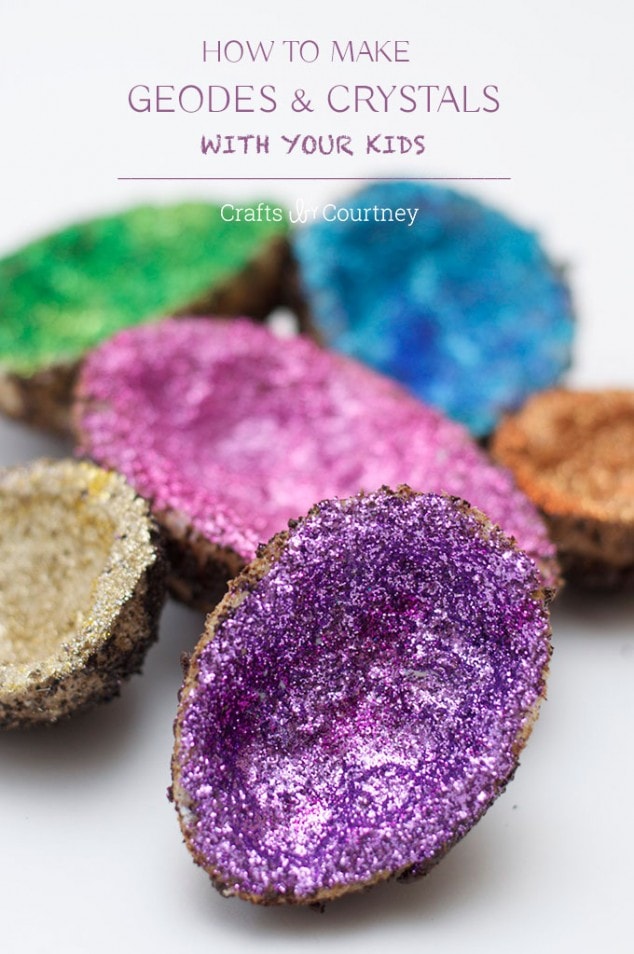
Since it was a kids craft I talked is over with my 6 year old son to see if he had any ideas. Right away he thought about making dinosaur eggs. I was totally planning on making them until…. We experimented with the outer shell first and really liked how it turned out. Then we hollowed out the center on another. My son thought that it could look like a crystal and I totally agreed.
We pulled out some glitter and it worked perfect! So we went in a new direction. My son LOVES geodes and crystals, last month we went on a field trip with his school to a local mining company. Ever since then all he’s talked about were the geodes and crystals he got. So I’m really glad we came up with this idea together.
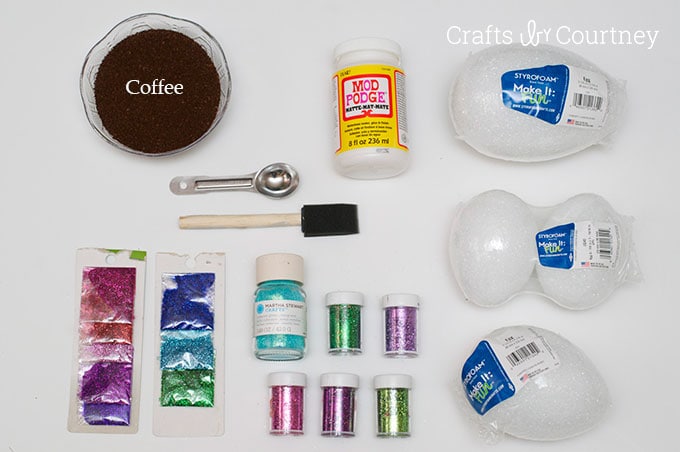
Supplies Needed:
Getting Started
I had all the crafts supplies on hand for this project. I gathered them all together and we got started!!
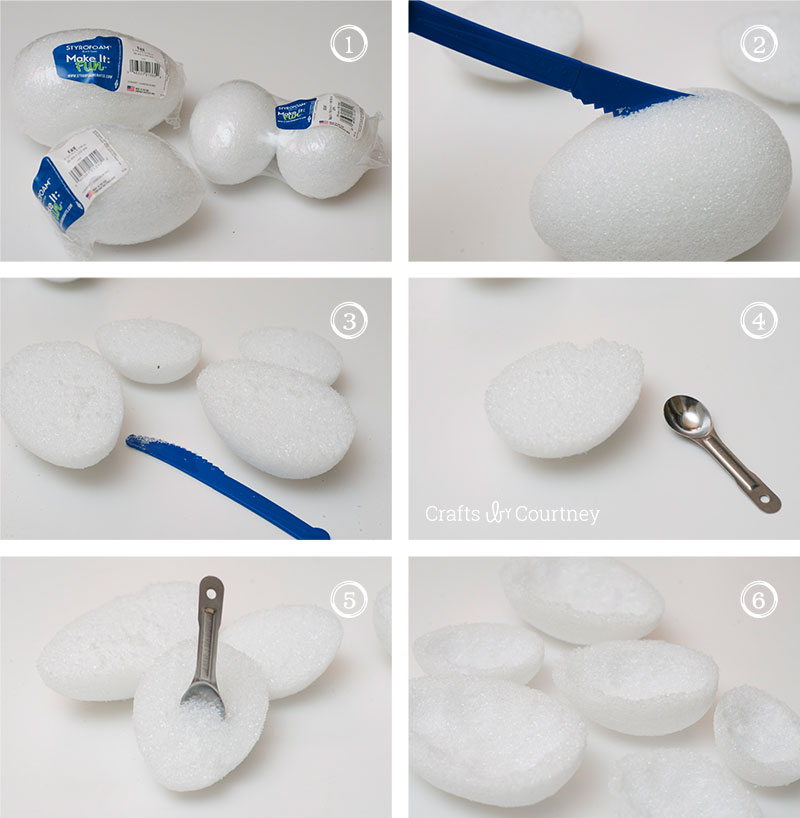
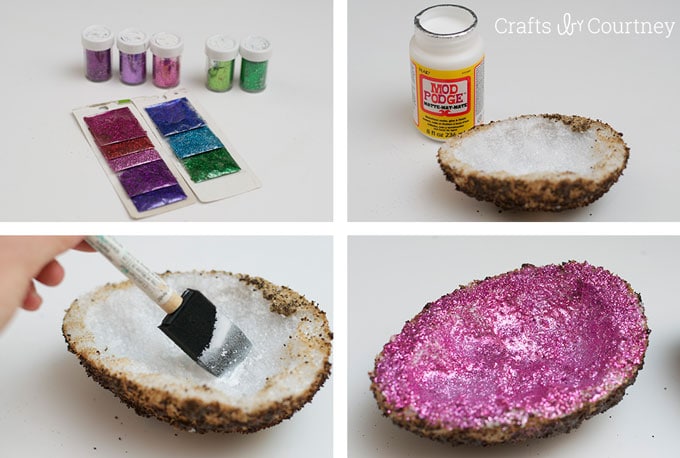
Step 1 – Prep Your Styrofoam Egg
First I picked out the eggs sizes I needed, then I used the FloraCraft® Make It: Fun® Foam Tools to cut our eggs in two.
Then I pulled out my “Trusty” teaspoon and hollowed out the center of the eggs.
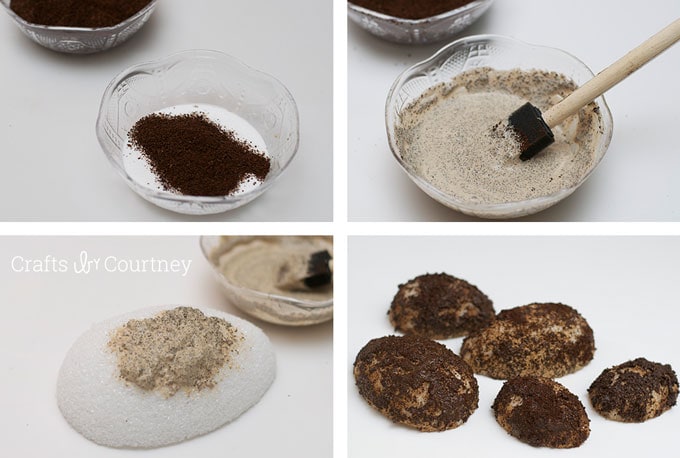
Step 2 – Create Your Rock Look
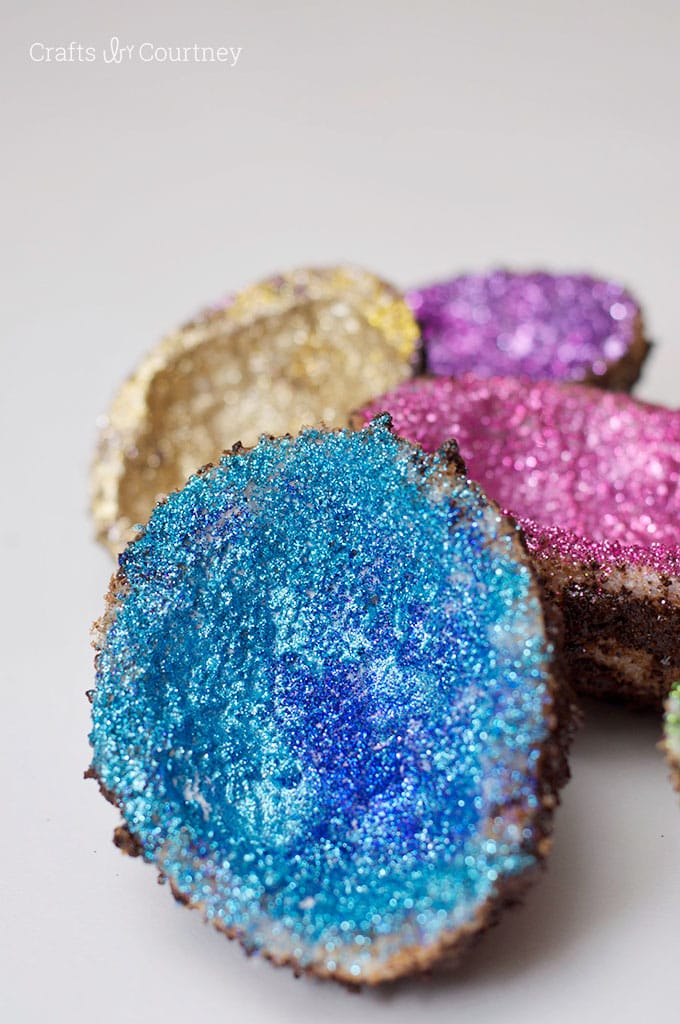
Next, I made my “rock shell”.
I mixed some coffee and mod podge together to create the perfect paste. I didn’t want it to be too thick, I just put in enough coffee until the Mod Podge started changing colors.
Then I covered the outer layer of the shell. The paste stuck to the foam perfectly and was pretty easy to do. I let them dry for 4 hours before we started the next precess.
Step 3 – Add Your Glitter
My favorite part, adding the GLITTER!!
We picked the glitter colors we wanted and got to it. I thought adding a lighter and darker color would be a pretty outcome. So when we did a pink crystal we added a lighter and darker pink glitter.
My son covered the inside of the shells with some Mod Podge and lightly sprinkled on our glitter. We let dry 2 hours.
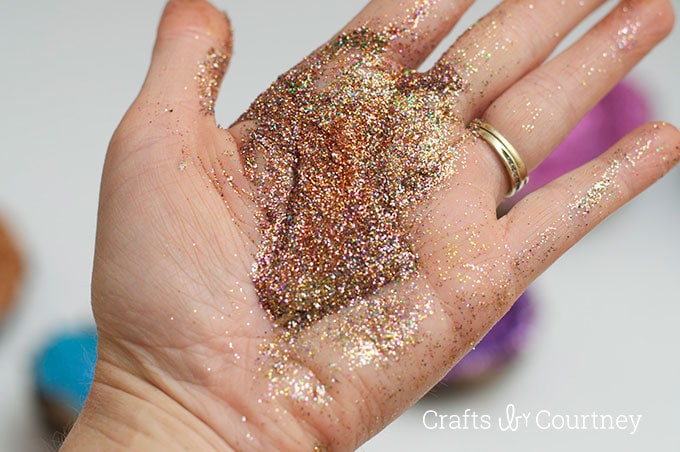
Here’s some of the glitter aftermath!! Oh how I just LOVE glitter, in High School I put glitter all over myself (hair, makeup, nails you name it) it was a crazy time. Now I hold back some restraints…
Finishing Touches
After the crystals were dry we were ready to get some pictures. My son can’t wait to put these in his room next to his jars of rocks.
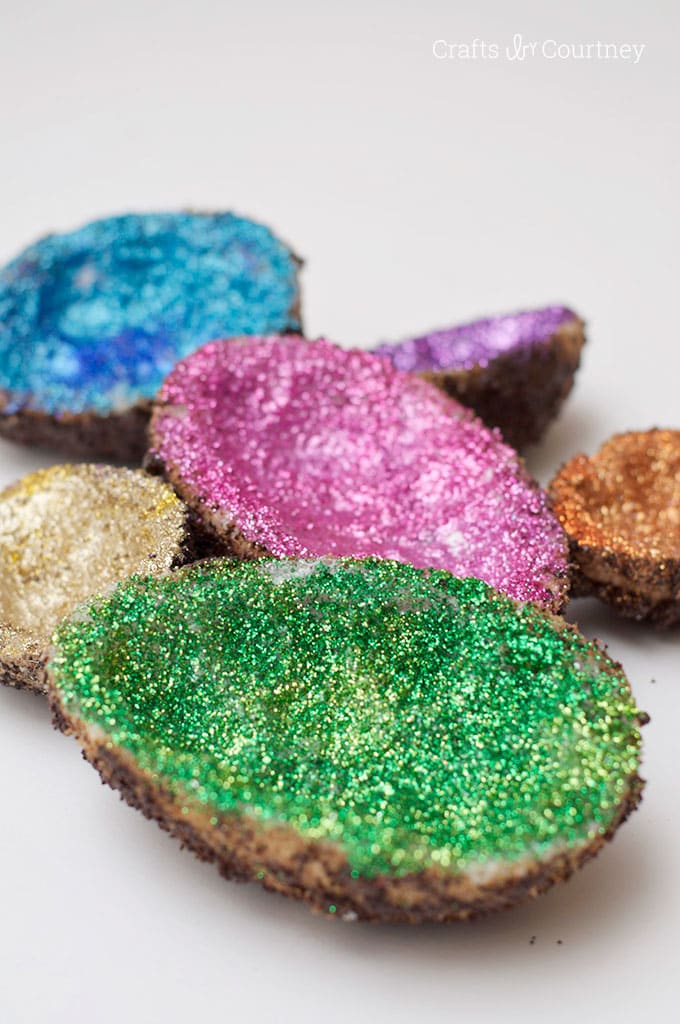
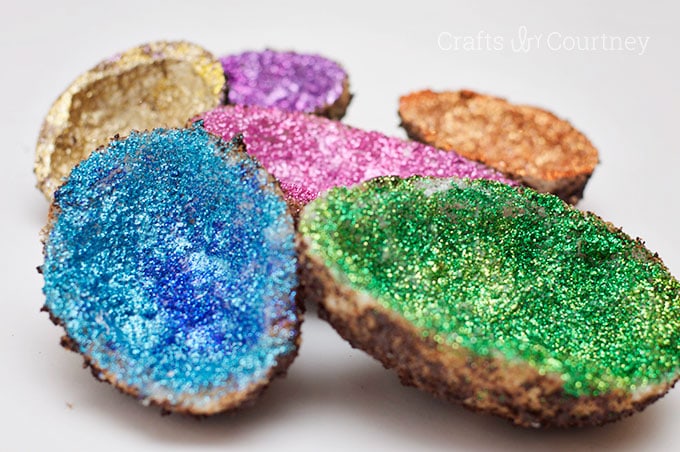
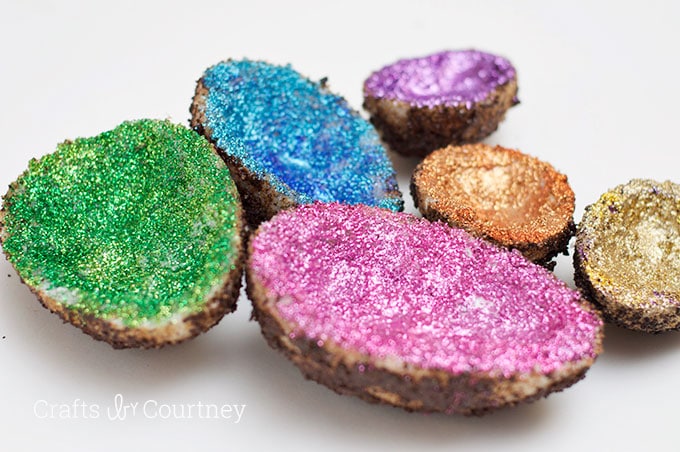
This project does take a while to do but I thinks it’s well worth it. My son totally agrees too! I can’t wait to start learning more about them with my son, it will be a great learning experience for everyone as well. Plus I really do think they look so pretty!
If you want to check out all the other ladies great projects then here’s our teams Pinterest board. They have come up with some amazing ideas.
Love, Courtney