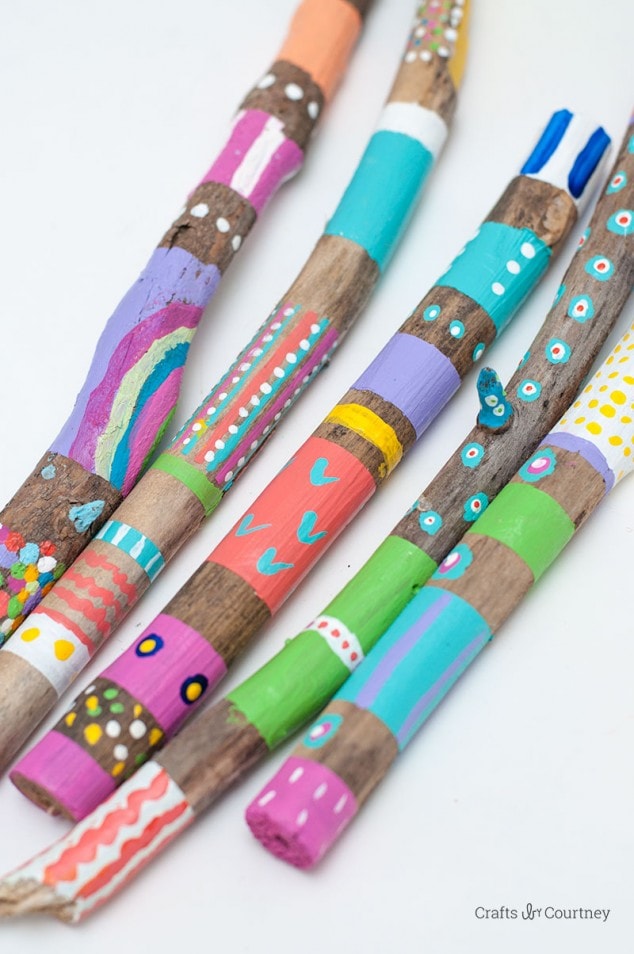
This is a craft that honestly doesn’t need a detailed tutorial. It’s a pretty start forward nature craft for kids. But you know me, I LOVE taking pictures and writing tutorials so I just had to make one.
I LOVE keeping the kids busy this Summer with fun kids crafts. I recently did a similar craft, a DIY Wind Chime and after I did that I knew we had to paint more sticks. I’ve seen some great inspiration on Pinterest of these painted sticks. It’s a quick and easy project you can have done in no time, or they can get as detailed with this craft as well. Depending on the age.
Let’s get started!
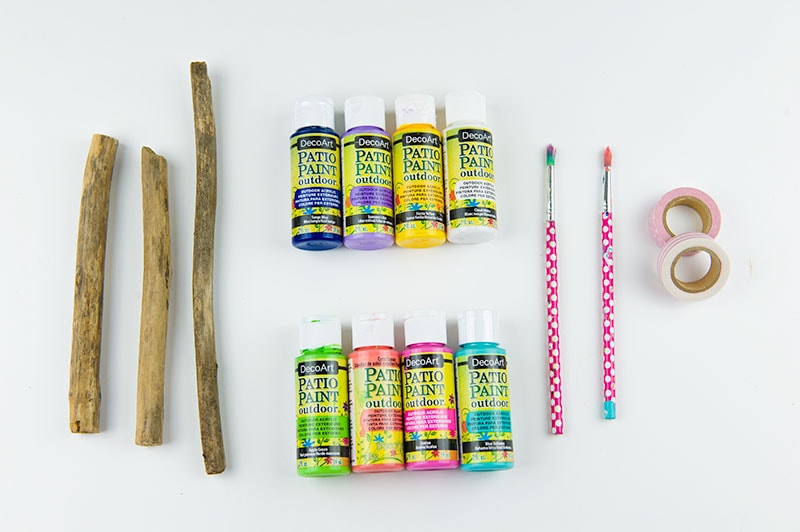
Supplies Needed:
PAINTED STICK NATURE CRAFT
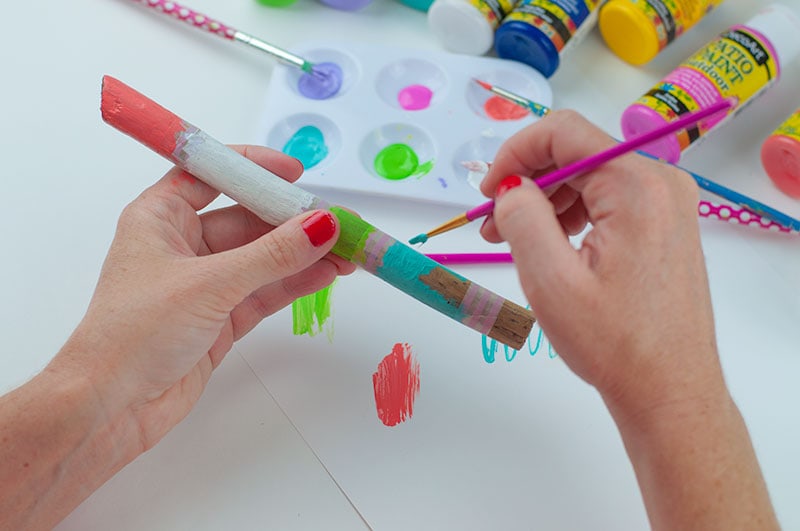
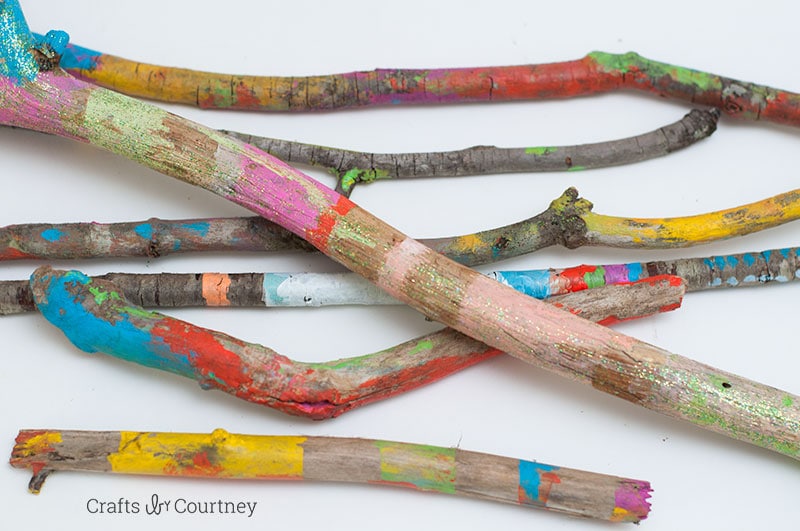
Step 1 – Tape Sticks Off
For this step I just used some simple washi tape and taped off some sections.
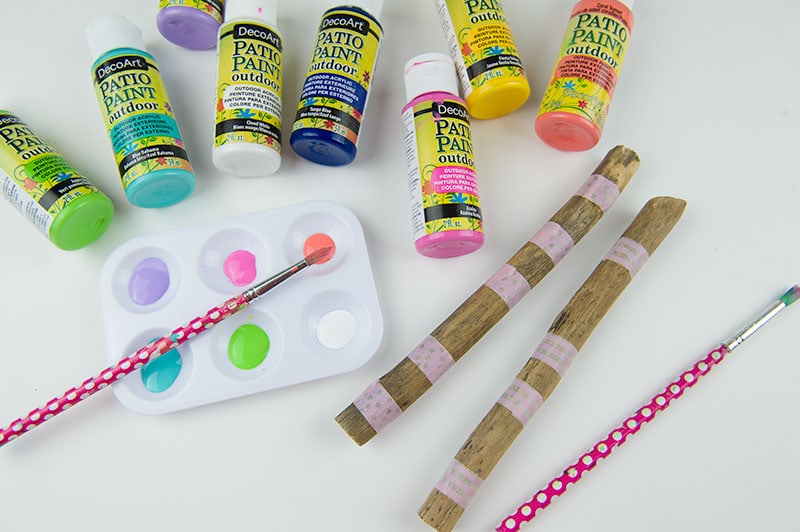
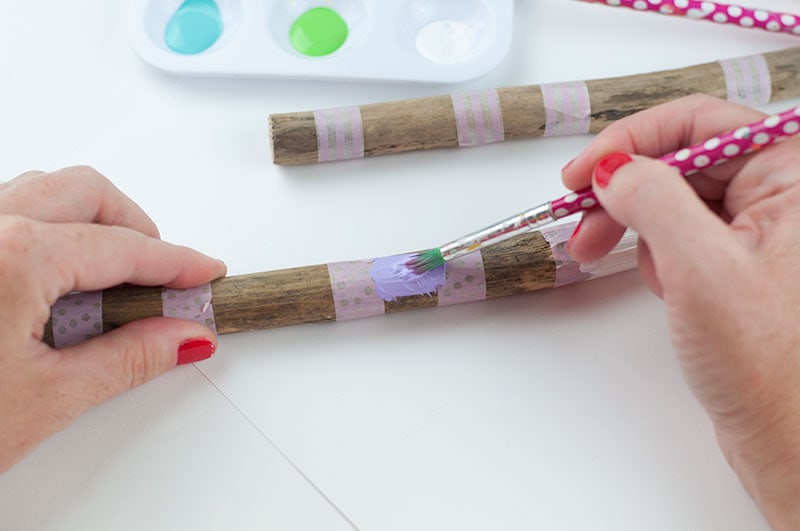
Step 2 – Add Your Paint
Now it’s time to add our fun colors!! I really like the patio paint, because I only needed to add one coat of paint for this step. This paint dries pretty fast, but I would wait until it is completely dry before the next step.
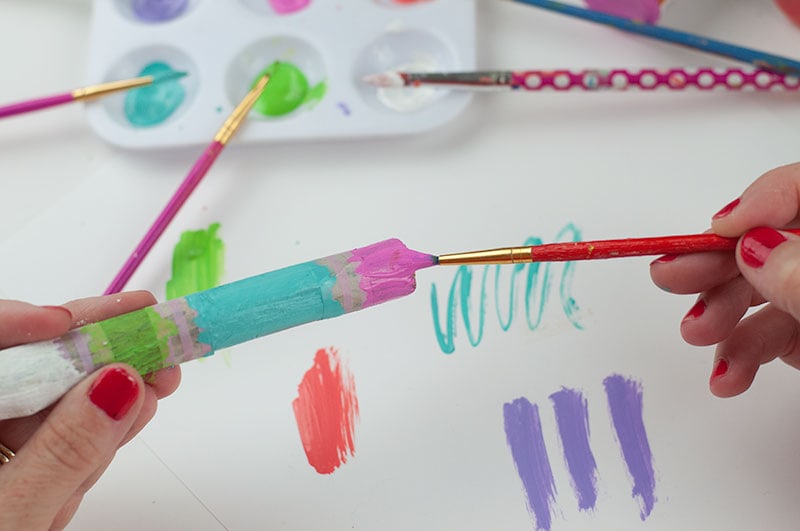
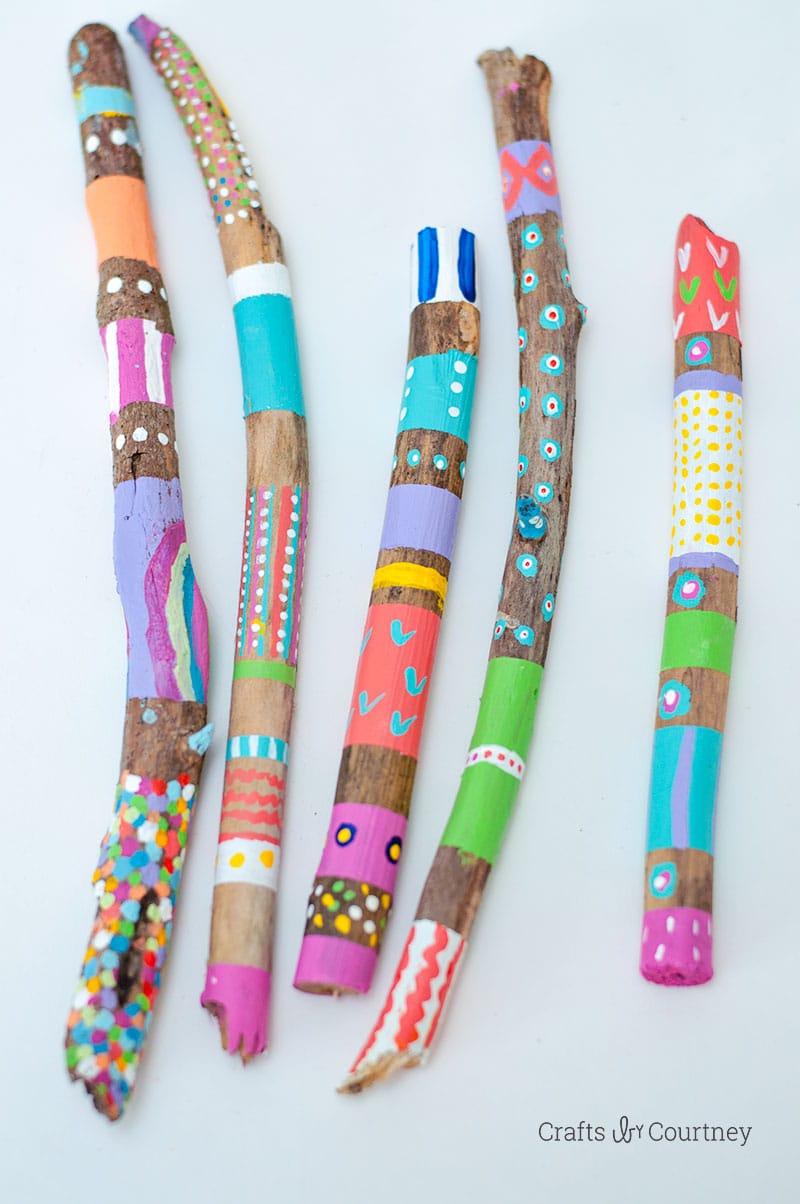
Step 3 – Add Your Design
Now let’s add our details! The fun part about this, you can get as CREATIVE as you want!!


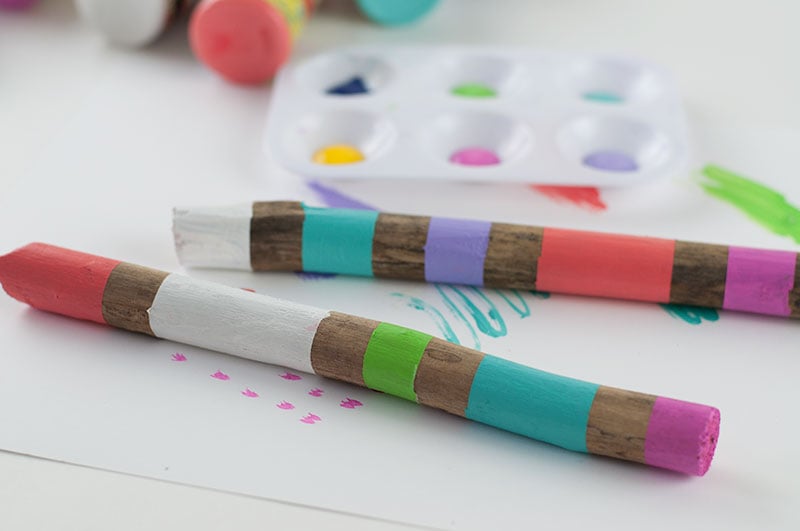
Finishing Touches
See how easy that was! This is a pretty simple Summer craft to keep the kids busy!
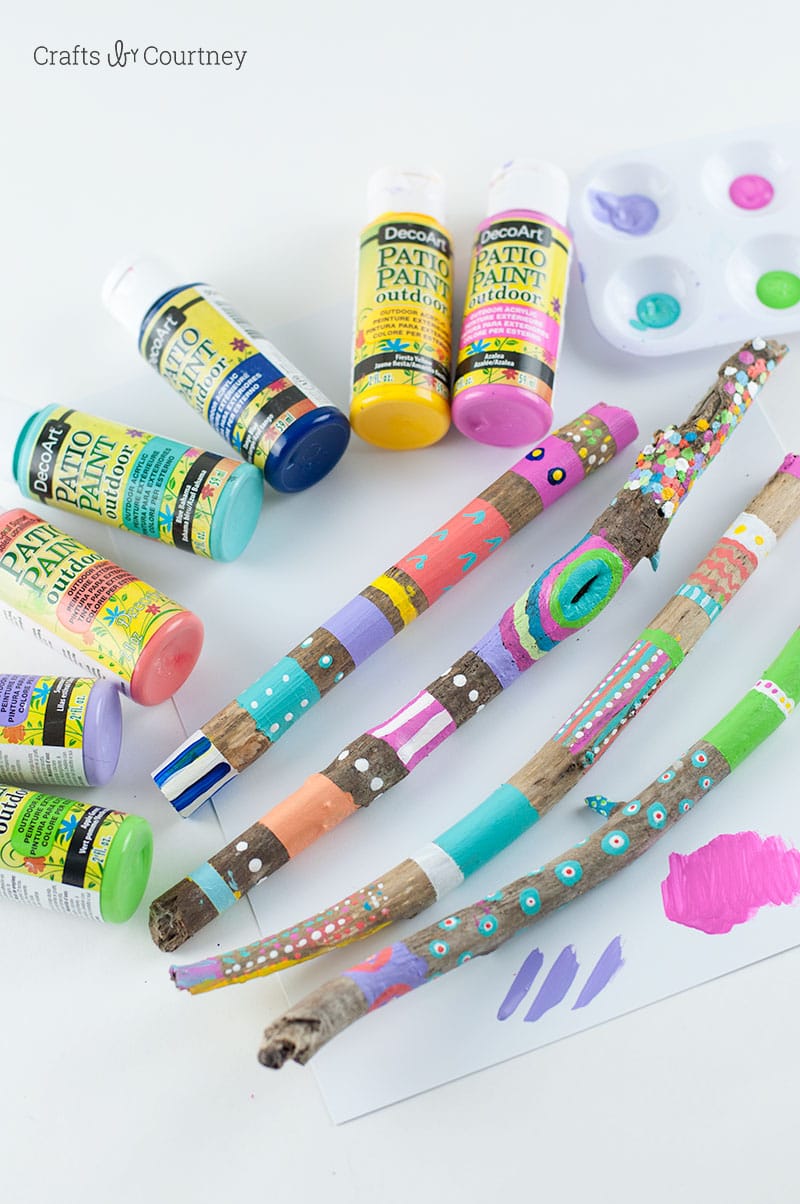
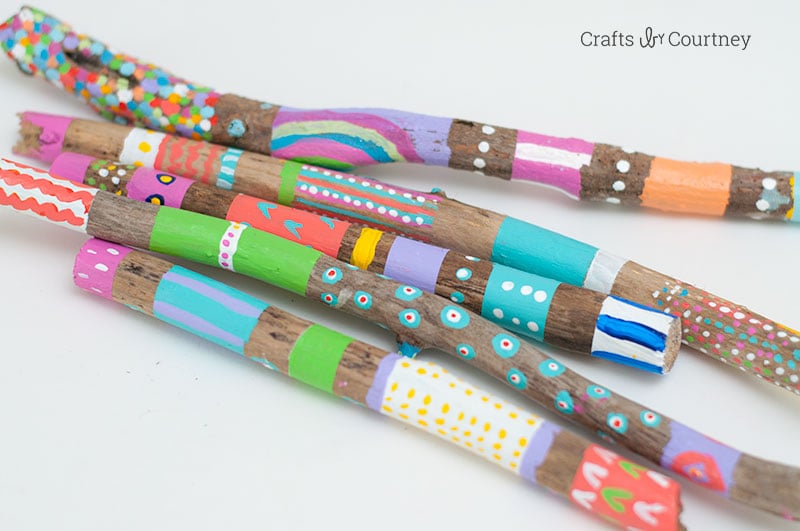
Here are the sticks my kids did!!
My kids loved working on this project together. My 6 year old even added some glitter paint to his stick. I really think for the younger kids taping off sections really helps. I know asking a 4 year old to add small details could be challenging.
So next time you go on a nature walk grab a TON on unique looking sticks for this simple nature craft!
Looking for another fun nature craft, then this painted rock tutorial is a perfect one for you! It’s crazy how popular it is to paint rocks right now and place them around your town. This is on my to-do list next for my boys!
More Fun Summer Crafts
Love, Courtney