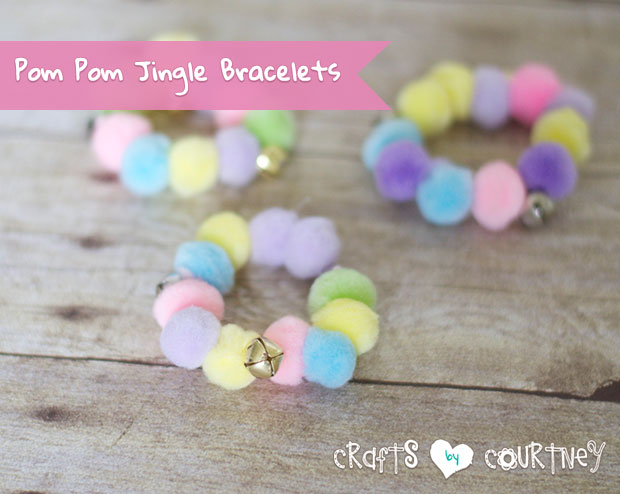
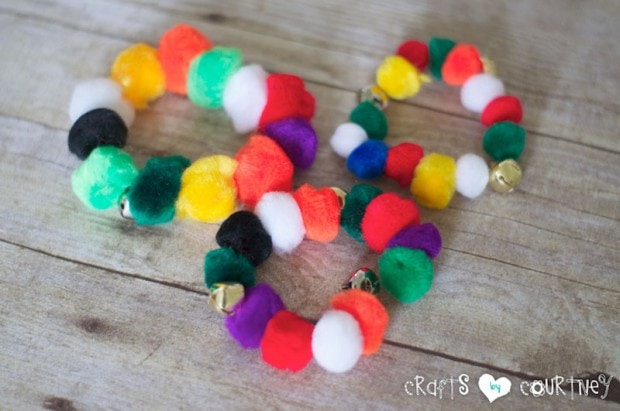
I’m part of a “mommy’s group” and I have been helping with the kids crafts. The theme this week was musical instruments and when I saw these pom pom bracelets knew they would work great for the kids. I made some soft pastels for the girls and primary colors for the boys. These bracelets were very easy to make.
I pre-made them all since the kids were between 2-4 years old. We didn’t want them using needles in the classroom. I did have my 4 year old make one for himself and I was pretty surprised at what a great job he did.
Getting Started
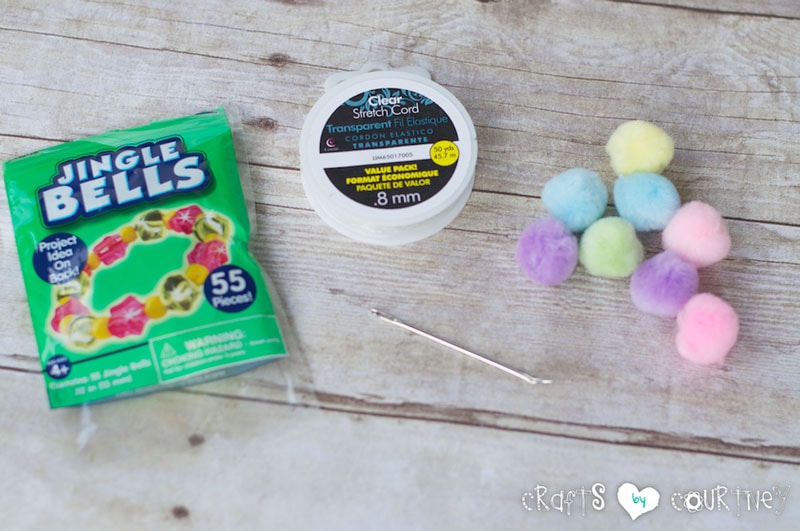
I picked up some clear stretch cord and some jingle bells at my local craft store. I was already pretty stocked up on pom pom balls. I was pretty excited to get started on this project (I had to make 16 of them).
Step 1 – Thread Your Pom Pom Bracelet
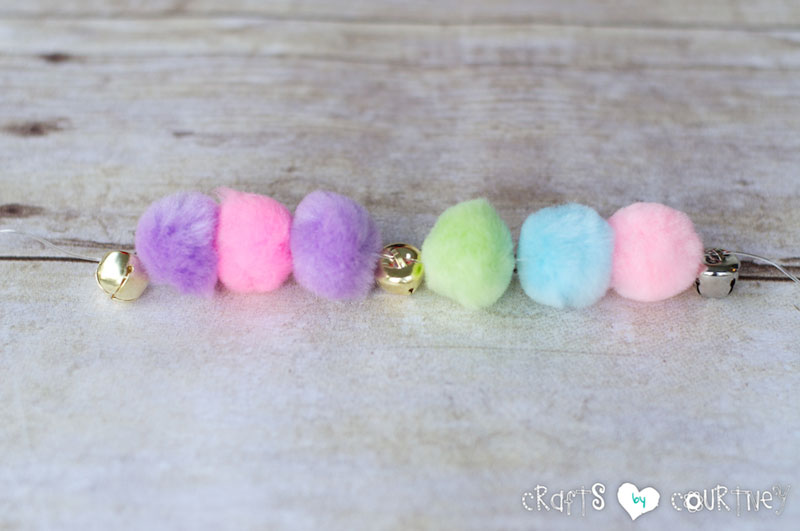
I used a large sewing needle with a long strand of stretch cord and cut is a little longer then a child’s wrist. Then I pushed the needle right into the middle of the pom pom balls.

Step 2 – Add Your Pom Poms
I created a pattern of about 3 pom poms and then 1 jingle bell. Then repeated that three times. Since they are little kids hands, you only need about 9 or 10 pom pom balls for your bracelet.
Step 3 – Finishing Touches
Once I had all my pom pom balls strung on my bracelet, I made sure I tied the ends well. I gave the bracelets to my 2 year old for “product testing” and they passed with flying colors.
It’s been a couple weeks and we still have our bracelets. They are in great condition. I hope the others fared as well as ours…
It was such an easy and inexpensive craft to make for the kids. It’s great to make for one child or a big group like we did. Hope you enjoy!
Love, Courtney