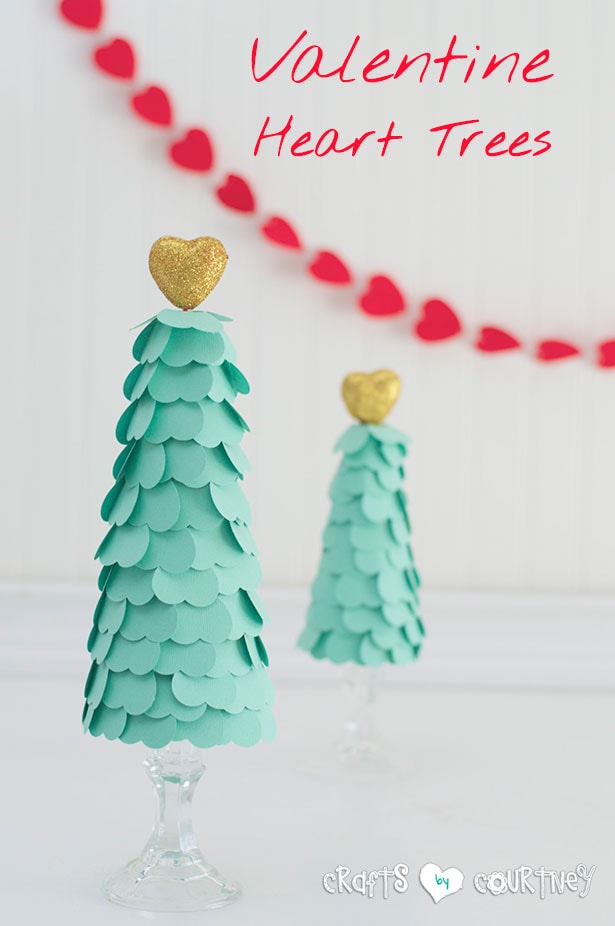
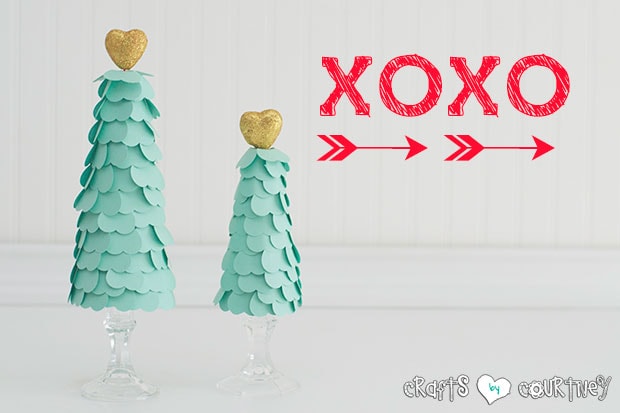
I’m really excited to start working on some Valentine’s Day crafts. One of the FIRST crafts I got started on this year, were these adorable Valentine trees made with paper hearts.
They are so cute, inexpensive and easy to make. My three favorite things!
I’m really excited to start working on some Valentine’s Day crafts.
Mint and gold is such a popular combination right now. I really wanted to incorporate it into this year’s Valentine home decor.
Getting Started
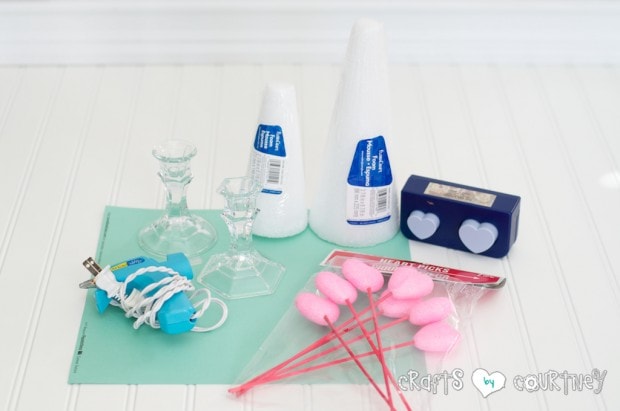
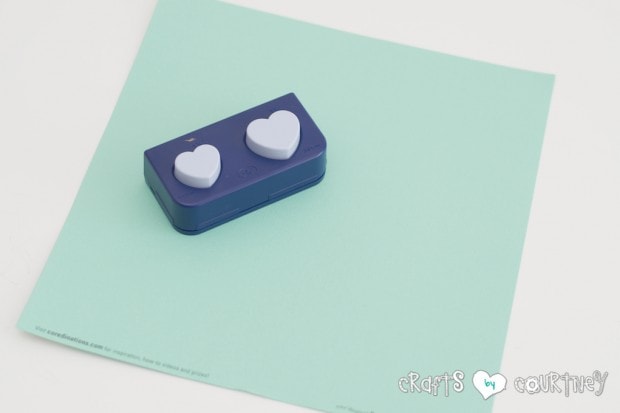
For this craft, I got ALL of my materials from the Dollar Tree and Michaels (besides the heart punch). I scrapbook, so I already had a heart punch. But ANY craft store will have one.
Some stores (like the Dollar Tree) already have pre-cut hearts. In my finishing touches picture, you will see an example.
The glass candle holders and foam hearts are also from the Dollar Tree. Gotta’ love that place!
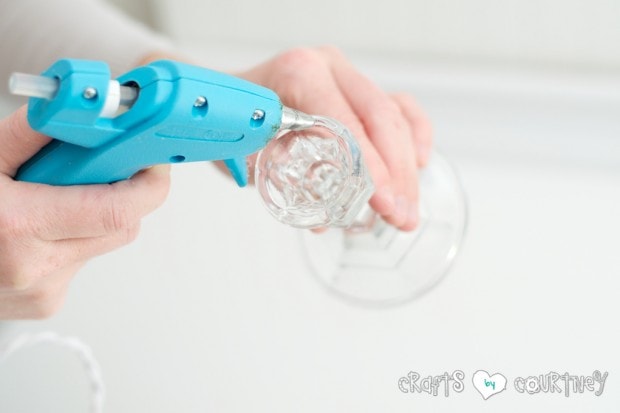
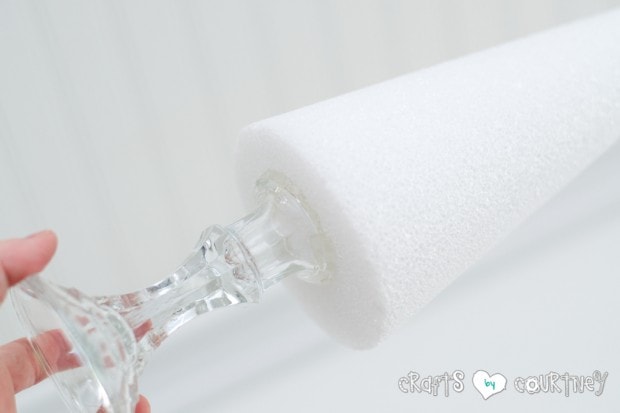
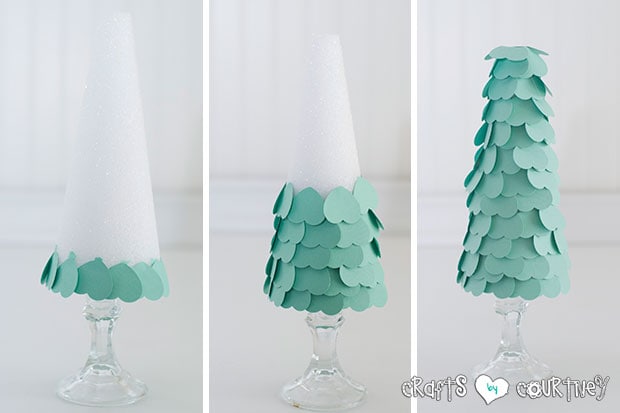
Step 1 – Glue Your Candle Holder to the Foam Cone
I decided to just use hot glue for this step. I made some last year and they’re still intact!!
All you need to do is, add a thick layer of hot glue to the top of your candle holder. Then, FIRMLY press the foam cone to the top of the candle holder. Voila, all done!
Side Note: If you’re enjoying these Valentine trees, then why not try my stenciled Valentine heart frames!
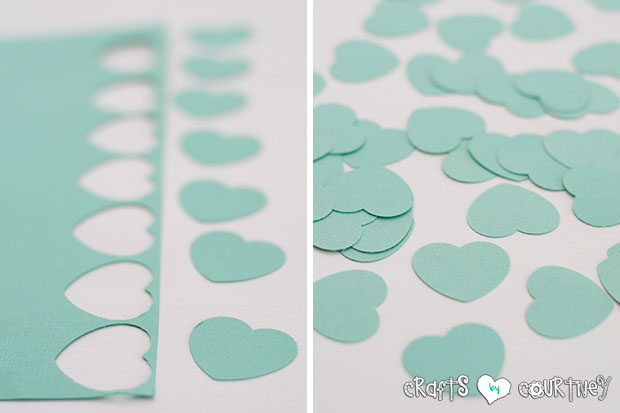
Step 2 – Cut Your Hearts
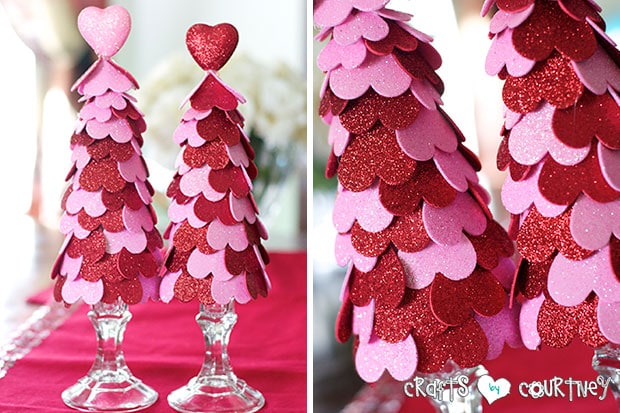
For this step, you can use whatever kind of hearts you like. I already had the heart punch, so it worked out best for me. The trees I made last year I used glittery hearts from
I saw that Lolly Jane actually cut out felt hearts for her tree and it turned out super cute!
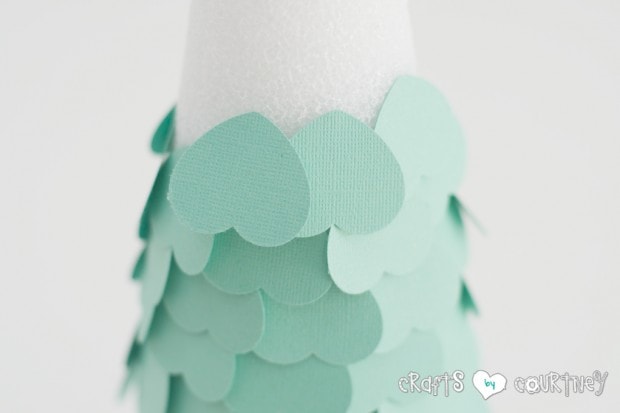
Step 3 – Add Your Hearts
I added a small amount of hot glue to the back of my heart and firmly pressed them on the cone (slightly overlapping the hearts).
This part was REALLY SIMPLE. I had both trees done in 15 minutes!

Step 4 – Add Glitter to Your Hearts
I like the pink hearts I got from the Dollar Tree, BUT I really wanted a mint and gold theme. I lightly covered the hearts with glue and sprinkled fine glitter over top.


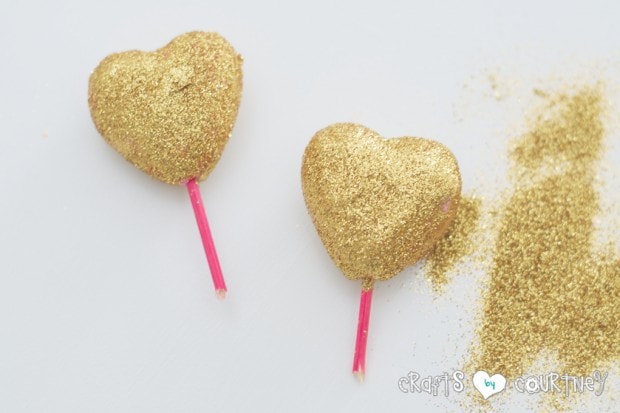
Quick Tip: I made sure to leave a little of the stick on the heart (about an inch) so it would be easy to press them into the foam cone.
Step 5 – Add Your Heart Toppers
Since I left some of the stick on my heart, I was able to EASILY press them into the foam cones.

Step 6 – Finishing Touches
I was super excited to see how my trees turned out! Last year, I made the glitter ones and loved them.
But THIS YEAR, I wanted to change them up a bit and give them a modern look.

This was probably one of the easiest craft projects I’ve worked on. Even with taking the pictures and setting up, I had them done in about a half hour.
I’m ALL about quick and easy crafts. With three little ones, my crafts need to be quick and easy!!
Love, Courtney