Affiliate Post: This post may contain affiliate links. By clicking an affiliate link and purchasing a product, we receive a small commission. With that said, all opinions expressed here are our own.
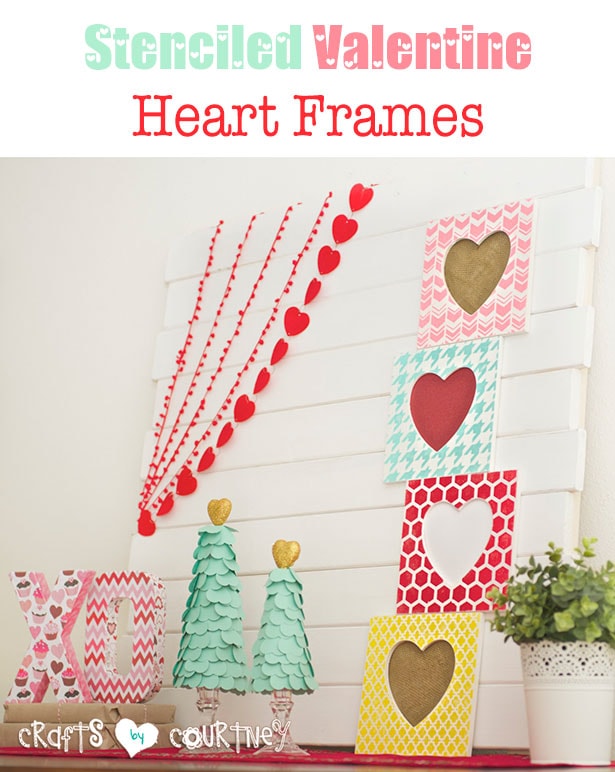
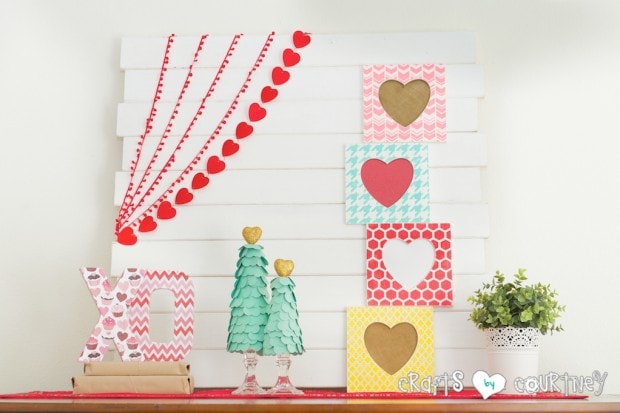
Aww…LOVE is in the air at my house. I’ve been trying to get my Valentine home crafts done early this year.
So what does THAT mean? Decorating for a new holiday :) Yay! I love decorating the house for each holiday, it’s just so much fun!!
So what does THAT mean? Decorating for a new holiday :)
Since I’ve been wanting to make stencils using my Silhouette Cameo for awhile now, I thought this would be a perfect way to do it. Plus, I can incorporate it into a Valentines craft!! They really turned out great.
Getting Started
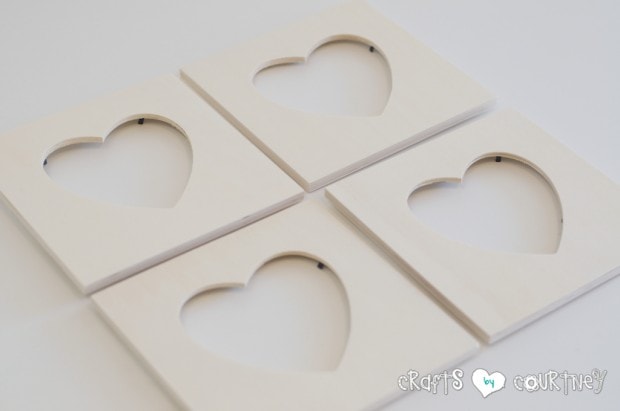
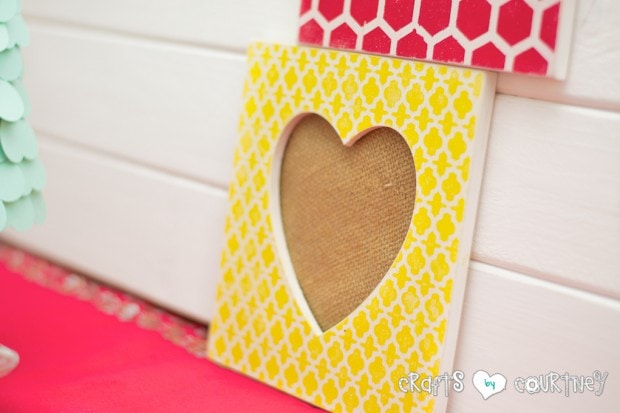
I grabbed some Valentine-y frames for $1.00 at Michaels (and my paints). They were having a sale on paints, so I got them for about .70 cents each.
Total score with that! I DO love a bargain!

Step 1 – Paint Your Frames
This part is pretty easy (I like easy). I added two layers of white paint over each of my frames and let dry for 20 minutes.
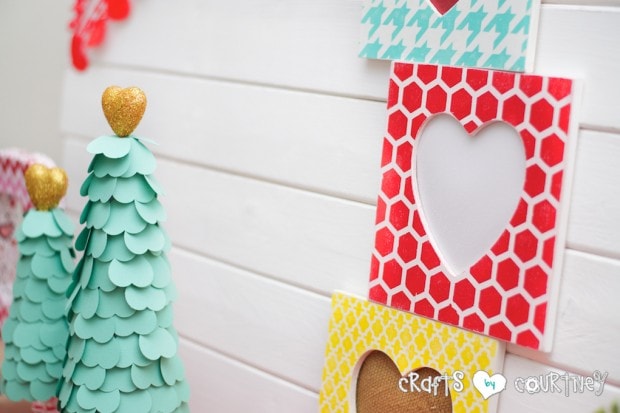
Side Note: By the way! If you LOVE my heart frames, I know you’ll enjoy these super cute Valentine heart trees!
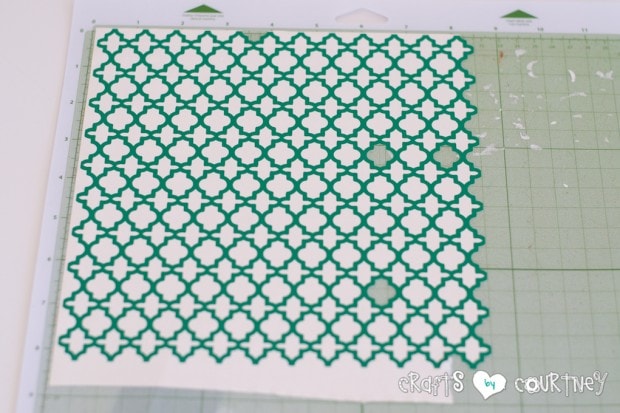
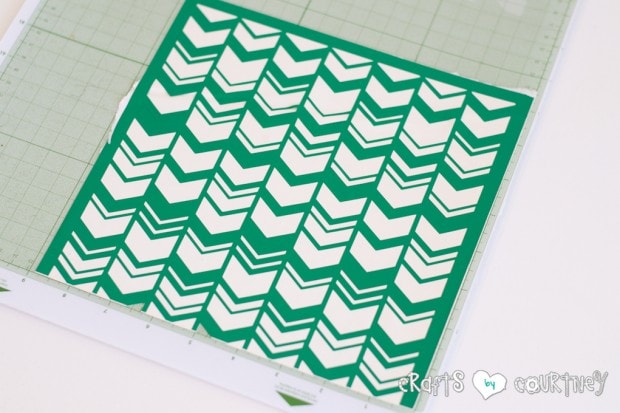
Step 2 – Create Your Stencils
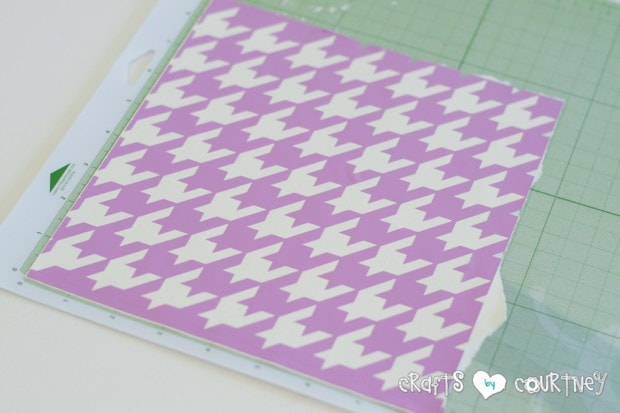
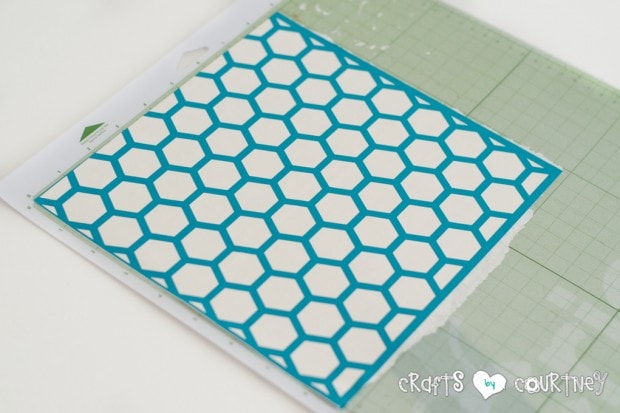
Since I used my “Trusty” Silhouette Cameo, I went to Silhouette’s online store and bought a few patterns (they were only .99 cents each).
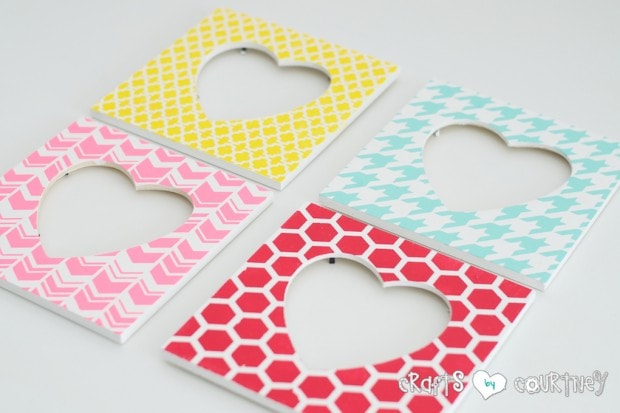
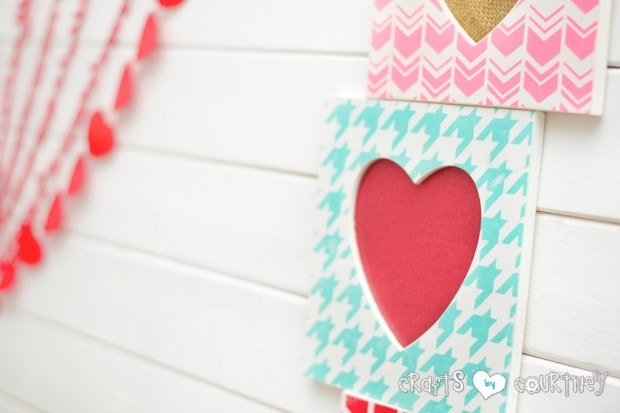
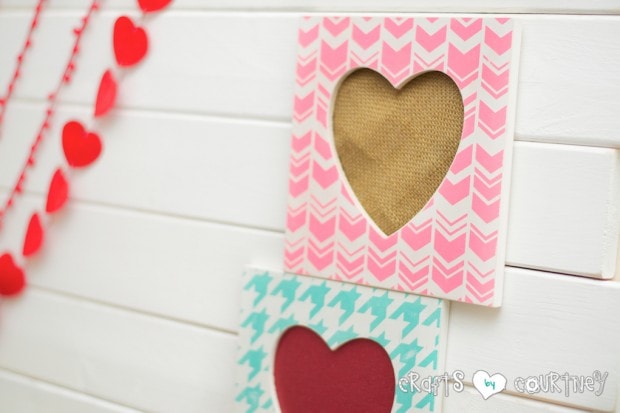
Here are the patterns I chose for my heart frames:
First, I made sure how large I needed my pattern by laying my frame on top of my mat and measuring it (7×7). It’s easy because it has the measurements right on the mat!!
I wanted a little to hang over the edge, so I made my stencil 8×8.
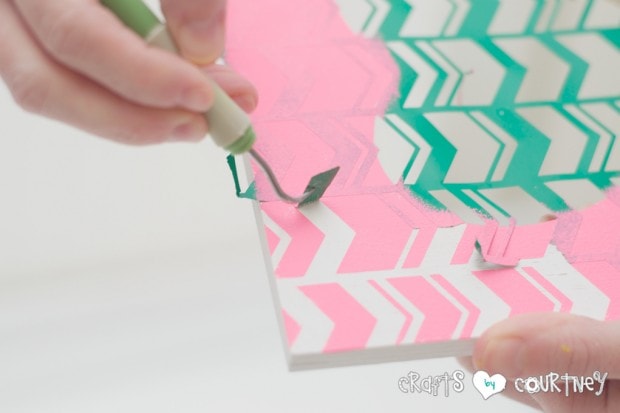
I cut my patterns on vinyl, so they would stick to my frames. If you’ve used a Silhouette Cameo, then you know about “weeding” your pattern first. To weed my stencil, I used a “hook” to peel off the pattern I wanted to SHOW on the frame.
Step 3 – Transfer Your Stencil to the Frame
Once I was done “weeding”, I applied my stencils to transfer paper and placed them gently onto the frames. I pressed down lightly to ensure they completely covered the frames.

Quick Tip: When I pressed my stencils to the frame, I used a credit card (like I normally do). DON’T DO THAT for this project! Just smooth them by hand.
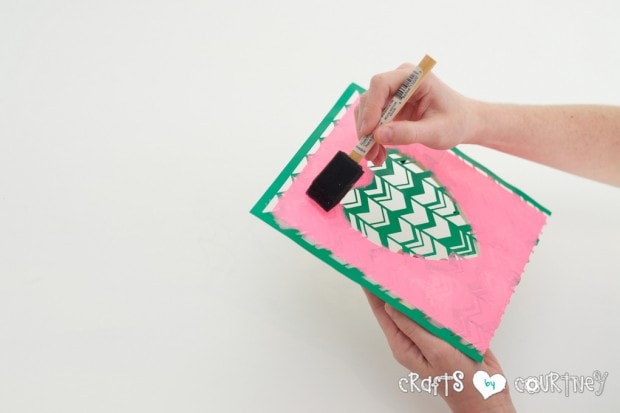
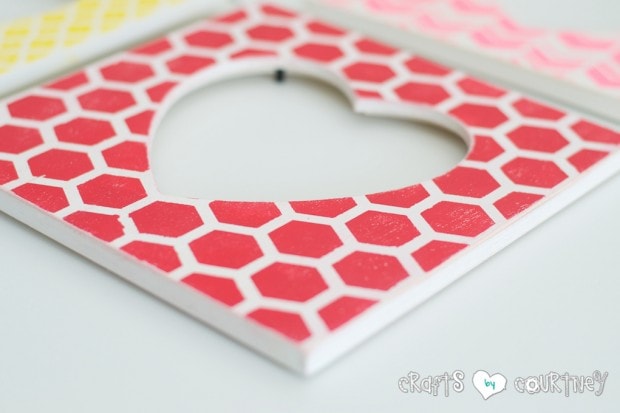
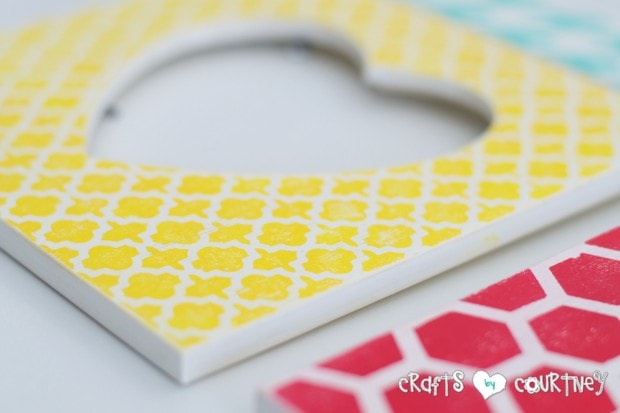
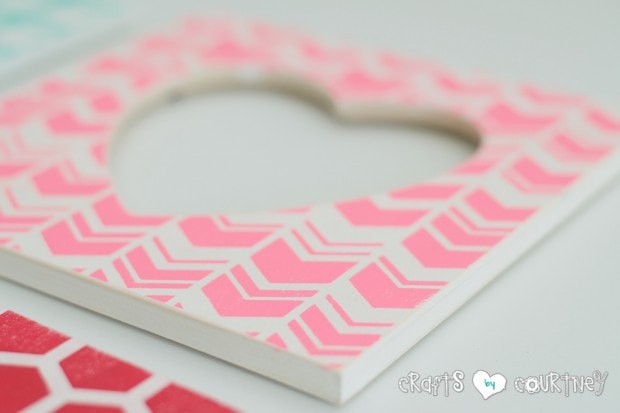
Step 4 – Paint Your Pattern
I lightly went over each frame with paint by dabbing with a foam brush. Then, let them dry for 10 minutes. You with me so far??
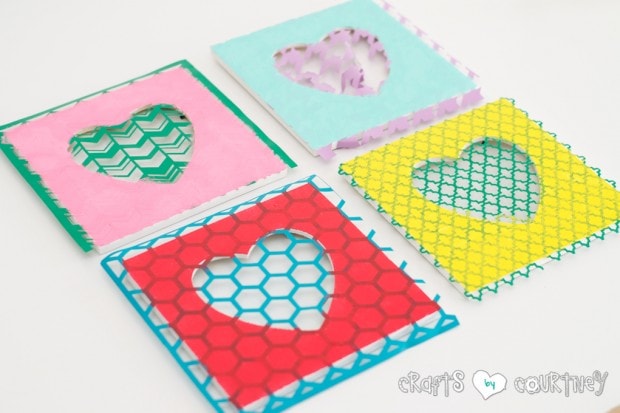
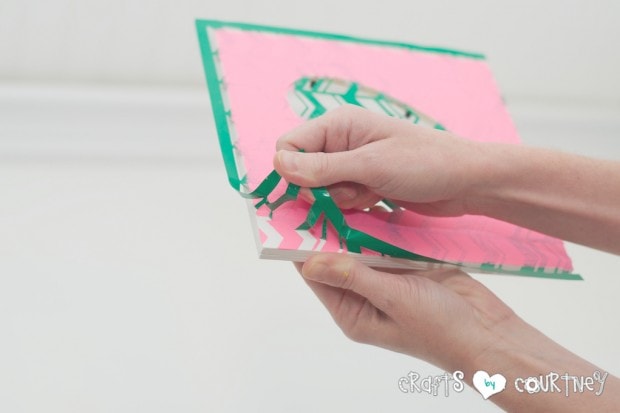
Step 5 – Pull Your Stencil Off
Once my frames were dry, I pulled off my stencils. If you have trouble pulling them off, you can use your “Handy Dandy” hook!!
MOST were pretty easy to remove, except the lattice pattern (yellow frame) because it was very small and detailed. I totally had to use the “hook” for that one.
Step 6 – Add Your Finishing Wax
Since I planned on sanding my frames, I decided to add my wax FIRST. This always works best for me.
I pulled out an old sock and lightly went over each frame with my finishing wax. I made sure to cover the entire frame with wax. It only takes a minute, and makes a big difference with how your frames look when finished.
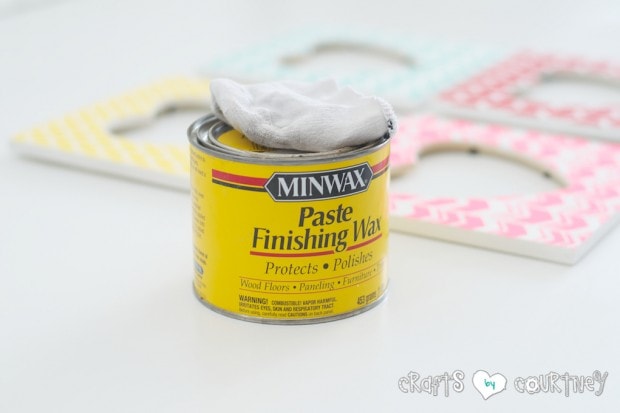
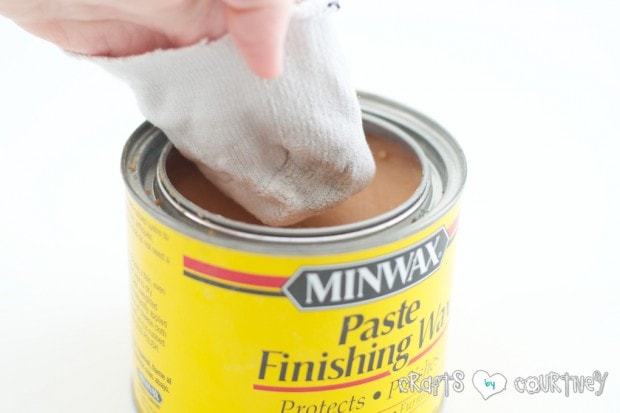
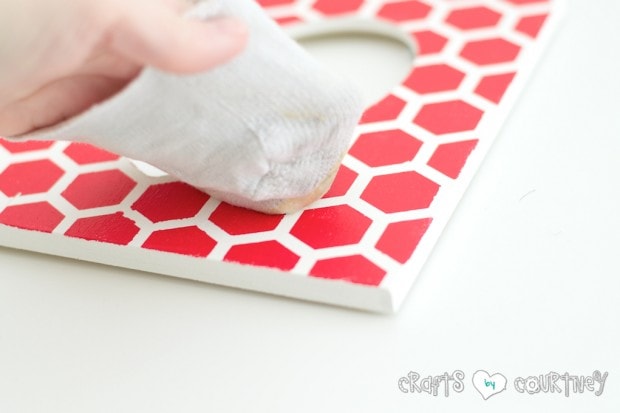
Quick Tip: You don’t need a lot of wax for this step, just a small amount goes a long way.
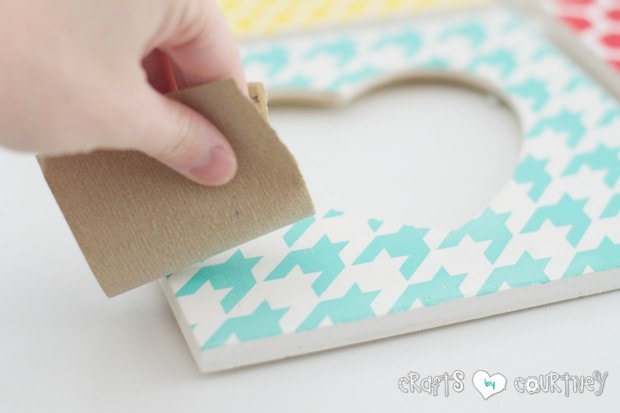
Step 7 – Sand Your Frame
Since I wanted my frames to look a little “aged” I went over each one with some sand paper. I sanded all my frames until I was happy with the results!!
Now, they are looking pretty cute!!
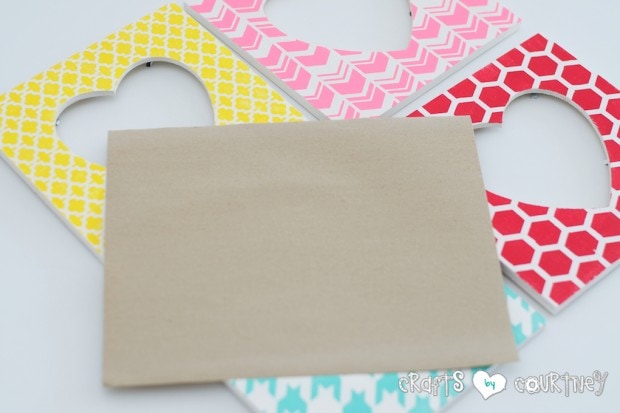

Step 8 – Finishing Touches
To finish off my frames, I added some burlap for 2 of the frames and glittery scrapbook paper for the other 2 frames. I’m am LOVING how they turned out.
This was my first time using my Silhouette Cameo for a craft like this. It took a little longer than expected.
BUT since I know what to expect now, I think I’m gonna make frames like this more often! Honestly, once you know what you are going to do, it’s a pretty easy craft to make.
…I think I’m gonna make frames like this more often!
Besides owning the Silhouette, this was a pretty inexpensive project. I already had my vinyl. All I needed to buy, were frames and paint!
Excited to make more Valentine crafts for my home decor!
One of the best parts about this project, is you can choose any design you want! For more inspiration, be sure to check out…
Love, Courtney