
This was my first time making a sensory bag from glitter and gel. The creative sensory bag craft was a major hit with my son (and baby).
I have seen sensory bags several times on Pinterest and thought it would be a great craft project for the kids. It was definitely something my oldest son could do himself.
Who would’ve thought that a lil’ bit of hair gel and glitter could make for such an entertaining day?
Sensory Bag Supplies Needed:
Getting Started
I grabbed a couple bottles of hair gel at the Dollar Tree (I already had the glitter and food coloring on hand). Once we got everything together we were ready to get started!!

Step 1 – Add Hair Gel
Fully open the Ziploc bag and lay it on a flat surface. Then, pour the hair gel into the bag.
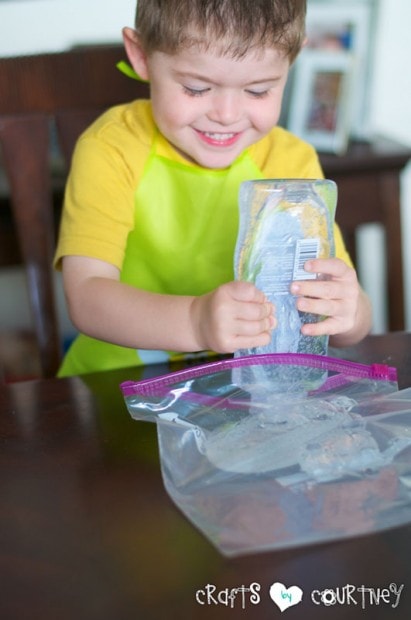
Quick Tip: To get the right look and feel, be sure to completely fill the Ziploc bag with gel (pay attention to the corners of the bag).
Step 2 – Add the Food Coloring
Apply a couple drops of food coloring to the gel inside the large Ziploc bag.
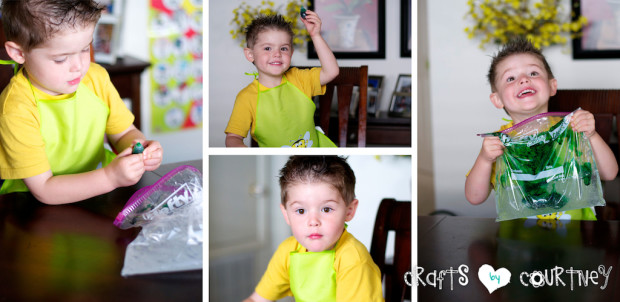
Quick Tip: It doesn’t take much food color to get the perfect shade. Be sure not to over use the food coloring drops because it might end up dark and mucky.
Step 3 – Add the Glitter
Sprinkle the glitter into bag. You can use as much as you would like. We love glitter in this house!
Step 4 – Finishing Touches
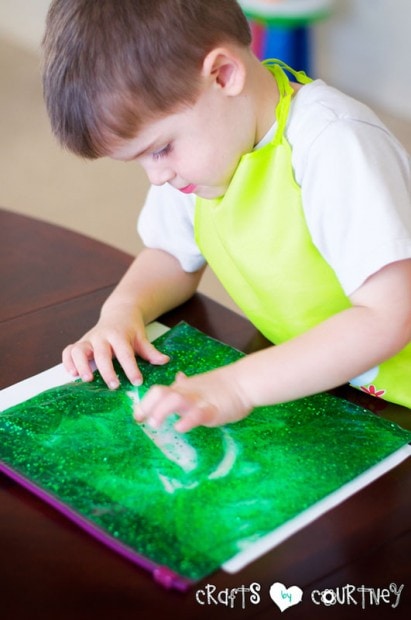
After you have added all the necessary materials, you can now prepare the sensory bag for use. To finish up, zip the bag closed and apply tape to the top of the Ziploc bag. I laid my bag over a white piece of paper so you are really able to see what you are making with the bag.
Quick Tip: Before sealing the bag, remove as much air as you can it. It’s ok if a small amount of gel and glitter seeps from the top. Remember, no air bubbles equals more fun!
Once your glitter and gel sensory bag has been sealed, your little one can now enjoy it! My little guy made faces, shapes and letters with his sensory bag. We really got alot of use out of it.
Love, Courtney