OK, so we’ve all seen ’em…
You know, those custom short links that those BIG sites use on Twitter (ex: New York Post –> nyp.st and The Next Web –> tnw.to). They’re short and sweet. But most importantly, they’re custom branded!
Did you know you can do it too?
And guess what? It’s not hard…AT ALL! In just a few steps you too can make your very own custom branded short URL. It’s all thanks to Bitly!
…you too can make your very own custom…short URL.
It doesn’t take long, but before you begin, you’ll need to have the following already setup:
- Bitly account
- Website on a custom domain
- The Bitly Bitmarklet is installed
If you’ve got everything you need, setting up your custom shortened link will only take an hour or so :) Now let’s begin!
Side Note: I’ve already made a shortened URL for Crafts by Courtney –> crftby.co. So I’m going to make a NEW short link for a new site we’re developing called, “Get Inspired.”
Step 1 – Find and Purchase a Short Domain
To find a unique custom short URL, go to Domainr. Then type in what you’d like for your shortened domain. It also provides suggestions based on it. Which is useful, especially if the short link you want is taken.
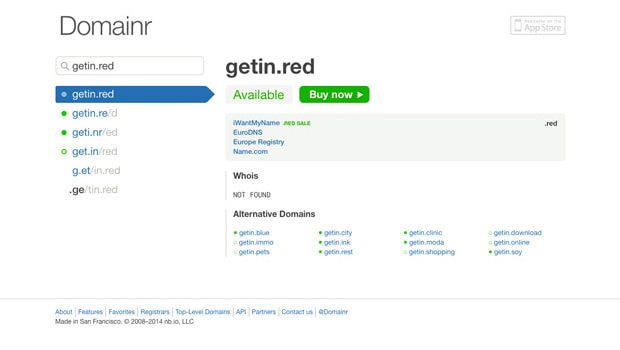
Now buy your new domain.
You can use Domainr (which goes through IwantMyName) or use another domain name registrar, like Go Daddy or Network Solutions.
I went with IwantMyName because you get a DISCOUNT for using Domainr :)
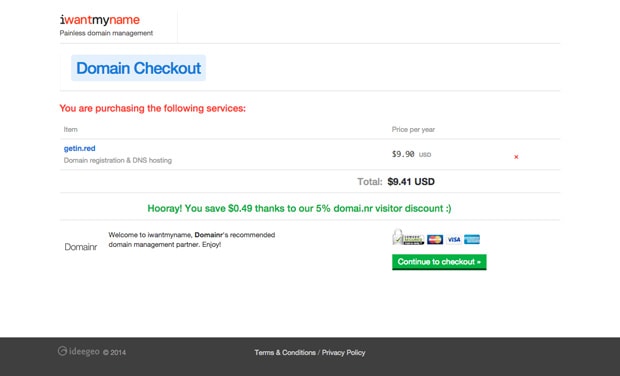
Check out that 5% discount!
Step 2 – Add Short URL to Bitly
Alright, now it’s time to add your new custom shortened URL to Bitly.
The 1st thing you need to do is log in to your Bitly account. Then go to your Advanced Settings.
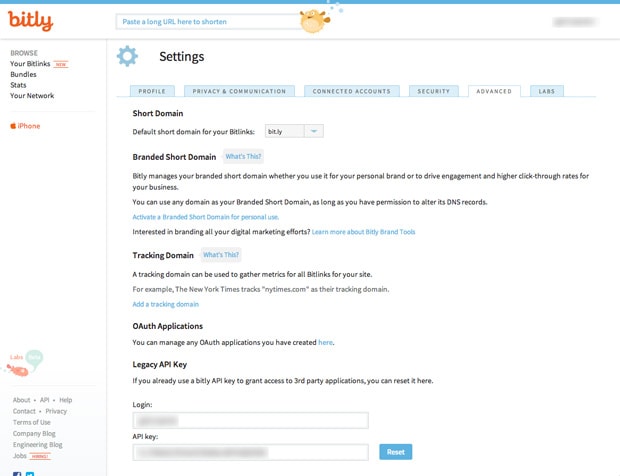
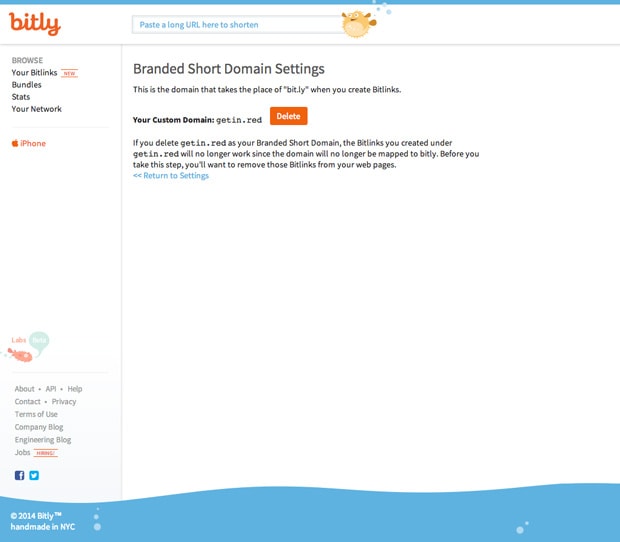
Now click Activate a Branded Short Domain for personal use. This takes you to your Bitly custom domain settings.
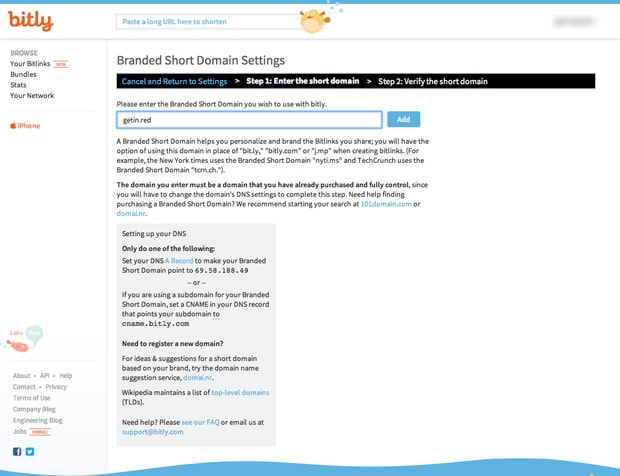
Next, input the short domain you just purchased and click the Add button. This provides you an IP address and puts your branded short URL into a pending status.
You can keep this page open.
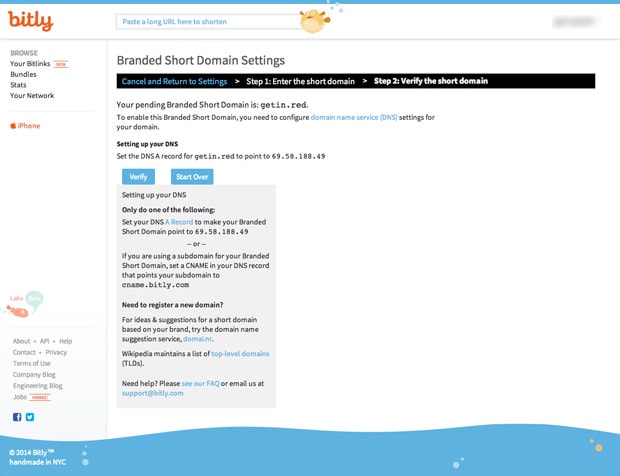
Step 3 – Update DNS for Shortened Domain
So now it’s time to add the Bitly IP address to you DNS records. Don’t be nervous, it’s not as bad as it sounds :)
To make the changes, go the registrar you used to purchase your short link and locate the DNS record.

Side Note: I used IwantMyName, so my explanation will include screenshots from there. If you used a different one, the main difference will be how you find your DNS record.
Now that you’ve found your DNS record, add the Bitly IP address to the file and save the record.
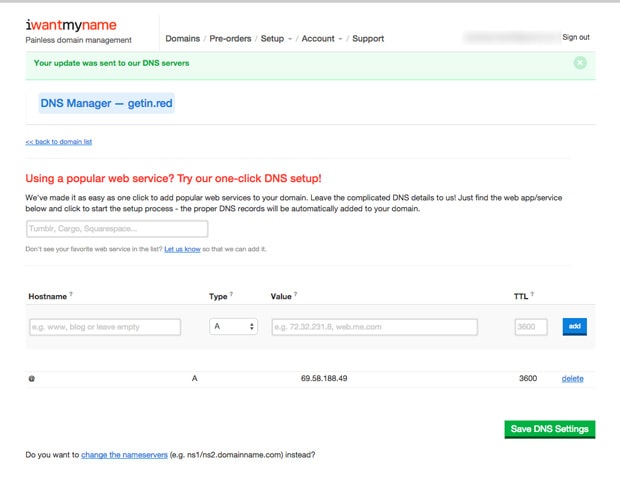
Quick Tip: Make sure the record type is set to A.
Next, wait 15 minutes to an hour for your changes to propagate (get updated across the web).
Finally, test your short link by trying to view it from a web browser. If it’s working correctly, the page will redirect to Bitly.
Step 4 – Verify DNS Changes on Bitly
Back on your Bitly custom domain settings page, click the Verify link.
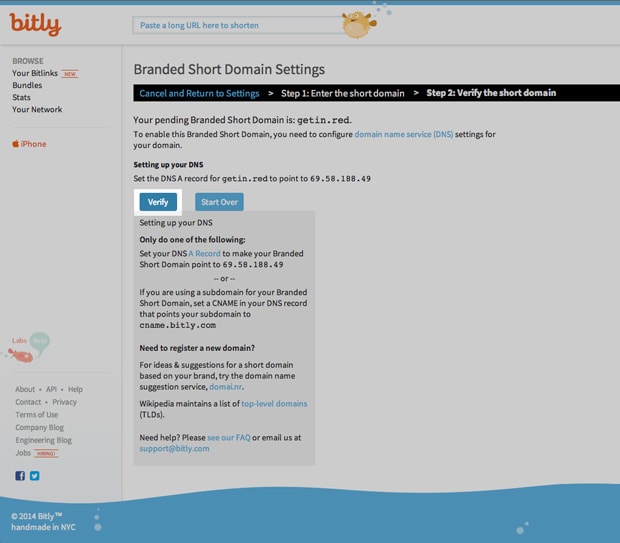
Refresh the page and your Custom Domain should be verified. AWESOME!
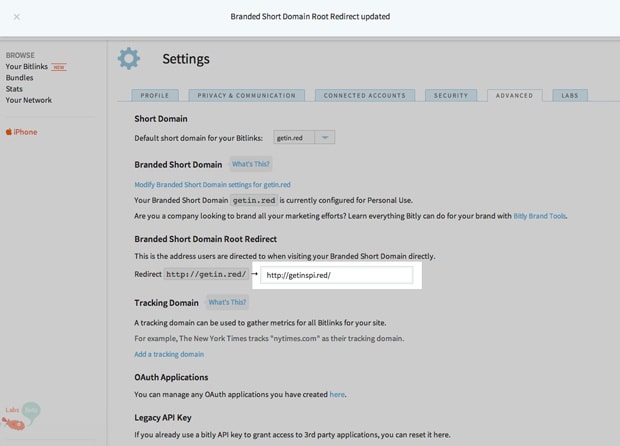
Step 5 – Redirect Branded Short URL to Your Website
You’re almost done! Now we just need redirect your shortened link to the home page of your website.
To do this, go to your Advanced Settings page and enter your site’s URL in the Redirect input field. Then click the Set Redirect URL button.
Step 6 -Test Your New Custom Short Link
To ensure all is working well, you’re gonna’ want to run a few tests on your new custom shortened URL.
Test Home Page Redirect
This first test is to verify that when anyone visits the “bare” short URL, it redirects to your site’s home page. For this test, just go to your short link in a web browser.
Side Note: Want to keep improving your site? Why not check out how to make a multi-resolution favicon? It’s really easy!
If you end up on your home page, all is well. Otherwise, you may need to go back to Step 2 and repeat/verify each step.
Test a Post On Your Site
OK, so this is the LAST STEP (and the most exciting)! To ensure your custom branded short URL is working, go to ANY post on your site (or another site) and click the Bitmarklet button from your browser’s Bookmarks Bar.
…this is the last step (and most exciting)!
Once clicked, you should see a popup that gives you your BRAND SPANKING NEW custom short URL! From there you can copy it and share it ’til your heart’s content.
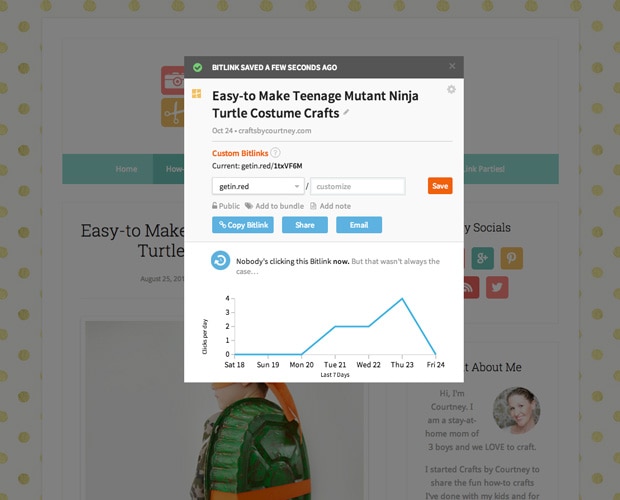
Quick Tip: You can also customize the characters at the END of your shortened link.
So that’s how you make your own custom branded short link. See…it wasn’t that tough. If you’ve stuck around until the end, be sure to let me know if this tutorial helped or if you have any questions.
Also, I’d love to see your custom short URLs. Let’s see how clever you are and share it below!