I am so excited to write my first post up for my new book, DIY Box Creations!! WOOHOO! This book is something that I am really proud of. My husband and I worked really hard coming up with all these unique ideas for the book.
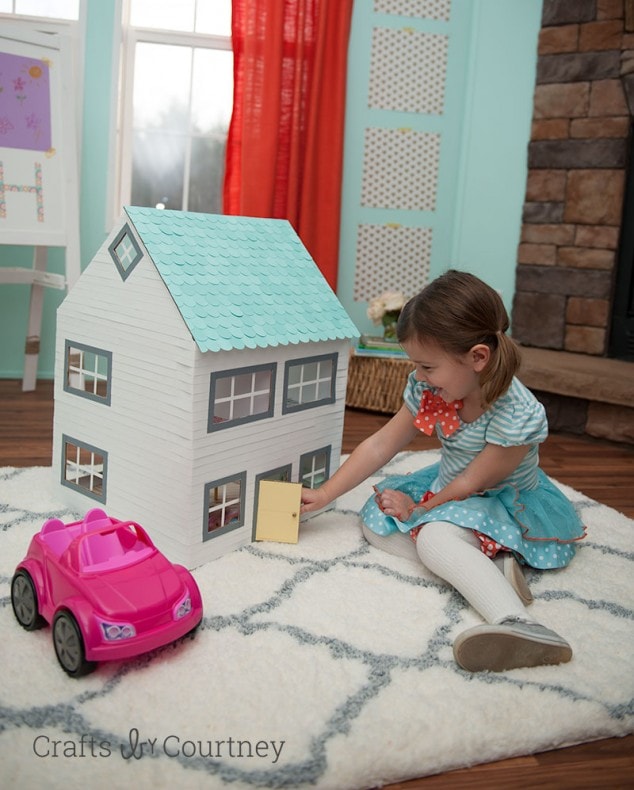
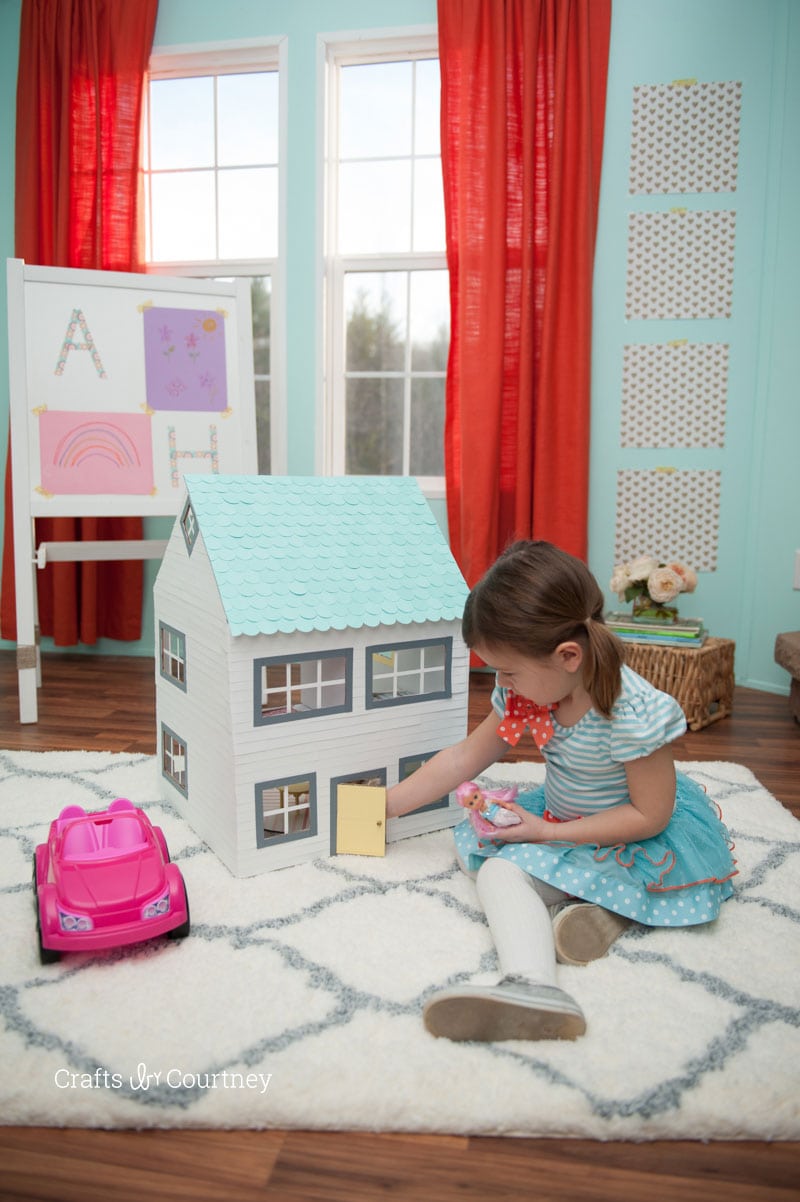
One of my favorite projects that I wanted to share was this cardboard box DIY Dollhouse we made. I just absolutely love it and had to share with everyone.
This tutorial is a little different then my usual tutorials, I’m not going into full details with this project. But I wanted everyone to get the basic idea on how to make this craft. For the full detailed tutorial you can grab my book, which has full details on every step.
After I made this dollhouse craft, I decided to make a diy cat house similar. Make sure to check that out too!
Ok, on to the details!
For this project you’re going to need:
- 1 16” x 16” x 15” Cardboard Box
- 1 Roll of Green Painters Tape
- 2 Glue Sticks
- Craft glue
- Hot Glue & Gun
- XActo Knife
- Cutting Mat
- Yardstick
- Standard Size Circle Punch
- 4 Push Pins
- 2 Small Beads
- Black Permanent Marker
- 4 Sheets of 12” x 12” Scrapbook Paper w/Various Patterns (2 w/same pattern) for
- Interior Walls
- Can of White Spray Paint
- 20 23 Sheets of 8 1/2” x 11” Cardstock for Siding and Inside Molding (Your Choice of
- Color)
- 4 Sheets of 12” x 12” Cardstock for Roof Shingles (Your Choice of Color)
- 1 Sheet of 12” x 12” Cardstock for Door and Inside Molding (Your Choice of Color)
- 1 Sheet of 12”x12” Cardstock for Outside Molding
- 4 Sheets of 8 1/2”x11” Wood Scrapbook Paper for Flooring
- 2 Small Plastic Beads
DIY DOLLHOUSE
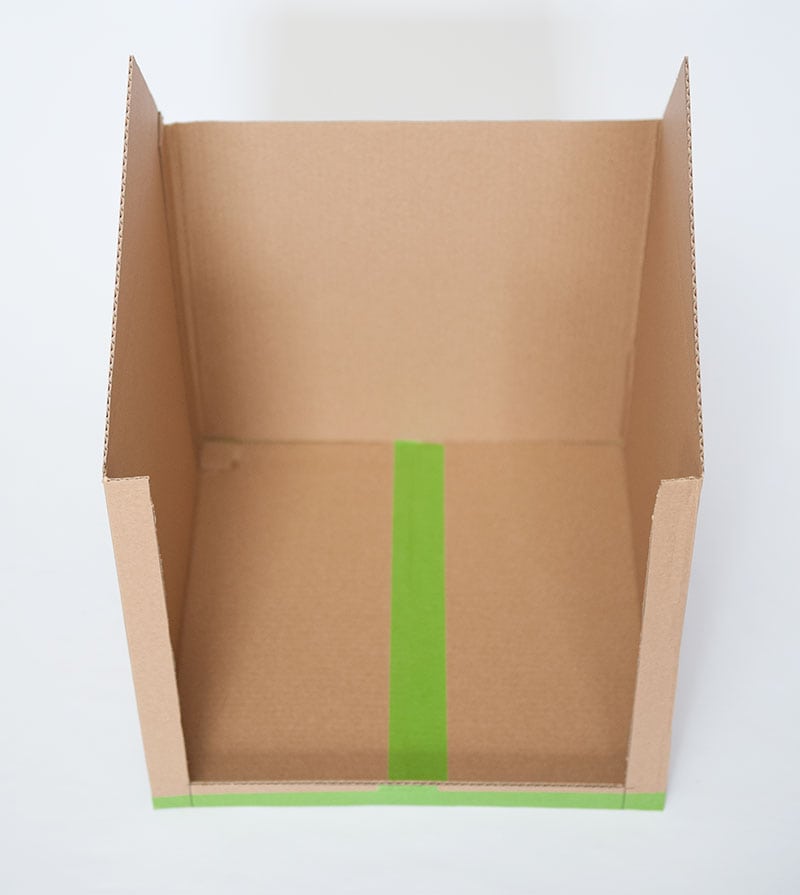
Step 1 – Create Your Dollhouse Shape
To create the top of your house, cut off opposing flaps from the top of your box. Next, draw out triangles on the remaining flaps. Then, cut the flaps with an XActo knife.
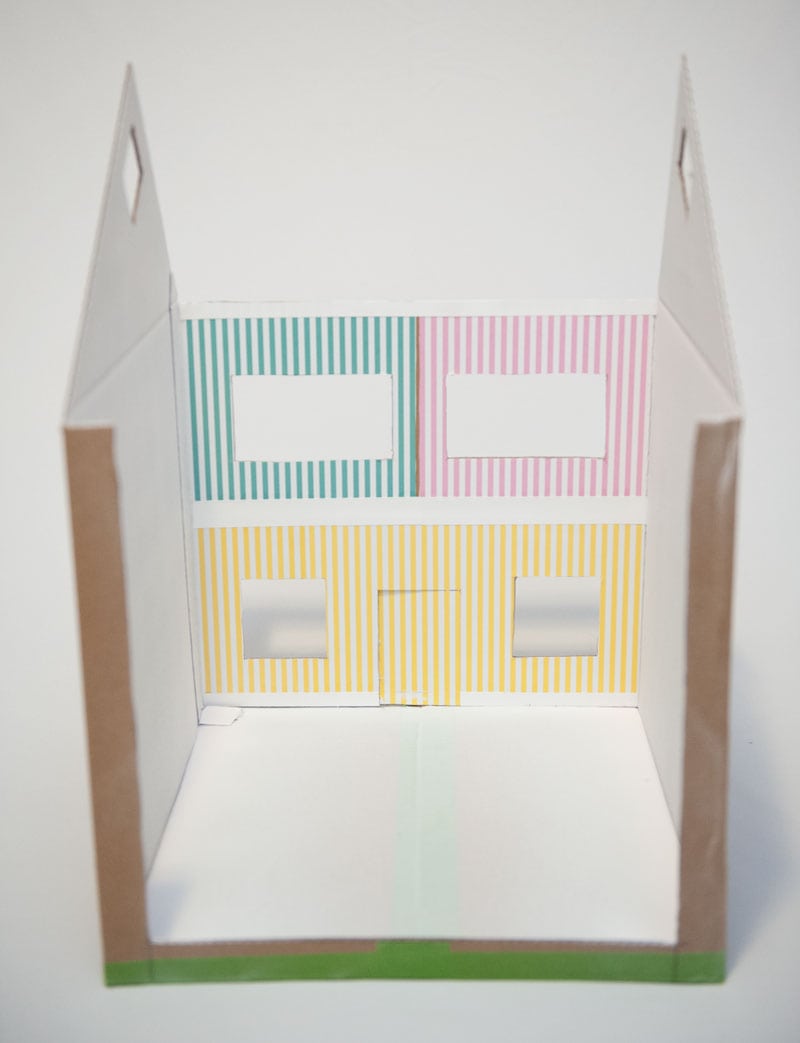
Now, flip your box over and cut opposing flaps from the bottom of the box and tape them together. This will create the bottom floor. Finally, cut an opening in the back of your dollhouse by cutting (leaving a 1” edge on the left, bottom and right of the box).
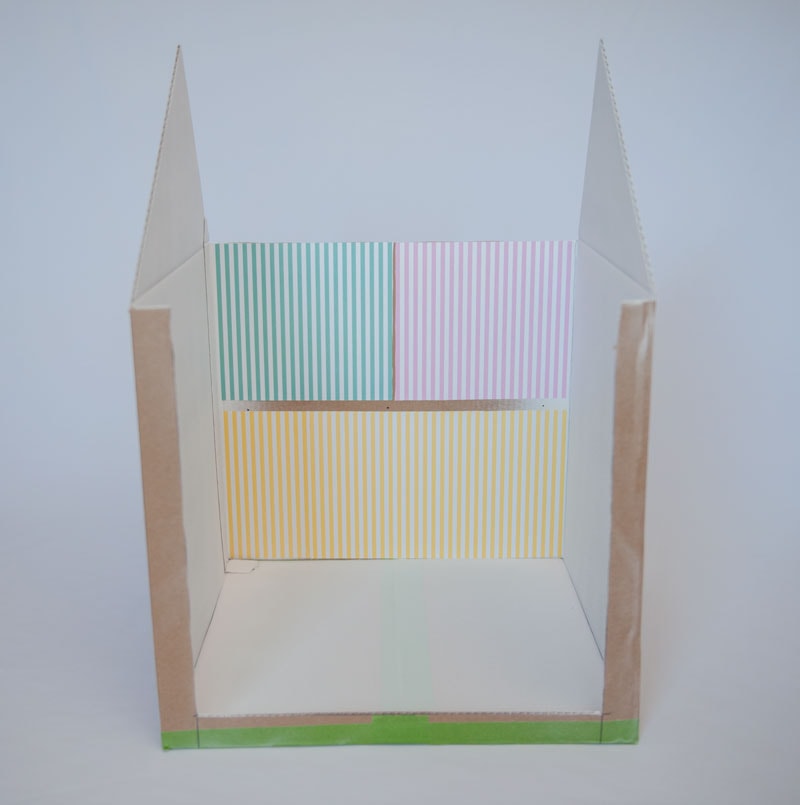
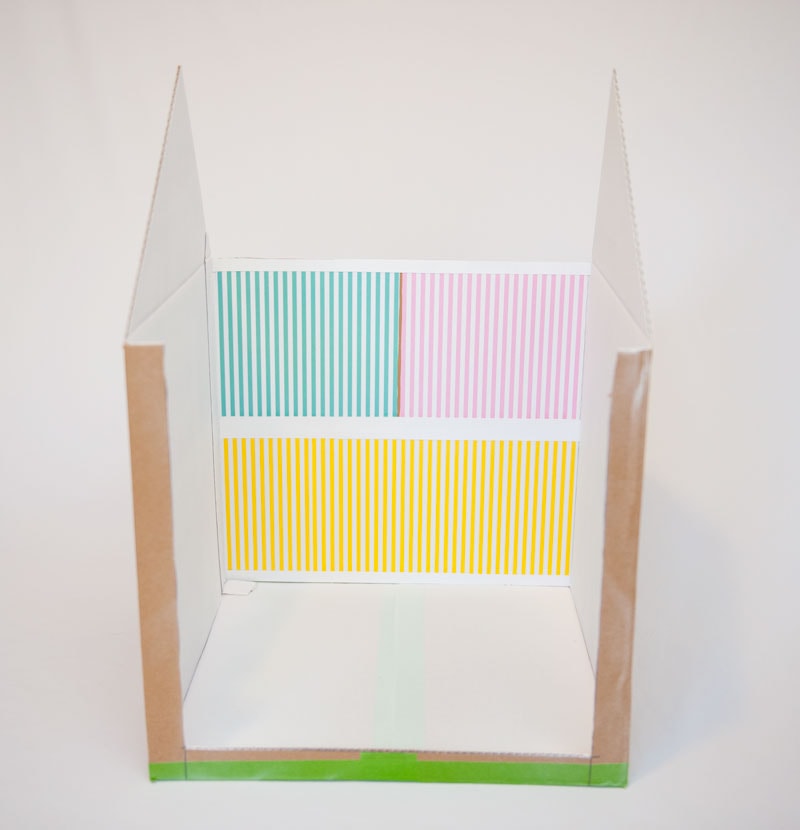
Step 2 – Paint and add Wallpaper
Now, let’s paint the interior walls by spraying 3 coats of white spray paint (add more if needed) into the box on the left, back and right. Be sure to spray all the way to the top and the sides. Let each coat dry 10 minutes and final coat dry at least an hour before handling.
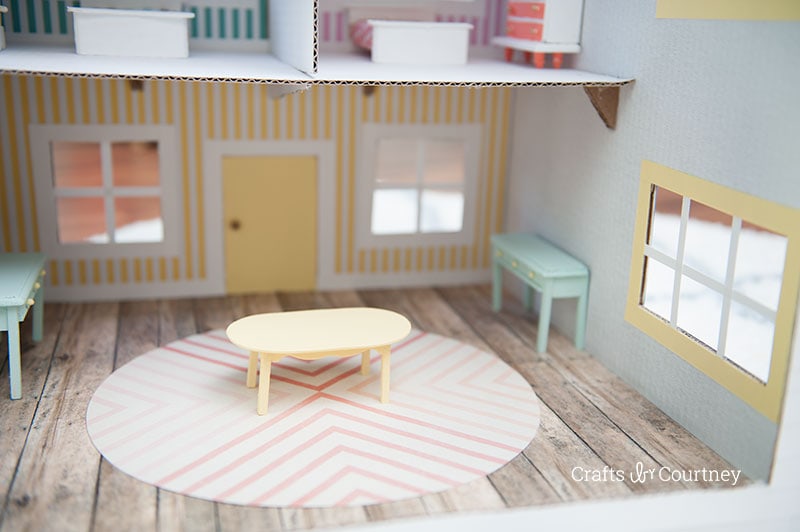
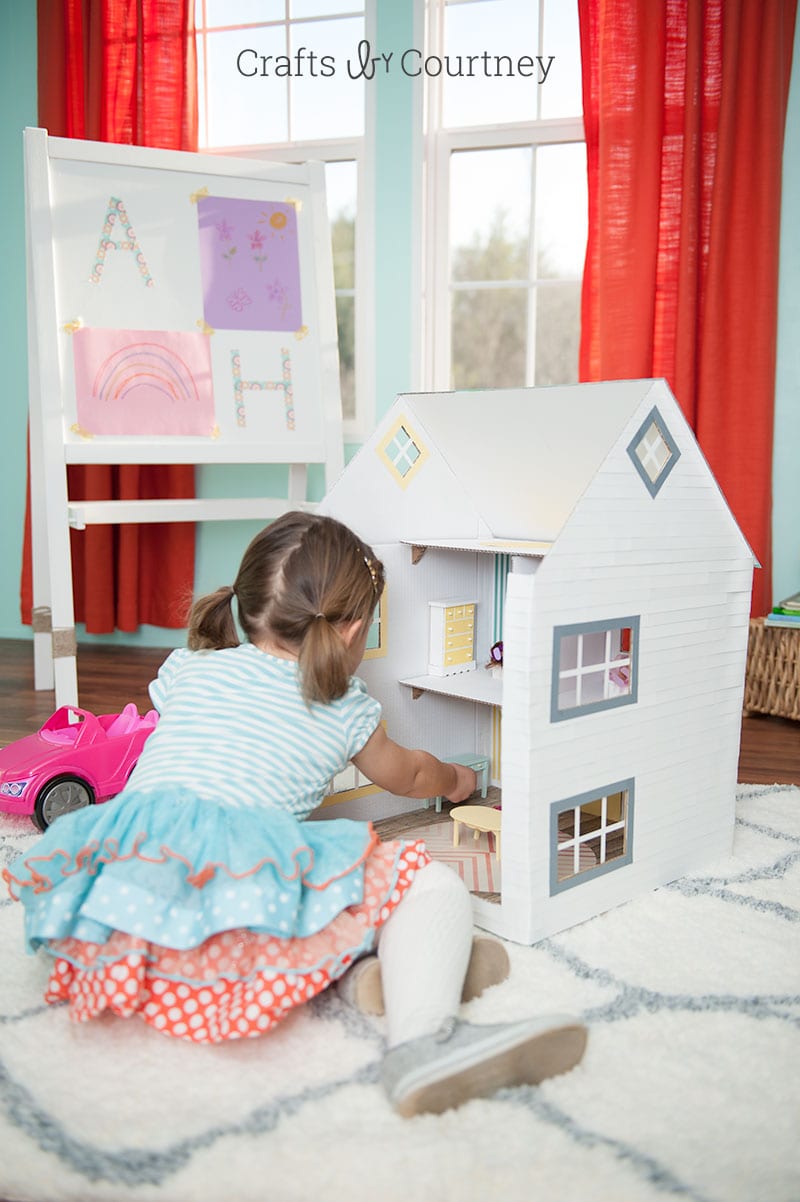
Add interior wallpaper and baseboards. To make your wallpaper, cut 2 sheets of patterned scrapbook paper to 8” x 8”. Then, cut the other 2 sheets to 8” x 12”.
Step 3 – Add Windows and Doors
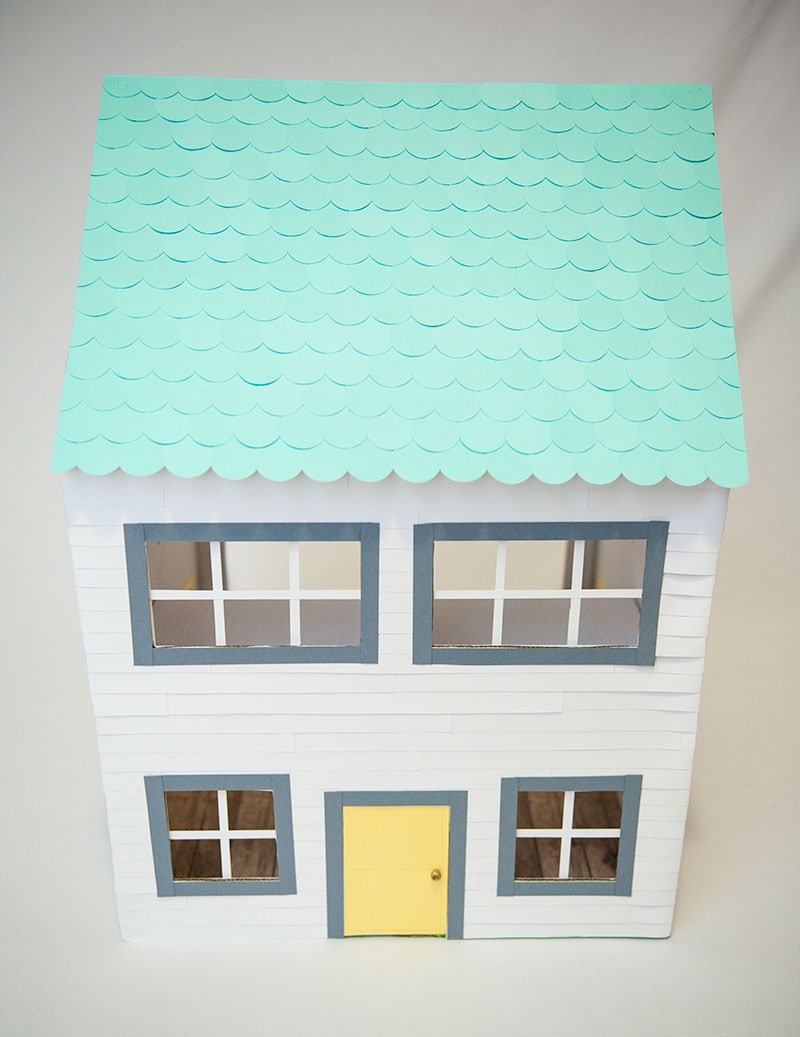
Time to create the doors and windows! First draw out the front door to 3” x 4 1⁄2” and cut the top, left and bottom using an XActo knife. Then the draw and cut out your windows.
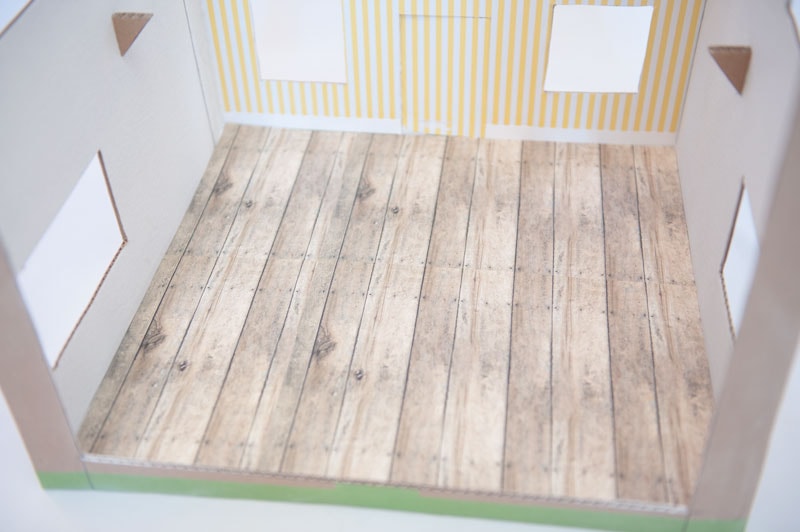
Step 4 – Flooring
I found the perfect wood scrapbook paper at Hobby Lobby. I used this for the flooring, add by using a little glue to keep in place.
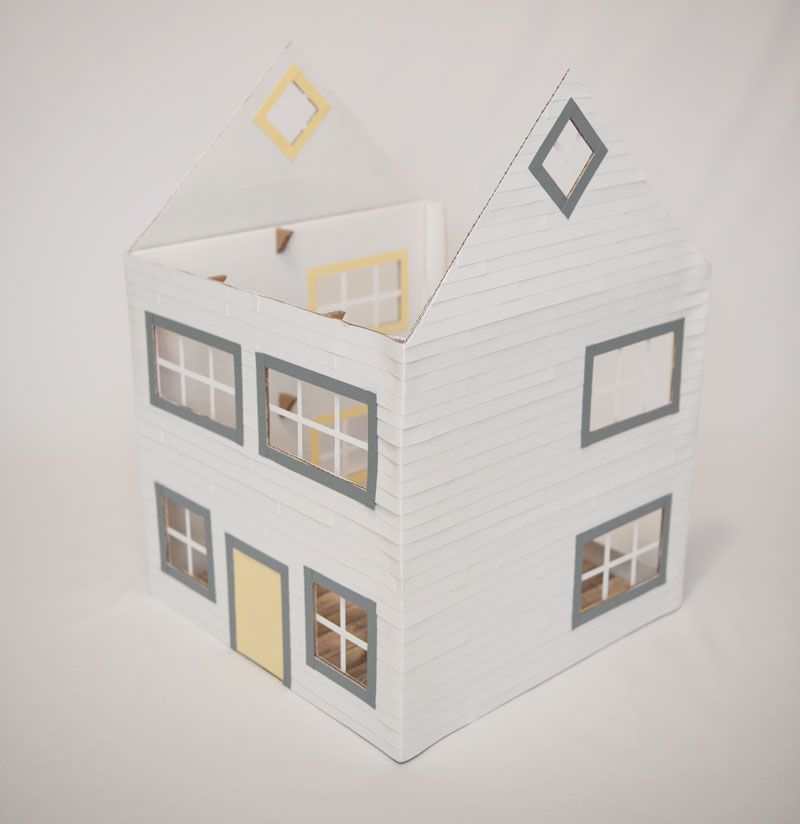
Step 5 – Add Siding and Window Frames
To create your siding, cut 15 sheets of your cardstock into 1” thick strips. Then glue them around the dollhouse using a glue stick. Start from the bottom and go around the house in a single row. Repeat going up until the dollhouse is covered in cardstock siding.
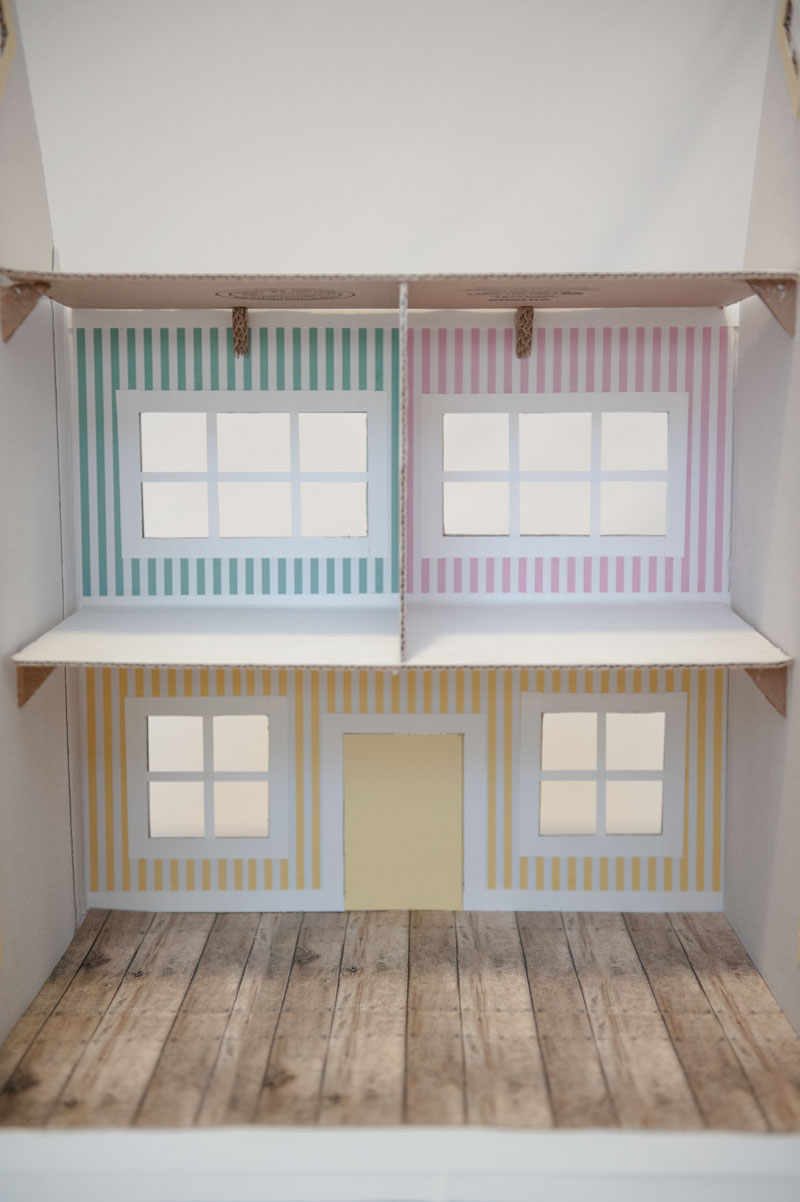
Step 6 – Add Upper Floors and Wall Partition
Now let’s get our upper floors and wall partition installed. To do that, piece together the 2nd floor and wall partition. Then, hot glue the floor to each floor support. You can also add a dab of hot glue to the top of the wall partition touching the dollhouse.
Next, hot glue the top floor to each of the remaining floor support. You can also add a dab of hot glue to the top of the wall partition on the other side touching the top floor.
Step 7 – Create and Attach Roof
Cut a scrap piece of cardboard to fit to the part of the dollhouse. We punched out LOTS of circle for the roof.
Next, glue them to the top of your roof using craft glue (starting from the bottom left and going right, then repeat going up). Each row is about 16 shingles and there are about 15 rows.
Now firmly place you roof on the dollhouse using hot glue to keep in place.
Finishing Touches
Now you’ve finished your dollhouse. I think I’m ready to move in, how ‘bout you? Your kids will have fun in their own make believe world inside this dollhouse.
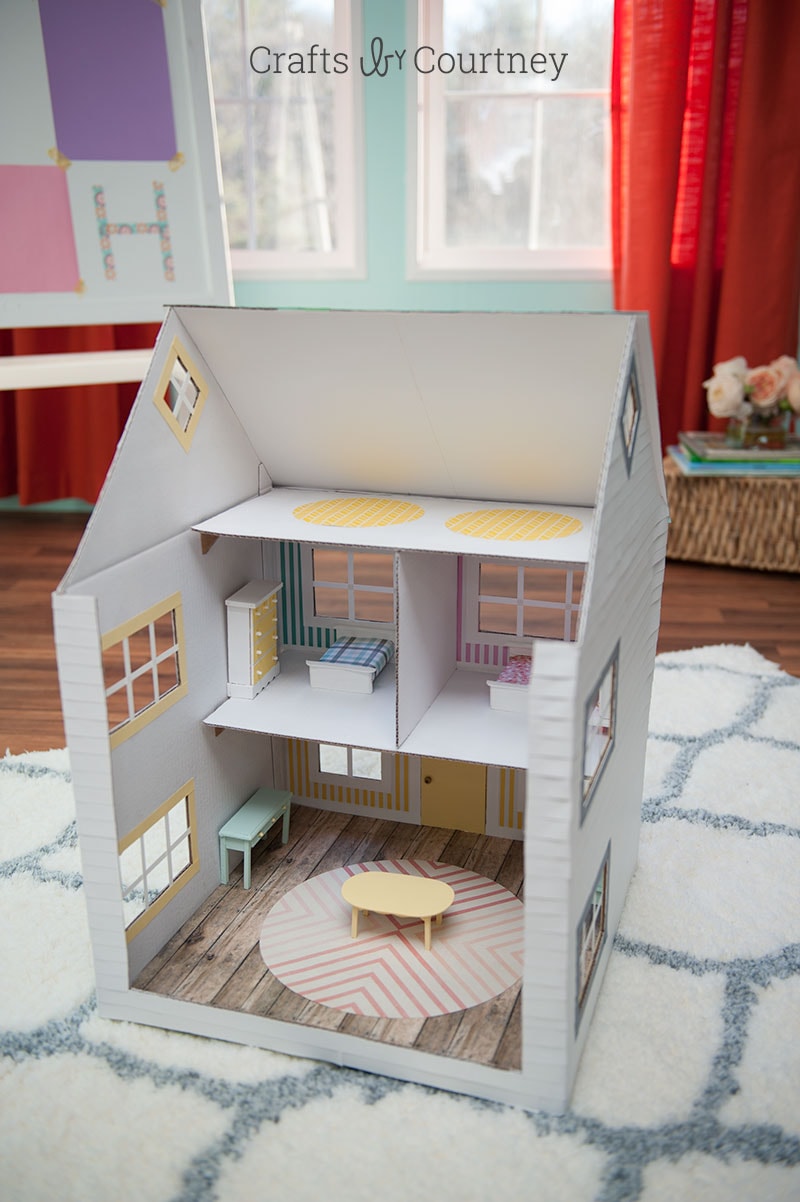
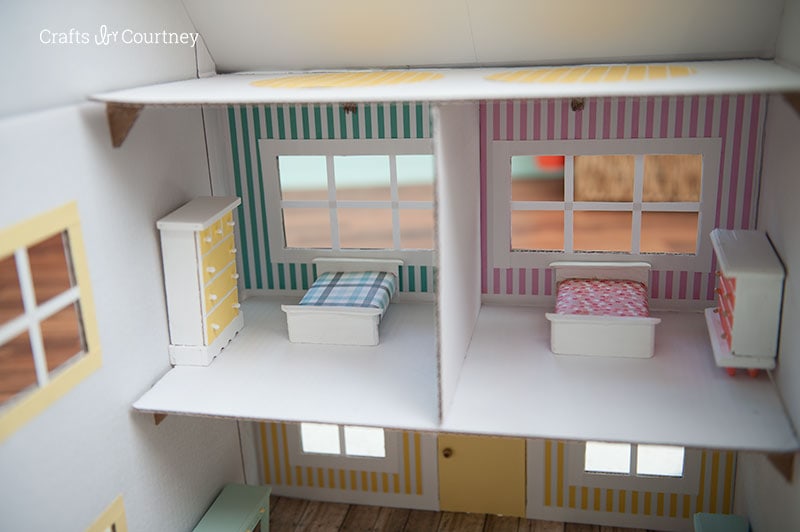
You can start adding all your own personal details to your dollhouse. I found these cute pieces of wood furniture at The Dollar Tree. I gave them a little makeover!
Create the dollhouse of your dreams with some scrapbook paper and a cardboard box! You can get as creative as you want with your rooms in this dollhouse. Don’t forget to add all your details like furniture, rugs, and pictures to get the perfect dollhouse look!
One of my close friends daughter was my model for this photoshoot. She did such a great job!
For full details on how to make this Dollhouse Craft, check out my DIY Box Creations book. Plus I have many many more DIY cardboard box craft ideas for ya!
looking for more dollhouse craft ideas, then check out a much easier one I did for Mod Podge Rocks! Both were a lot of fun to work on.
Love, Courtney