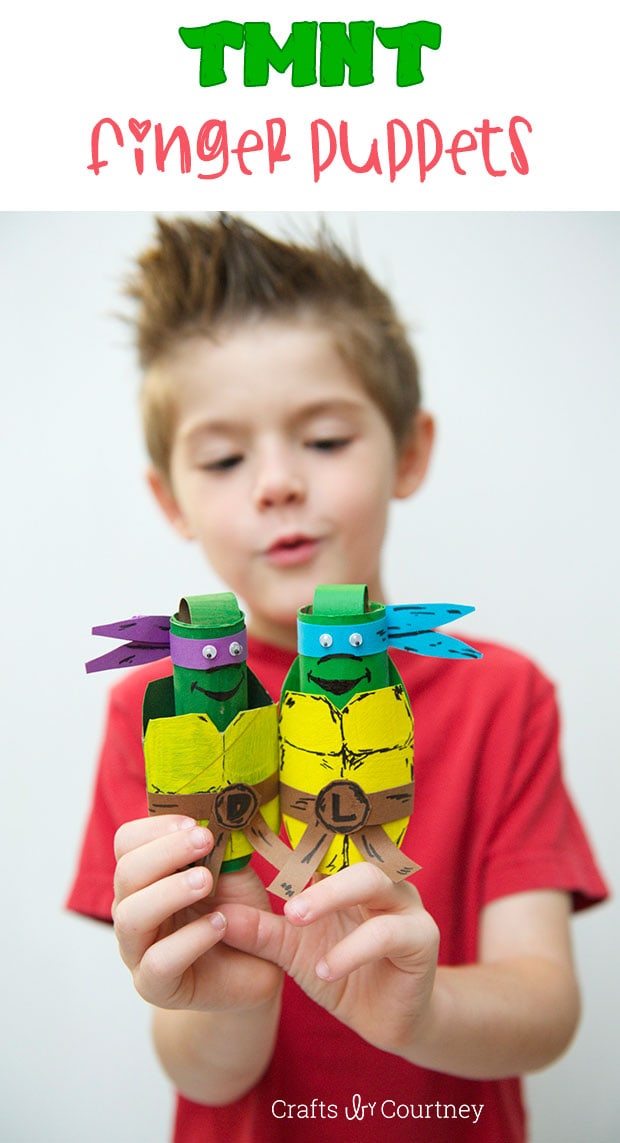
YES!!! The new Teenage Mutant Ninja Turtles movies is coming out!
In honor of the newest Ninja Turtle movie, Courtney thought it would be fun to make a few TMNT crafts.
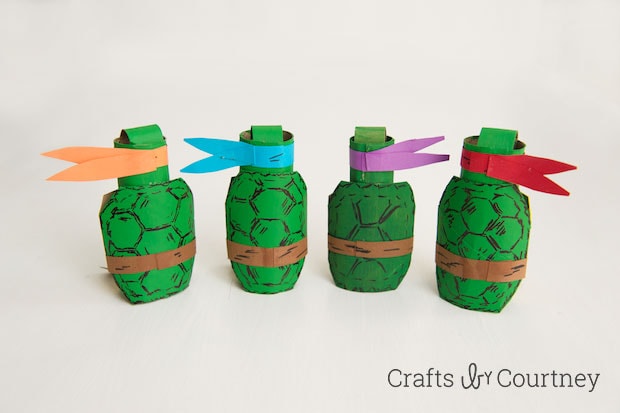
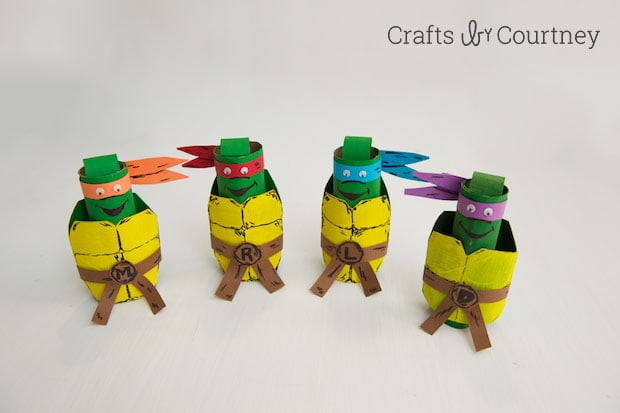
She made toilet paper roll Teenage Mutant Ninja Turtles (for younger kids). I’m making some TMNT finger puppets for older kids (like 7 and up).
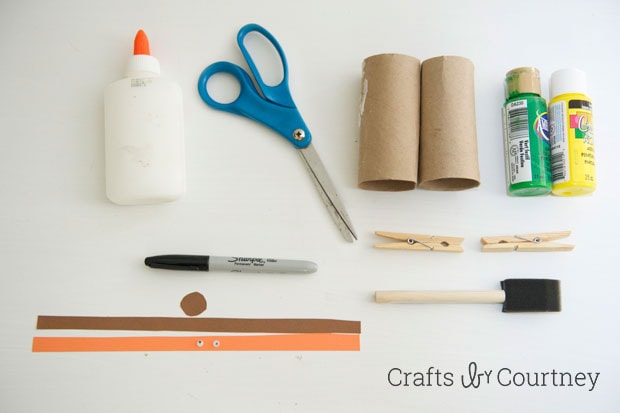
Getting Started
This Ninja Turtle finger puppet craft is GREAT for kids in elementary school! With some creativity and colored cardstock, they’ll be making their own finger puppet Ninja Turtles!
Step 1 – Create Your TMNT Mask and Belt
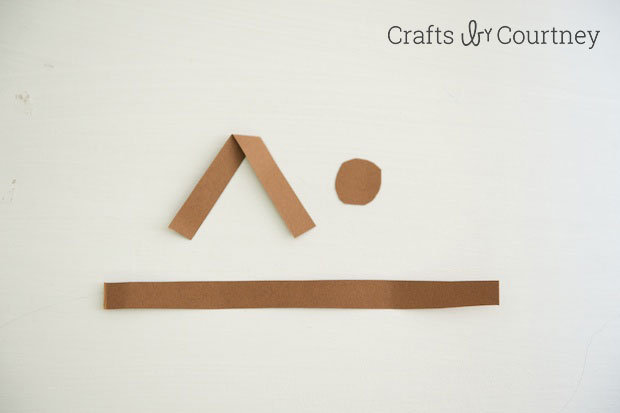
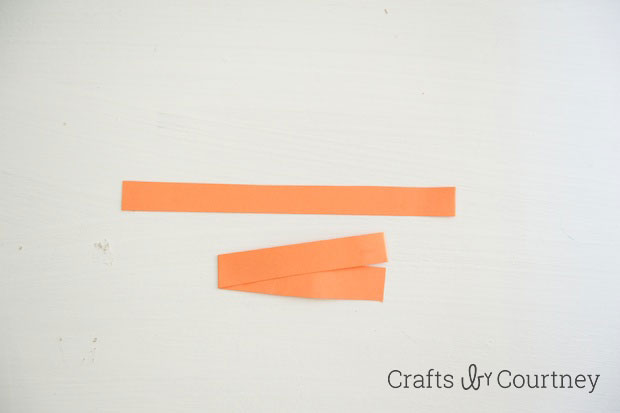
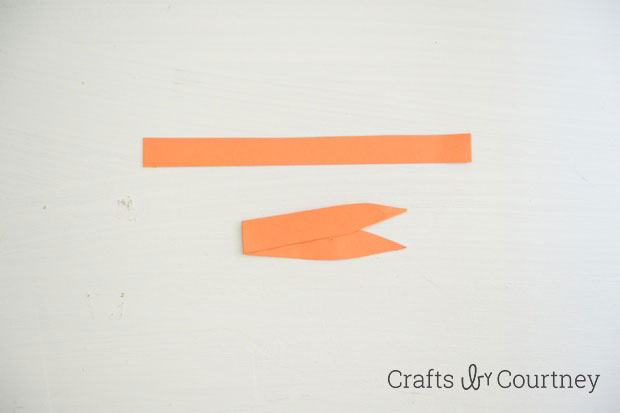
Cut Your Belt and Mask Pieces
Take your colored cardstock (brown and blue/orange/purple/red) and cut EACH of them into a thin strip. One is for the mask, the other is for the belt and buckle.
For the belt, you’ll need 3 pieces (belt, tassels and buckle). For your mask, you’ll need a piece for the tassels and the mask.
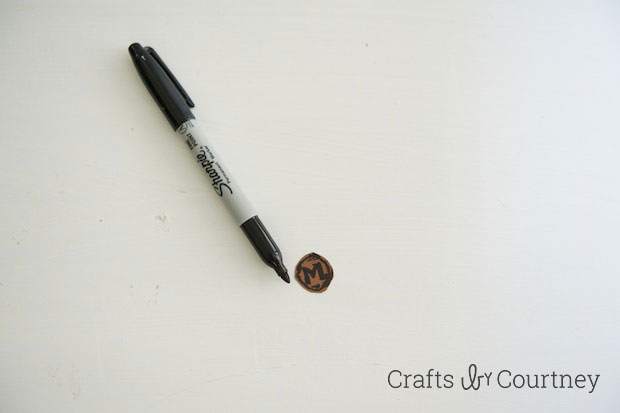
Draw Your Belt and Mask Details
On your belt, draw the LETTER of the Ninja Turtle you’re making in the center of the buckle. Now, draw some creases on your mask, belt and tassels.
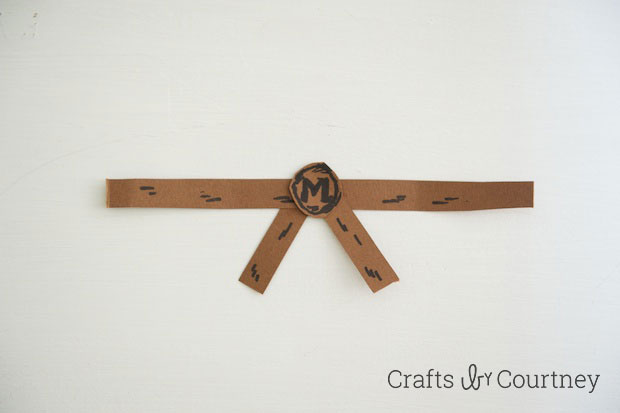
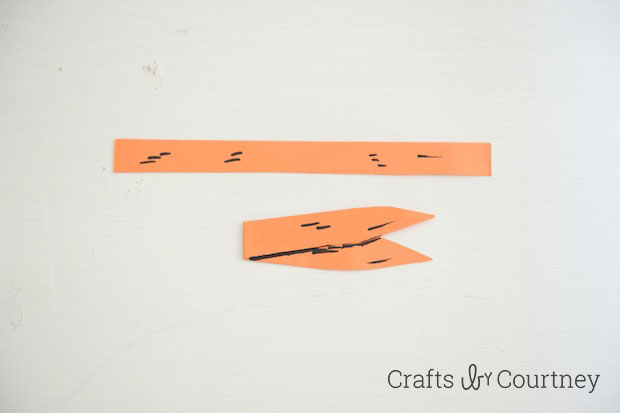
Quick Tip: Draw your creases to look like folds/shadows in your mask and belt. DON’T OVERDO IT.
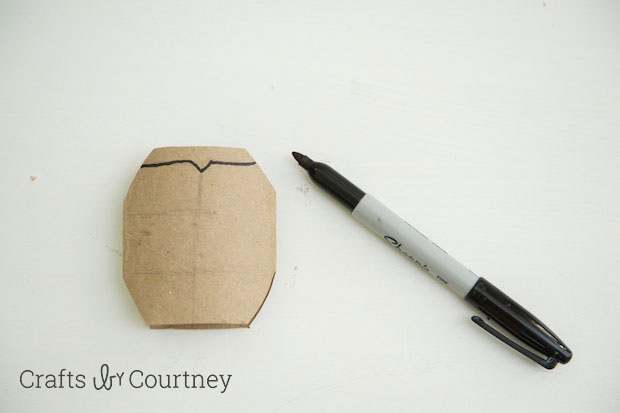
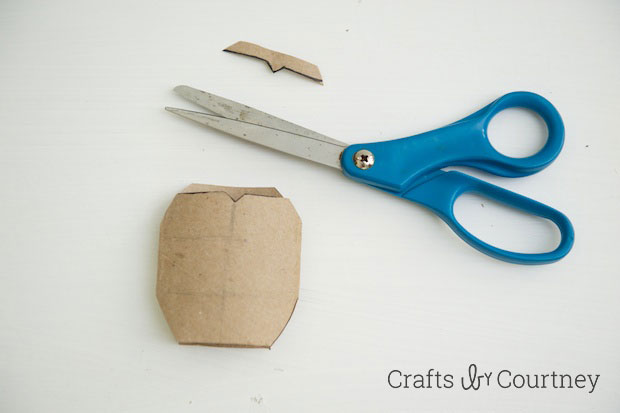
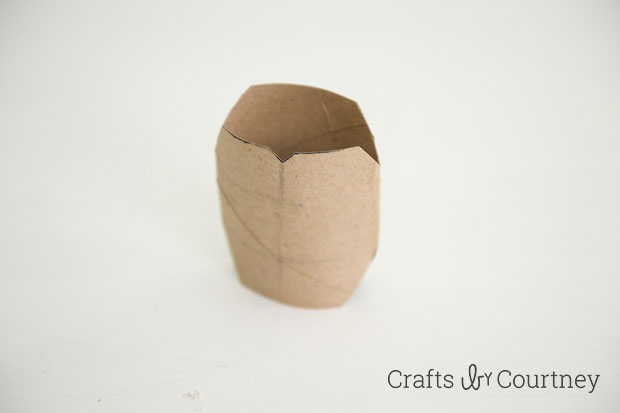
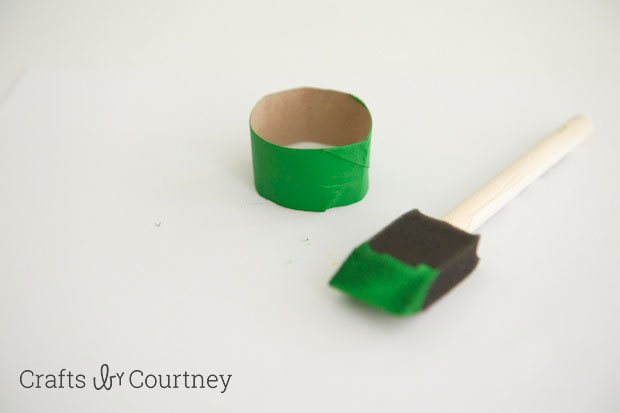
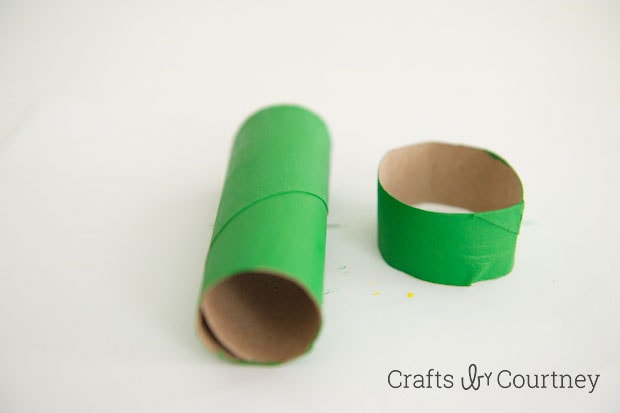
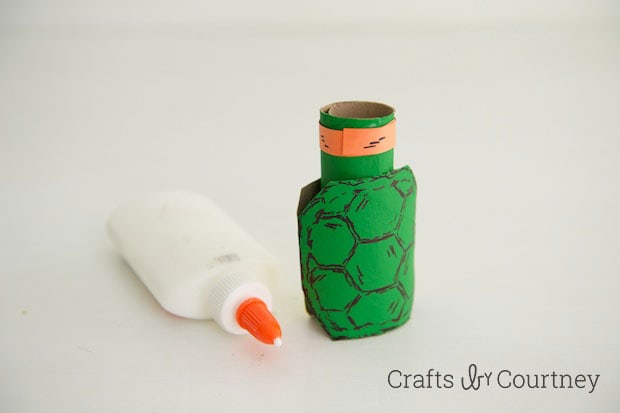
Step 2 – Create Your Ninja Turtle Shell
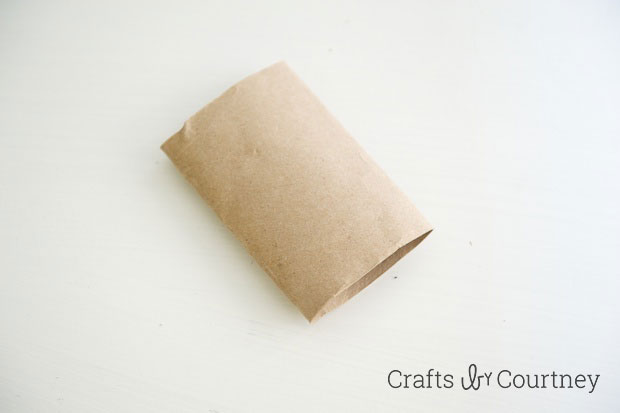
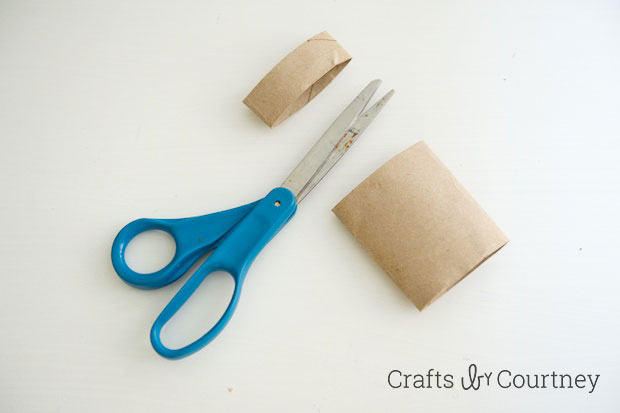
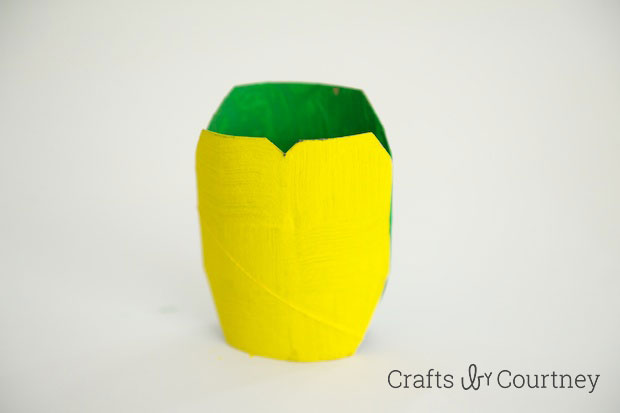
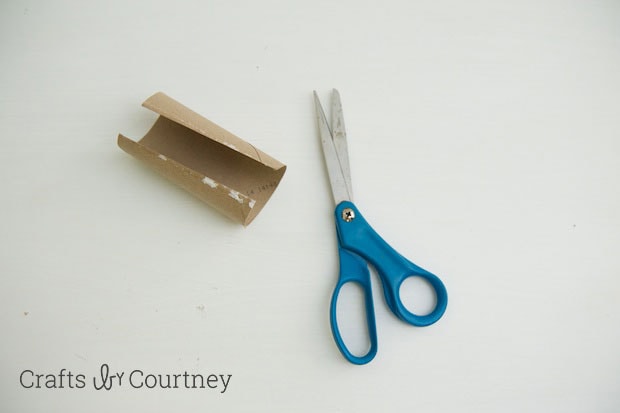
Cut Your Shell
With the 1st toilet paper roll, flatten it and cut about 1 inch off the TOP of it (this will be the top of your Ninja Turtle’s head).
Then, cut the chest shape into the FRONT and the shell shape onto the BACK of your toilet paper roll.
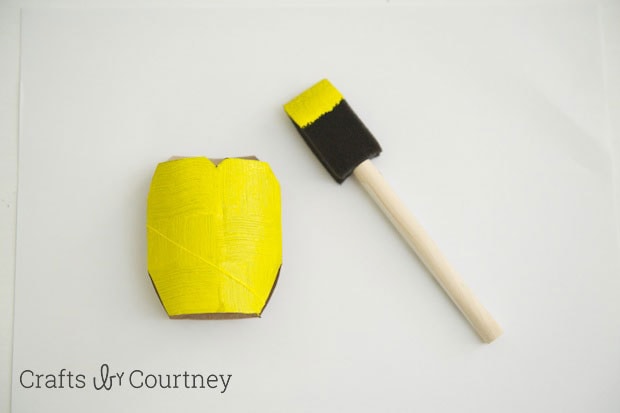
Paint Your Shell
Paint the chest of the shell yellow and the back of shell green. Also, paint the inside/top/bottom of the BACK shell green too! Let dry 15 – 25 minutes.
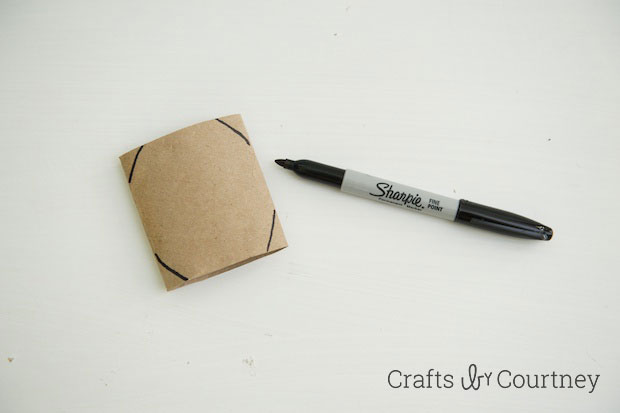
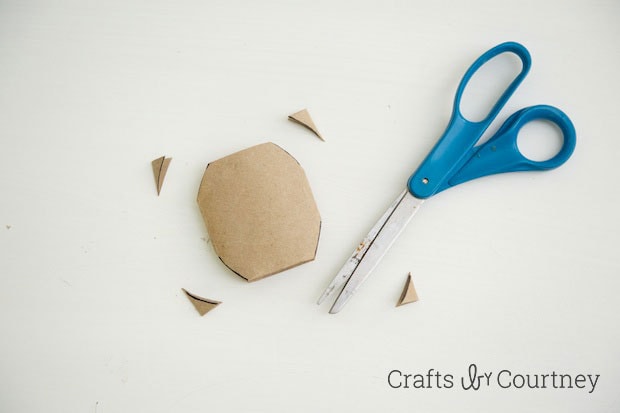
Draw Your Shell’s Details
When dry, draw in the shell details. For the chest, loosely draw 4 or 6 rounded squares with your marker. For the BACK of your shell, draw in your shell pattern and edges.
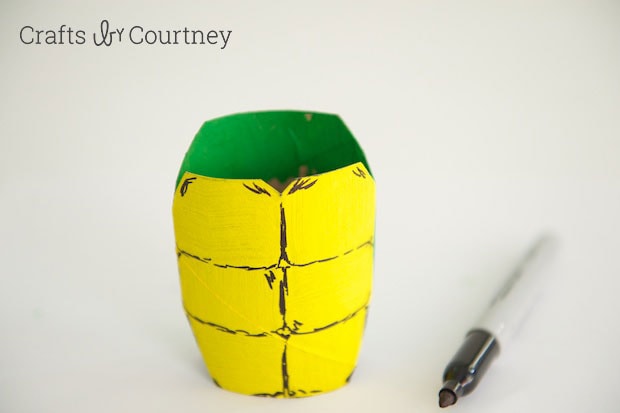
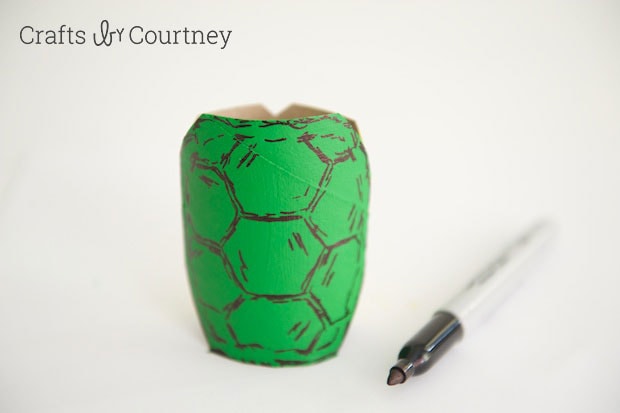
Quick Tip: For the back shell, start with a hexagon in the CENTER and work your way out.
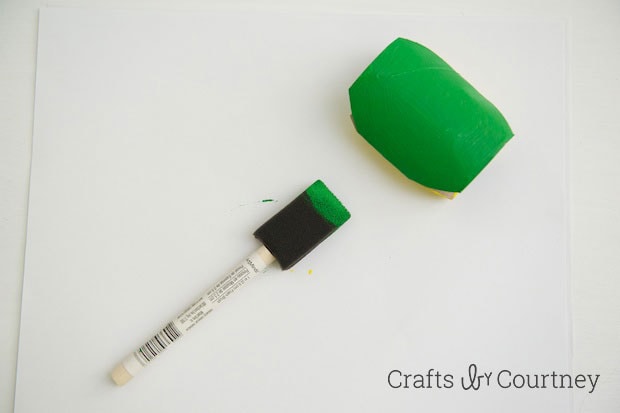
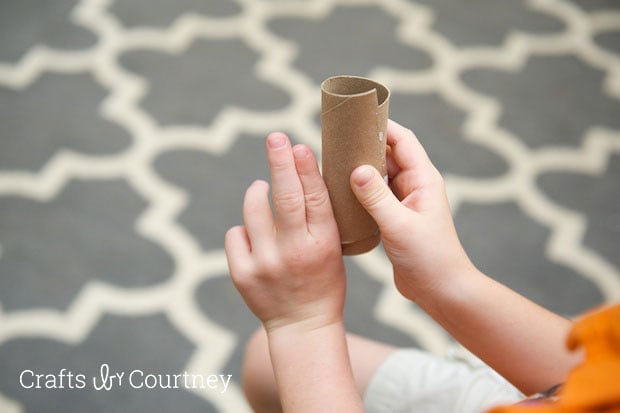
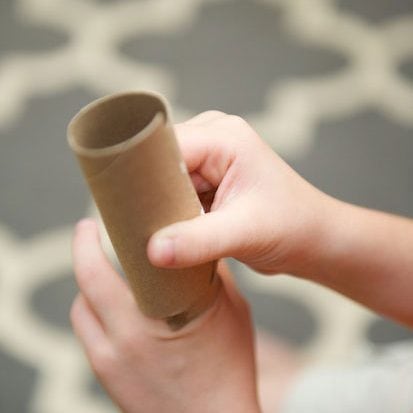
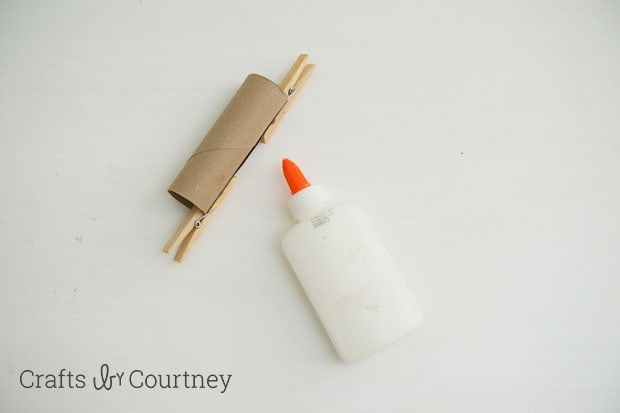
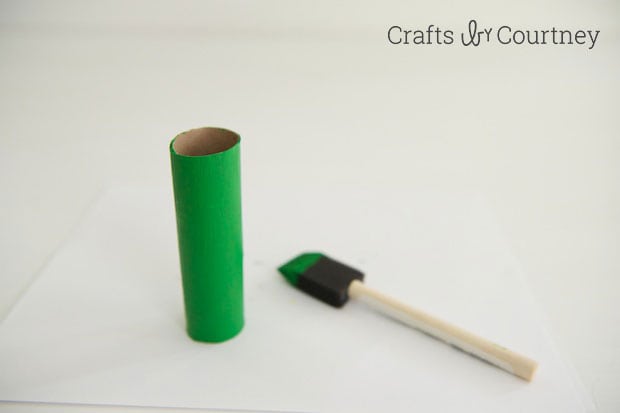
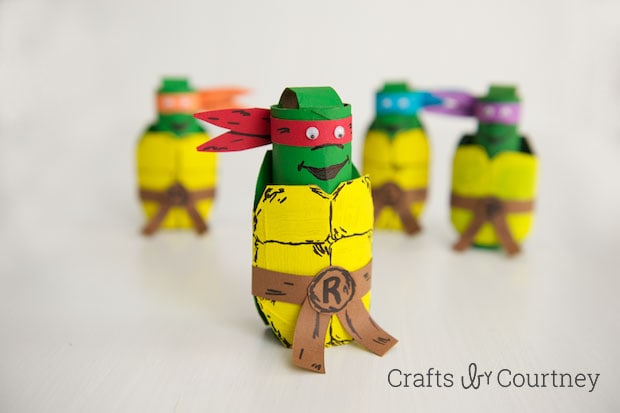
Step 3 – Create Your Turtle’s Head
Cut and Glue Head
With your second TP roll, cut and roll it to the size a little bigger than your kid’s index and middle fingers together. Then, glue and SECURE with clothespins. Let dry 15 – 25 minutes.
Paint Your Turtle’s Head
Now, paint your Ninja Turtle’s head and crown green. Let dry 15 – 25 minutes.
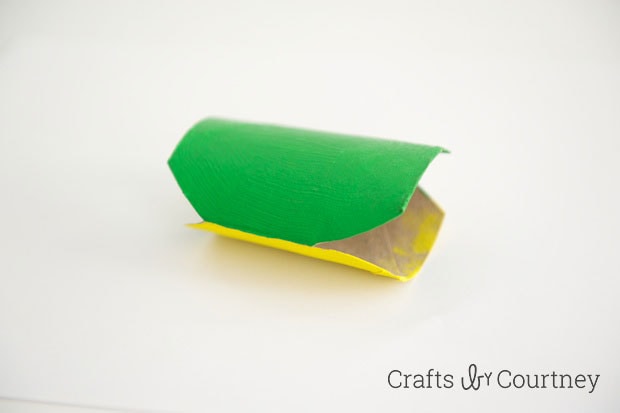
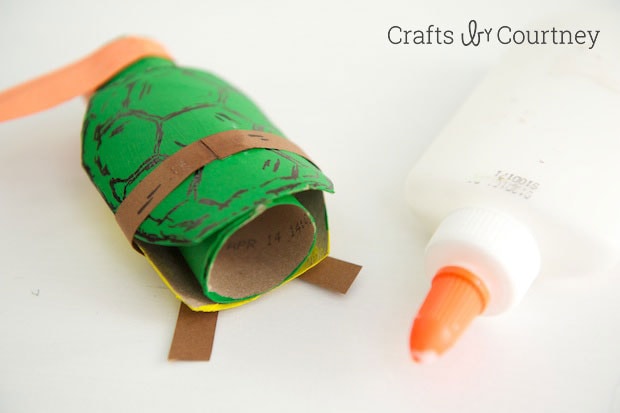
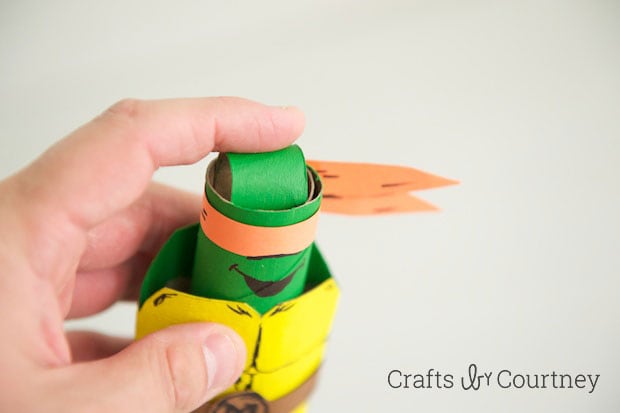
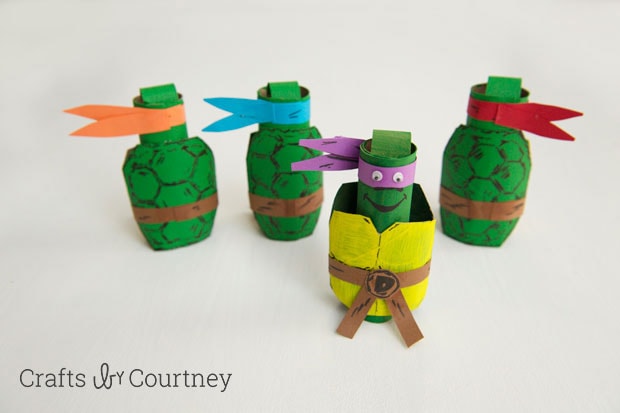
Step 4 – Glue TMNT Head to Inside of Shell
We’re getting so close to a Teenage Mutant Ninja Turtle puppet. This is SO COOL!
…so close…This is SO COOL!
To create our Ninja Turtle’s body and head, add glue to the insides of your shell. Next, slide in your turtle’s head and pinch together for a few minutes. Let dry 15 – 25 minutes.
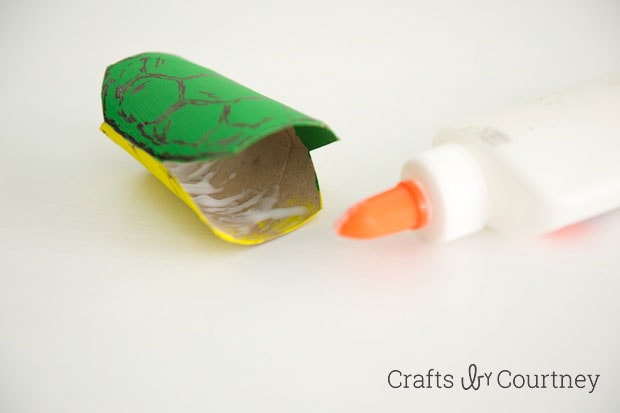
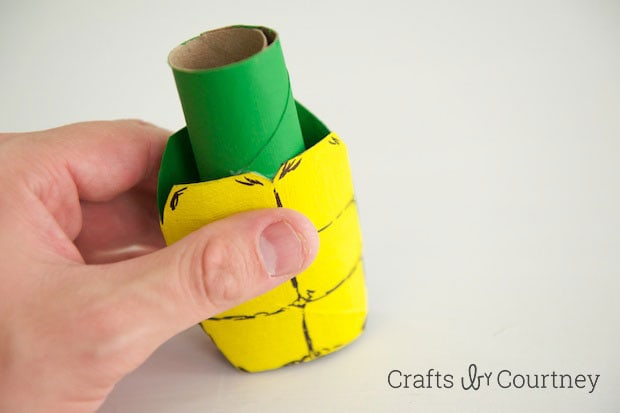
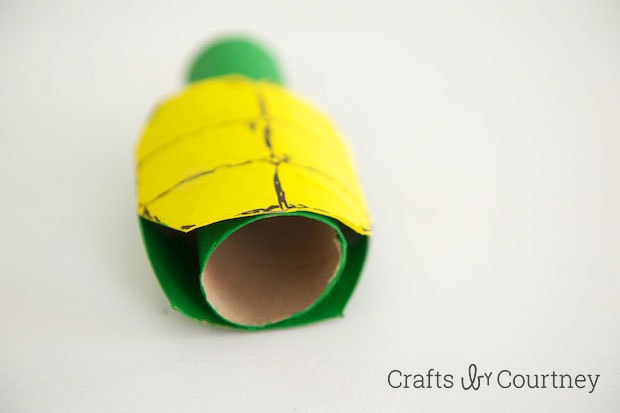
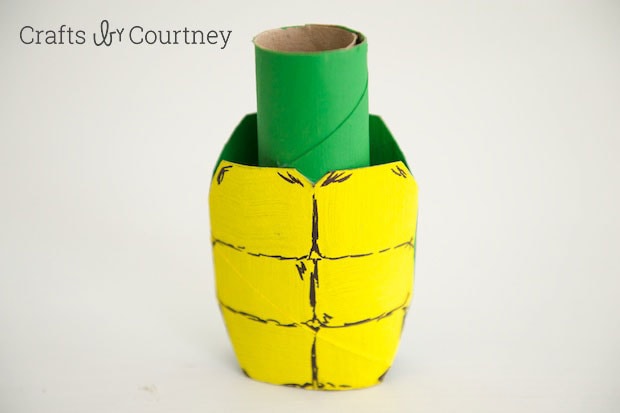
Quick Tip: Ensure the bottom of the shell and head are even. If done correctly, your Ninja Turtle should be able to stand upright.
Step 5 – Glue Mask and Belt to Ninja Turtle
Glue Your Mask
Now, add your mask by wrapping it around the TOP of your turtle’s head (leave a small gap) and glue the ends together.
Then, take your tassels and glue them to the back of the mask. Secure with a clothespin. Let dry 15 – 25 minutes.
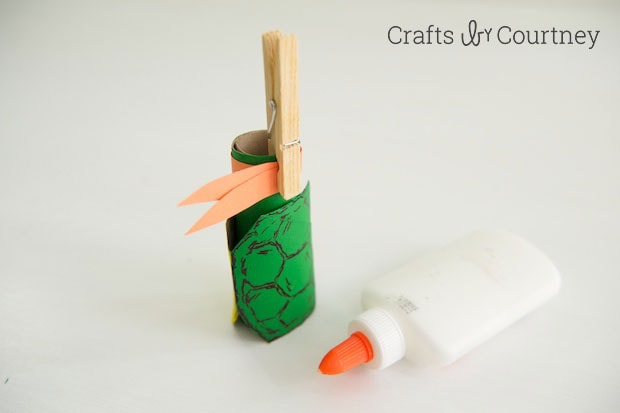
Quick Tip: For the perfect effect, draw a shadow under the top tassel with your marker.
Glue Your Belt
For the belt, wrap it around the LOWER-half of the shell and glue the ends. Next, glue your belt’s tassels and buckle to the front of the belt. Let dry 15 – 25 minutes.
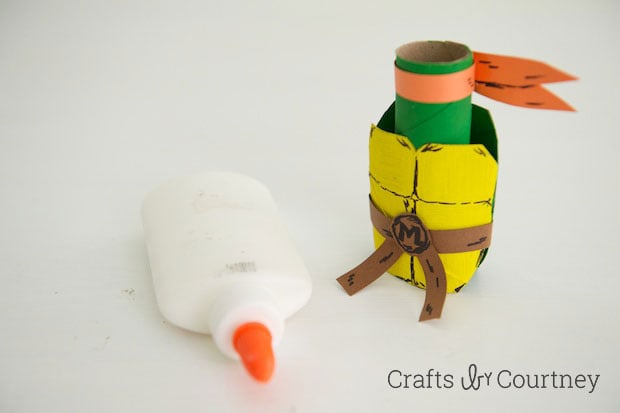
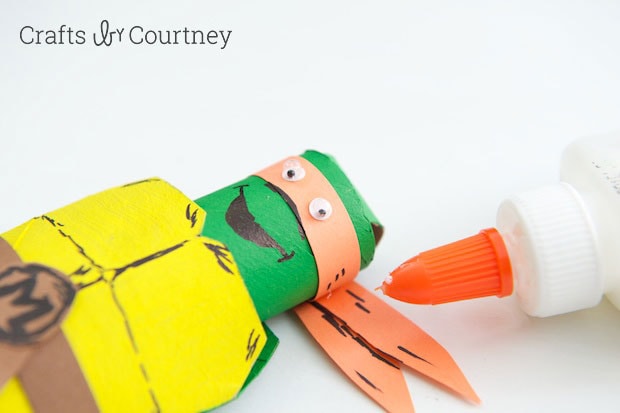
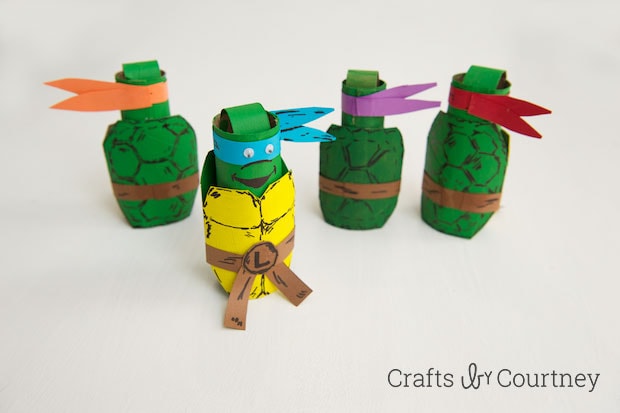
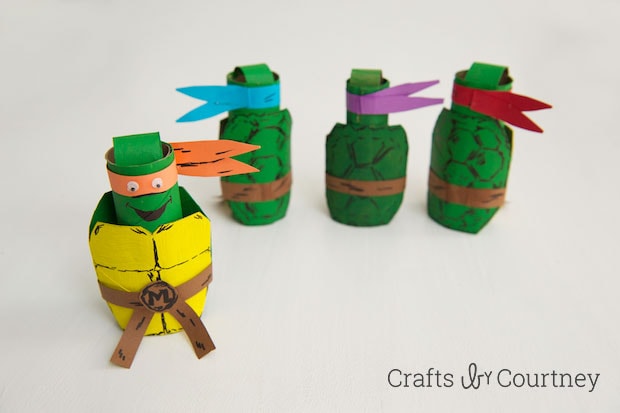
Step 6 – Create Your Ninja Turtle’s Face
To complete our TMNT finger puppet, draw on the nose and mouth of your Ninja Turtle. Next, push your turtle’s crown into the TOP of his head.
Finally, glue your googly eyes to the FRONT of the mask. Let dry 15 – 25 minutes.
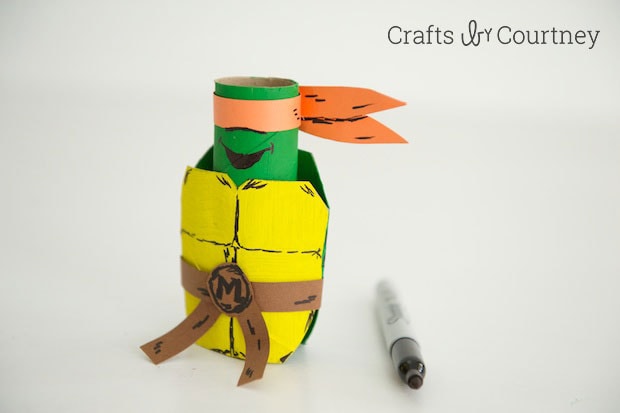
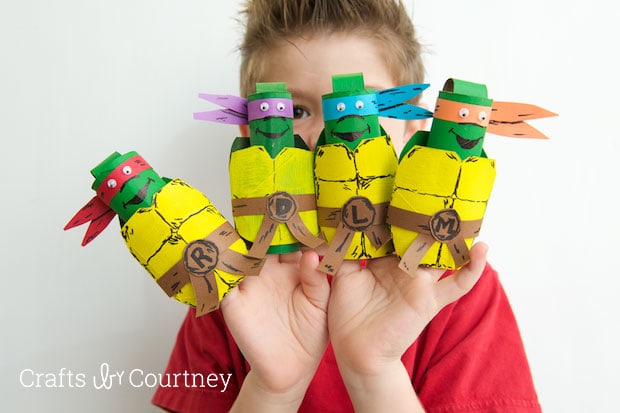
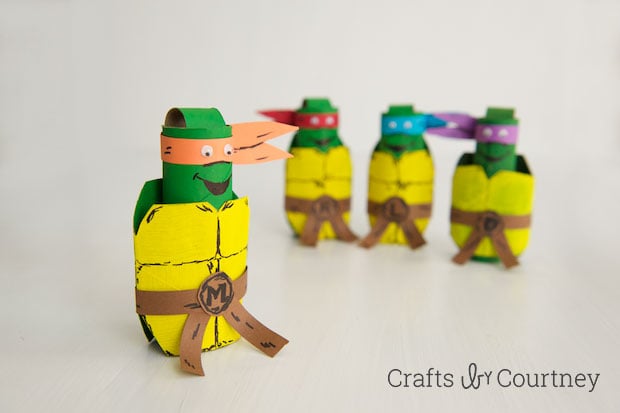
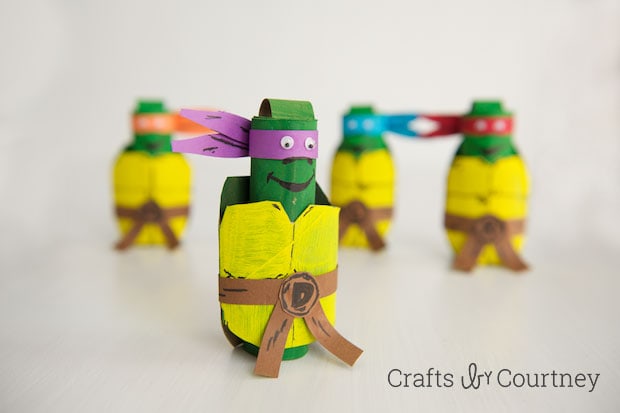
Our Finished Ninja Turtle Finger Puppets
Now, it’s time to play!!! Get your little one’s fingers ready for some TMNT finger puppet FUN!
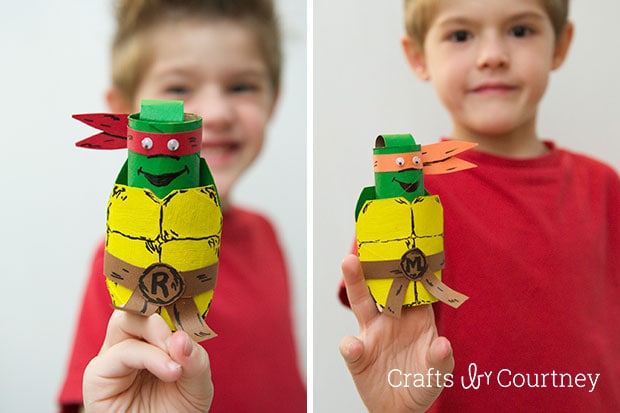

How cool was that Teenage Mutant Ninja Turtle craft!?! It makes want to say, “Cowabunga!”
I hope you enjoyed these TMNT inspired finger puppets! I bet your kids will have great time with ’em (our boys sure did). If you liked ’em, let us know in the comments!