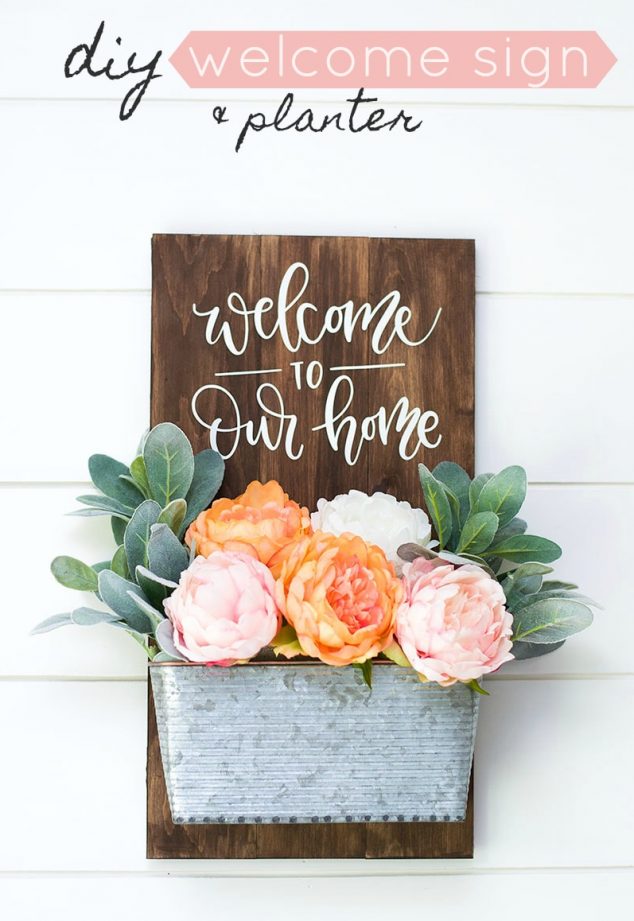
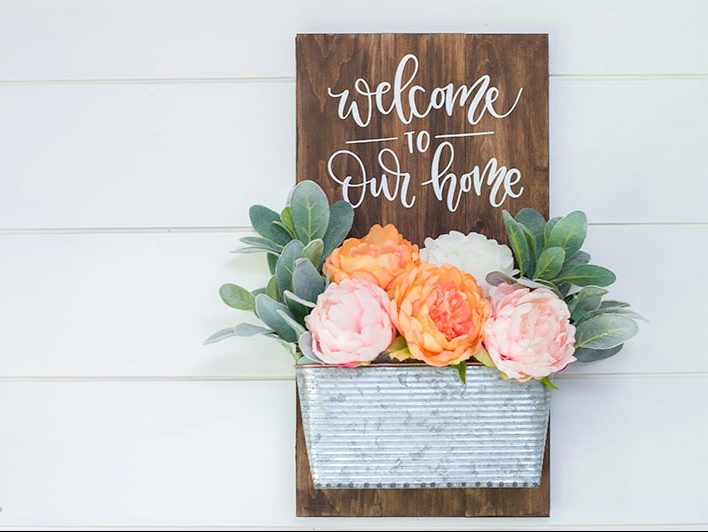
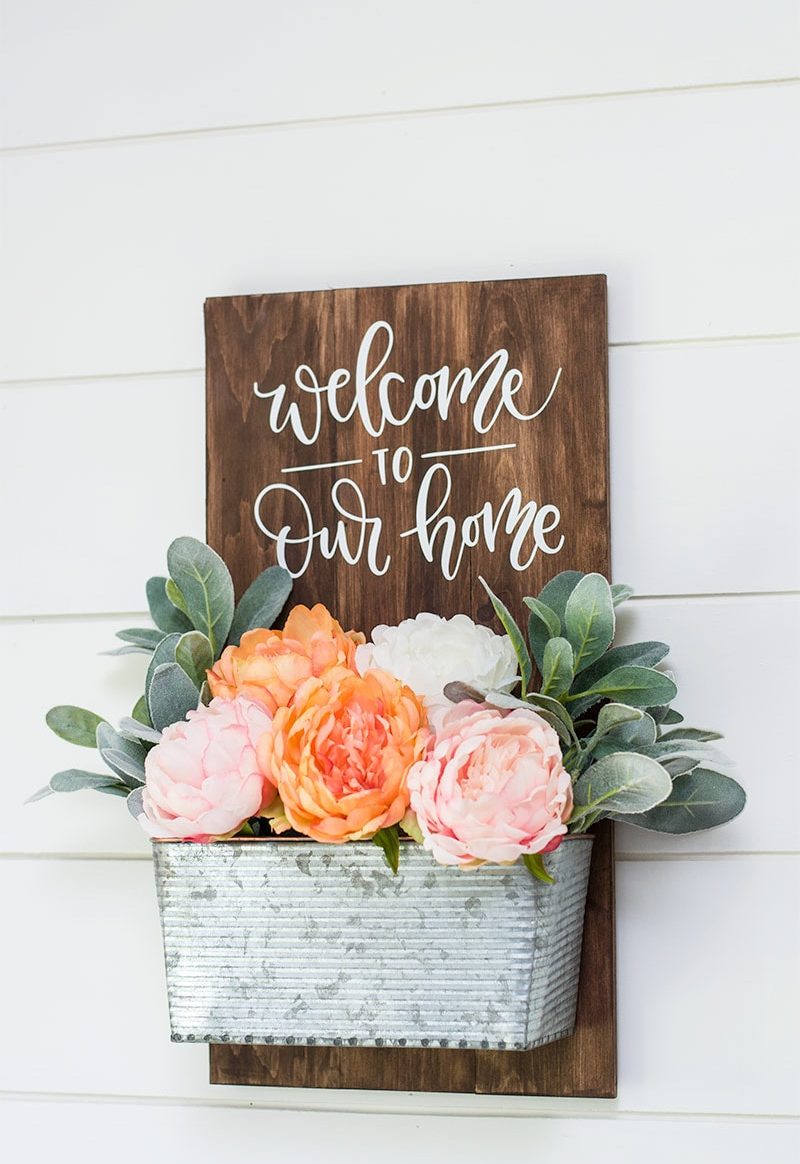
Hello friends, I hope your Summer is kicking off to a great start! I’ve been super busy here working in the yard, planting flowers and just getting my outside area ready for Summer. One area I really wanted to spruce up was my front steps. So the easiest place to start was a Welcome Sign. Then I can start painting and adding all my other stuff.
I ordered this wall planter a couple months ago and I didn’t have a specific project in mind. I just thought it was really pretty and had to have it. After getting some ideas together for my front steps, I came across some DIY Welcome Signs. Then BOOM, I got inspired! I knew what my front steps needed was a pretty Welcome Sign. So let’s get started!
Several of my friends saw this welcome sign and now want me to make them one as well. So I’m thinking this would make a great housewarming gift for someone as well!
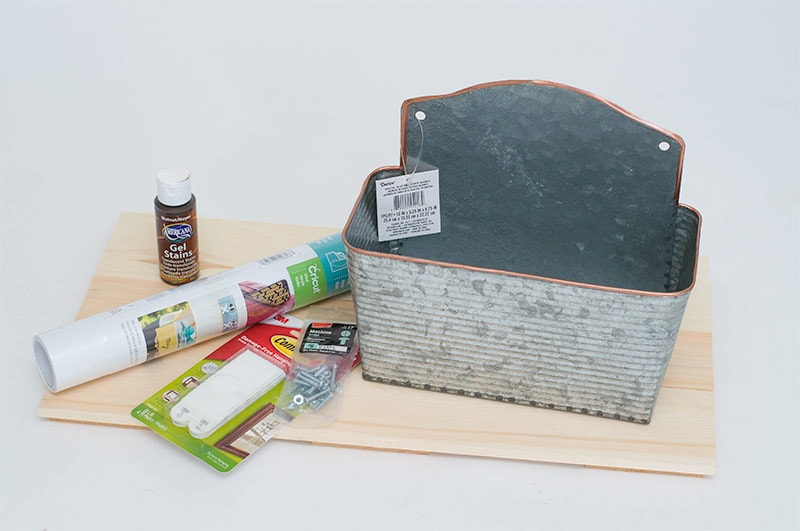
DIY WELCOME SIGN & PLANTER SUPPLIES:
- Wall Planter (find similar here)
- 14×24 inch Unfinished Pallet Sign
- Stain
- Vinyl
- Silhouette Cutting Machine
- Transfer Paper
- Foam Brush
- Foam Sheet
- Weeding Tool
- Peony Long Stems
FRONT DOOR WELCOME SIGN
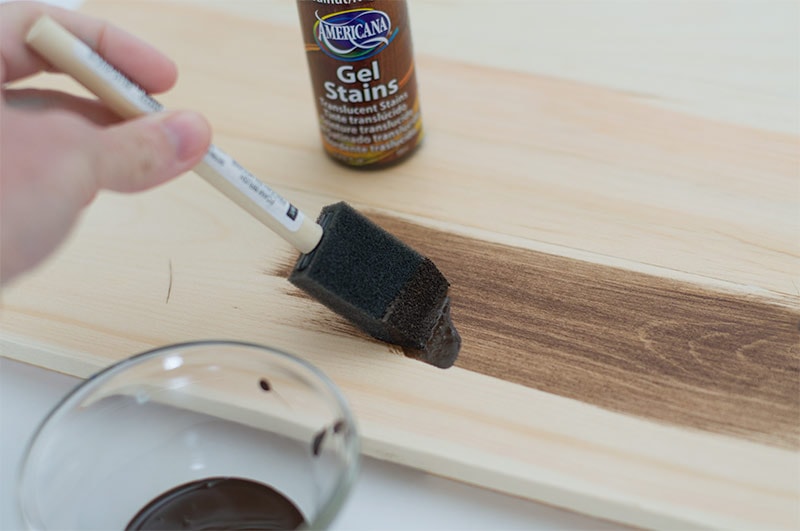
Step 1 – Stain Board
Pick out the color stain you want to use for this project, I used a Gel Stain from DecoArt and was really impressed with the results.
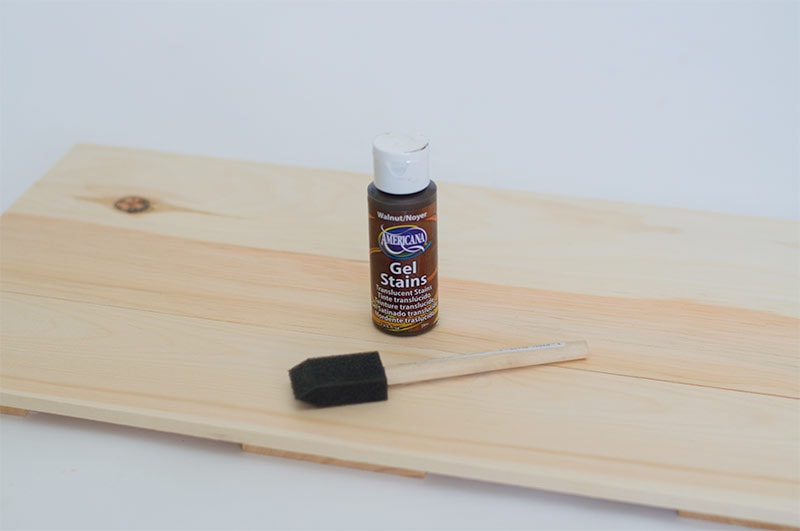
I only needed to add one coat and it was dry within 20 minutes.

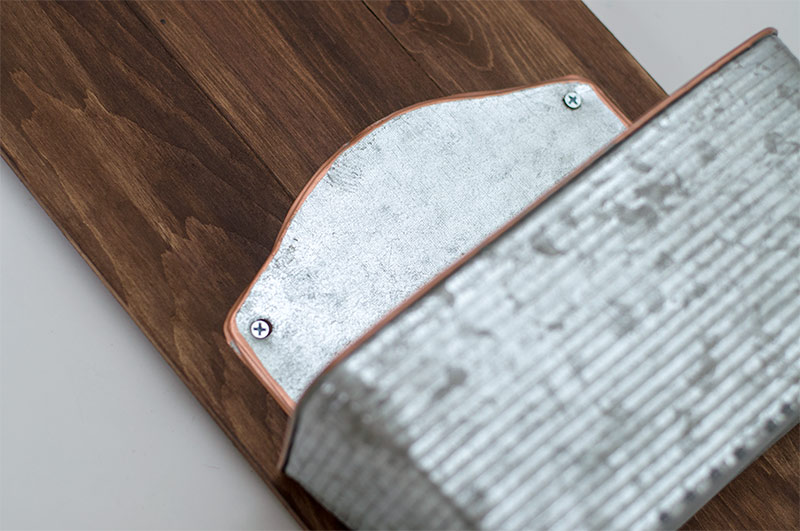
Step 2 – Add Planter
Next let’s add our wall planter. I found the perfect size screw to help keep the planter in place on the pallet.
Step 3 – Cut and add Phrase
Now it’s time to cut your saying!! Woohoo! I found this AMAZING saying in the Silhouette library that I had to use. I weeded the saying with my “handy dandy” weeding tool and then used transfer paper to add it to my pallet.

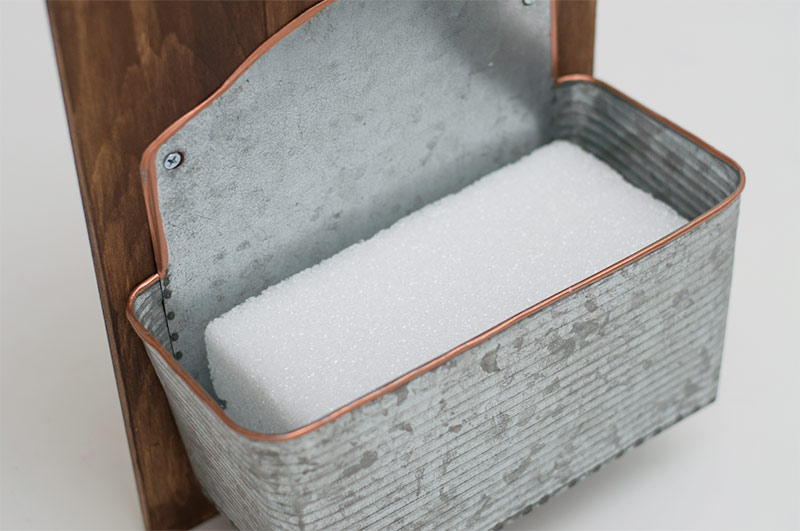
Step 4 – Flower Time
Let’s add our beautiful flowers! It was a back and fourth, should I use real flowers or fake ones for this project since it was going to be outside. But in the end I had these peonies that I got from Darcie awhile back and they were perfect! I added a little foam at the bottom, which I had on hand. It made it a lot easier to keep the flowers in place. Plus during the holidays I can change the flowers out.

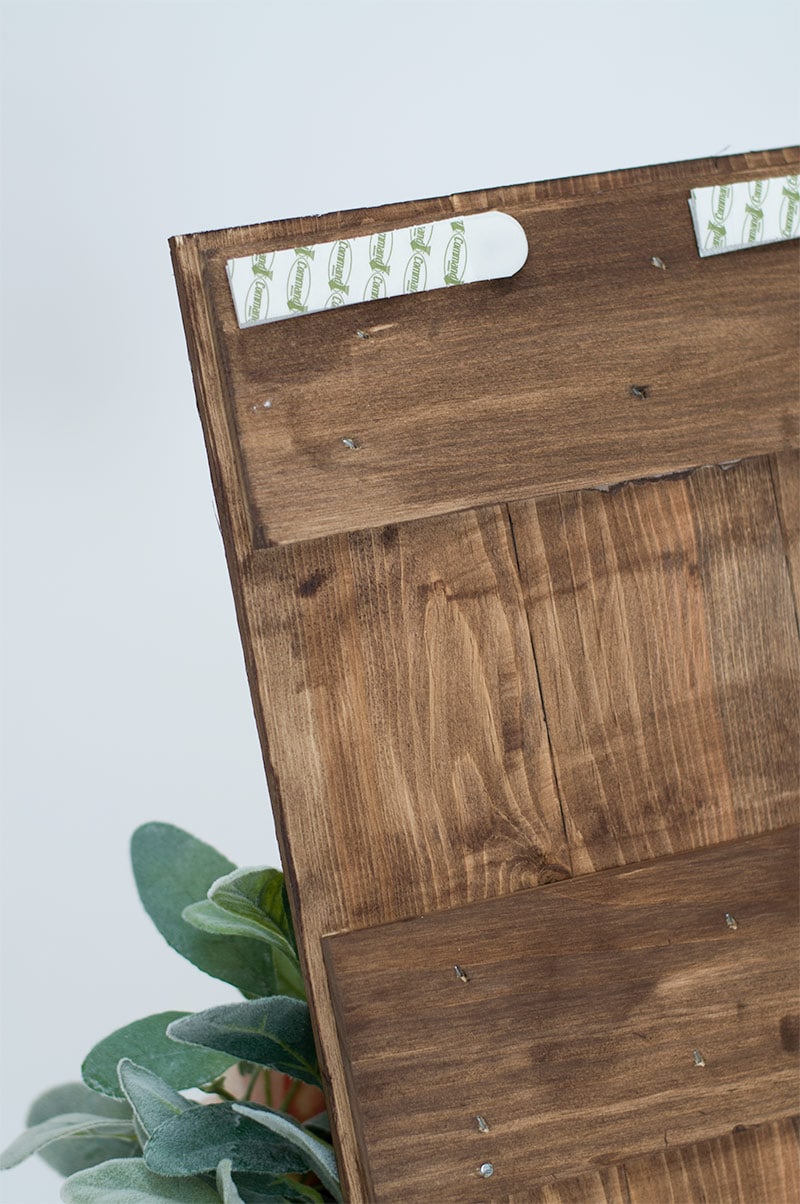
Step 5 – Command Strips
Now this is my favorite step. Adding the Command Strips! Any projects I can hang up with a Command Strip I will. Since this project will be going outside on the porch the Command Strips will work great. You can add this welcome sign to your front door, wall, etc. Whatever works best for you!
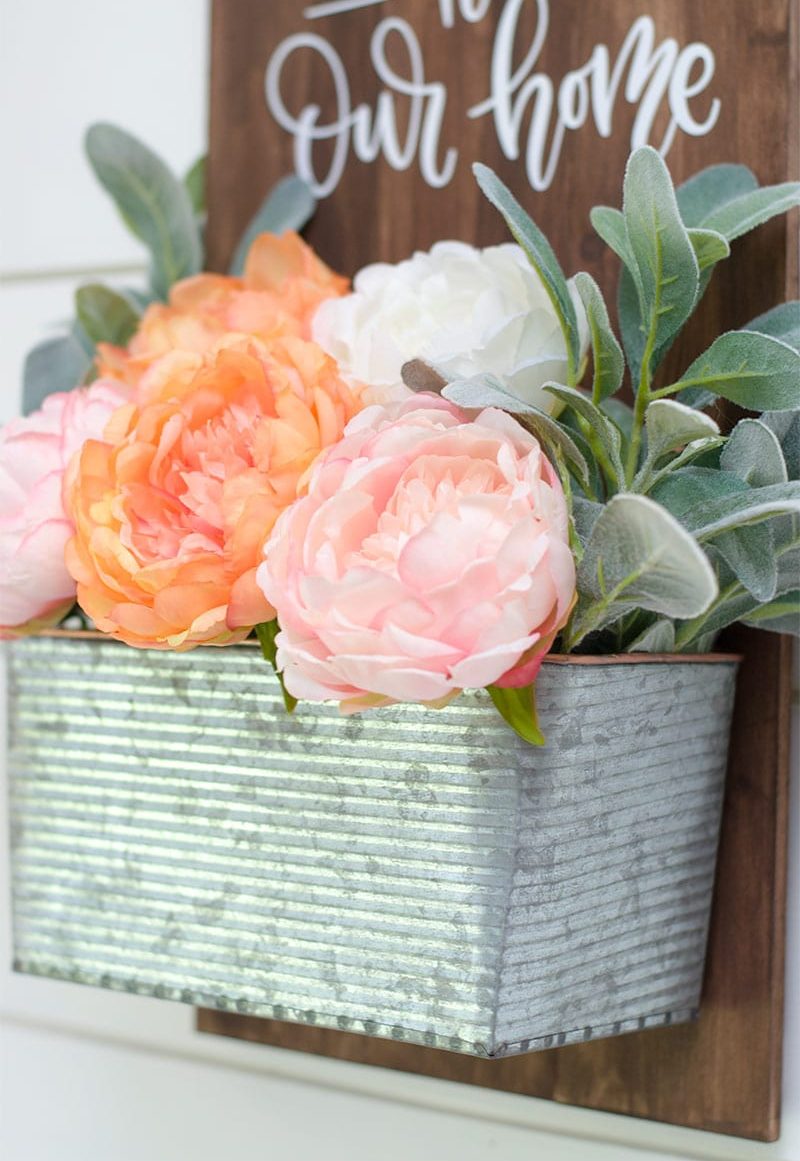
See how simple that was to make and it’s going to be perfect hanging on your front porch. If you wanted to take it a step further you can add your house numbers to the front of the planter box with vinyl. It’s a great home decor piece.
As always thank you for stopping by and checking out my newest project. If you have ANY questions about about this project please do not hesitate to send me a quick message!
Or if you make this project I would LOVE to see pictures!
More DIY Sign Ideas
Love, Courtney